

Living in an RV sure has its charms but remember that if everything is a good thing, it might as well be a dream because in reality, everything has its ups and downs. RVing is no exception to that. We might experience different problems while living in an RV, be it in the interiors, exteriors, or the vehicle motors itself. We must know how to deal with these problems and solve them as soon as possible to avoid further mishaps and accidents. After all, we want our lives to be less stressful and more enjoyable while we are staying outdoors or while we are calling our RVs home.
What are the common RV problems among RV campers? Common RV problems include maintaining the vehicle’s batteries, lighting, fuel source, protection from the elements, water and roof leaks, toilet waste disposal, hygiene and cleaning issues, tire blowouts, issues with the electrical system and so on.
Consider this article as your comprehensive guide for the most common RV problems, from its exteriors, interiors, energy sources, waste disposal, vehicle maintenance, and so much more. We will include solutions on how to solve these problems as well as precautionary measures to prevent these from happening again and stressing you out while you are on the road. Lastly, we will include the latest guidelines on living outdoors in the midst of the coronavirus pandemic based on the latest CDC guidelines for your safety and guidance.
Common RV Problems: Batteries, Lights, And Electricity

Your energy sources and the things it powers are very important parts of living in an RV. You must deal with these problems as soon as possible since these are very prone to danger and accidents when left unattended.
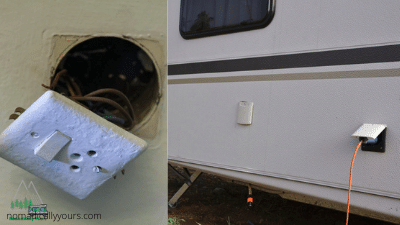
Malfunctioning Electrical Outlets And Switches On Your RV
The first thing you should know is that if you are at all uncomfortable dealing with electrical issues, you should seek professional assistance.
After all, you run the risk of damaging your setup with other DIY repairs. However, when it comes to electrical DIY repairs, you run the risk of inflicting yourself great harm, including injury or death.
However, there are some minor electrical issues with motorhomes and travel trailers that may be handled by the ordinary home handyman without requiring professional assistance. For example, the switches or pushbuttons in your circuit breaker panel may occasionally cease working. It is a simple task to replace these.
The same may be said for the outlets strewn over your RV’s interior. If you locate one that is not working, it could be because RV manufacturers frequently employ the clip-together form of receptacle. These receptacles cut through the insulation of wires, clipping on them to make contact and conduct an electrical current.
They are simple, which saves money, but they are also prone to getting lost, and, thus, not working. You may easily replace them with the same type of outlet boxes that you have at home to fix the problem and establish a more stable power source..
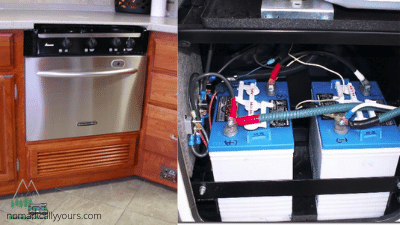
Replacing Batteries And Upgrading Electricity Sources
RV batteries are also regularly replaced by RVers, especially when switching from a generator to a solar panel system. Lithium batteries are smaller, lighter, and require far less maintenance than their lead-acid counterparts.
They are also quite easy to install and set up on your own, though for this one, you will need an RV power inverter and a few other items. Replacing these is very important since you will need fuel to power up your appliances and make your RV living much more comfortable.
Fixing And Maintaining Your Air Conditioners
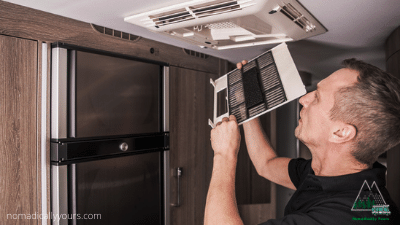
Air conditioning in your RV is not just a luxury, but a need depending on when and where you are going. That is especially true since many of us take our large annual travels during the summer, when temperatures can be unbearably hot.
For example, if your air conditioner is on but the air coming out of the vents is not quite cool, the issue could be as easy as unclean RV air vent filters, and the remedy could be as simple and inexpensive as replacing them.
You should do this step as a preventative maintenance routine on a regular basis anyhow, so maintain a stock on board for those periodic changes as well as in case something goes wrong.
Another typical RV air conditioning problem has nothing to do with the air conditioner itself; instead, it could be that your thermostat is broken and not connecting with your air conditioner properly.
Replacing an RV’s air conditioner thermostat is a straightforward task that may be completed using standard hand tools. Plus, if you are in an older RV model, now is a fantastic time to switch from analog to digital.
Finally, even in the worst-case scenario, where your RV needs a completely new air conditioning unit, DIYing your solution is not difficult. However, you need to remember that doing everything by yourself is not the prime solution to these problems.
Know when to call a professional to solve these problems so that you do not have to risk breaking your air conditioner and spend thousands of dollars into buying a new one.
Changing Your Burnt Out Lights In The RV
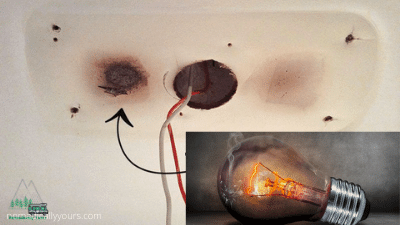
The light bulbs in your RV, like the light bulbs in your home, will burn out with time. A standard 100-watt bulb may not fit depending on the light fixture, but that does not make the replacement any less straightforward.
Make sure you have spare bulbs for all of the lights in your RV that you use frequently. That way, if you accidentally flip the switch to no effect, you will be able to quickly resolve the issue.
To avoid electric shock and burns, ensure the switch is set to “off” before doing so. If you replace the bulb and the light still doesn’t work, you may have a more serious electrical issue, such as a problem with the wiring.
Remove the light fixture to see what’s going on beneath the surface if you’re comfortable going into your RV’s electrical systems. If you are still unsure, call a professional electrician. Remember, saving a few dollars is not worth the risk of electric shock or a trip to the emergency room.
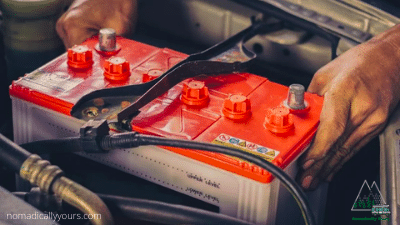
Battery Failures: How To Deal With It And Avoid In The Future
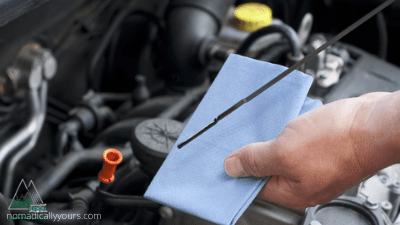
Without the batteries, the RV loses its charm. If the outlets aren’t working, the lights are not turning on, or the motor fails to start, there is a chance the battery is malfunctioning. Check the fluid levels in the battery on a frequent basis, as well as the charge, to verify it’s performing properly.
If your RV is not in use, disconnect the battery wires to prevent the electrical device from taking power from the battery, even if it is turned off. Regularly check the battery’s fluid levels and, if necessary, add distilled water. As the battery releases hydrogen gas, make sure you wear hand and eye protection and keep open flames at least 10 feet away from you.
Also, invest in sealed batteries that require no maintenance, so you will not have to worry. Charging dead batteries is a quick RV fix in the majority of circumstances. If you are in a campsite, connect the rig into an AC outlet to charge the batteries.
If your battery continues to fail, your only option is to replace it. Contact a professional and do not be afraid to spend money if you do not have enough knowledge or skills in replacing your RV’s batteries.
Common RV Problem: Protection From The Elements
Your RV serves as your protection from the harsh elements such as heat, humidity, rain, snow, and many others. Thus, it also needs protection to protect us even more. Here are some of the usual problems concerning the elements outside and how to deal with those.
Dealing With Roof And Window Issues In Your RV
Due to the fact that RVs are designed to be portable rather than immovable like a house, the roofs and windows are constructed differently than a traditional home. The roof and windows are made of materials that are more suitable for long-term exposure to the weather because your house is supposed to be immovable.
However, in order for your RV to be mobile, some elements of each section have to be sacrificed. The roof of your RV is identical to the sides, rather than the usual shingled or tiled roof found on a house, to keep the weight down. Your roof can be damaged by constant exposure to direct sunshine as well as impacting low-hanging debris, mainly tree branches.
In the case of your windows, a more rubberized sealant is utilized to aid avoid shattering rather than the standard sealant used on a house, which is only to prevent leaks and endure the environment. Poor weather, sunshine, and low-hanging branches all have the potential to harm an RV’s roof. If possible, utilize a roof cover to reduce your exposure to the weather.
Though the sealant used on an RV is designed to absorb shock better than that used on a house, it, like everything else, will eventually succumb to the constant jarring and exposure to the elements, necessitating reapplication or, in the worst-case scenario, having the window replaced.
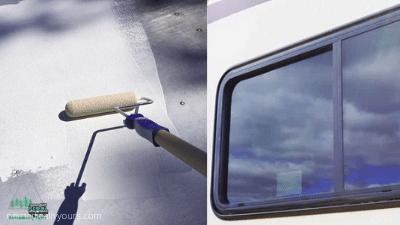
If you cannot keep the roof covered, check your RV’s roof once a month to see if there is any damage and fix it if necessary. You can also use rubber coating to protect your roof. If the window sealing fails, the windows may leak as well. Window seals should be checked at least twice a month, and do not forget to change them if you notice even the tiniest indication of wear.
Fixing Roof Leaks And Preventing It From Happening Again
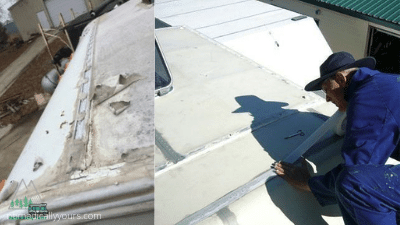
Water leaks are not simply a terrifying prospect when it comes to RVing: they are almost unavoidable. Even the most durable modern-day motorhome coatings will eventually succumb to the outdoors. Sealants, no matter how high-tech or well-made, harden and crack with time and motion.
Unfortunately, this ever-present boogeyman has the potential to wreak havoc on your camper. Water damage affects your interior in more ways than one. It can also corrode metal fixtures, harm delicate moving parts, and even cause dangerous short-circuiting in your RV’s interior electrical system. Of course, getting ahead of this continual threat and minimizing your risks of water leaks before they occur is critical.
The good news is that it is relatively simple to do so — all it takes is a few routine preventative maintenance procedures.
To begin, always keep your RV covered with a watertight, UV-resistant cover. An indoor storage facility, or at least one with a roof, is your best alternative if you can. This one is a good option especially if you do not have enough space in your lot to park your RV when not in use. However, we understand that renting a covered storage facility space isn’t always an option. Choose a high-quality RV cover in these circumstances to safeguard your investment even when it’s parked outside.
When shopping for a cover, seek for one that is both waterproof and UV-resistant, as this will assist in maintaining your finish as sound as possible and prevent seepage. Keep in mind that, though these covers can cost several hundred dollars, depending on size and features, they are still a lot less expensive than serious water damage repairs.
Furthermore, it is a one-time fee, as opposed to the ongoing costs of hiring a storage facility or making repairs after your rig has been damaged by water. Applying a new layer of RV roof sealant once a year as a preventative strike against failing seals is another technique to keep leaks at bay for as long as possible. You may already be aware that you may use Dicor or a similar solution to address current, localized leaks, but it’s far better to prevent leaks from occurring in the first place.
Finally, inspect your RV for water damage before and after each trip, as well as when putting it into or taking it out of storage. Examine every seam and seal on the inside of your rig for evidence of stains, paying specific attention to roof openings such as your bathroom or kitchen vent fans and your RV air conditioner. Although discovering a leak is inconvenient, learning about it as soon as possible might help you avoid substantial, or even irreversible, harm.
If your rubber roof is leaking, there are a variety of roof patching kits available. When it comes to adding the correct stuff to your RV toolbox, be cautious. You can use special RV roof sealing tapes to temporarily repair it while you are on the road. When you return, double-check that the mounting flange around the roof vents, antennas, and breather caps is correctly sealed with RV-specific sealant.
If the roof vent is broken or fractured due to tree branches or exposure, the best course of action is to replace it. For emergency repairs, use duct tape and plastic trash bags. Do not forget to repair it properly as soon as possible.
If it is leaking around a window frame, examine if it is merely a gasket material. If that’s the case, you will need to remove the window, clean the old seal, and reseal it. Install that window once again.
Dealing With Window And Seam Problems In Your RV
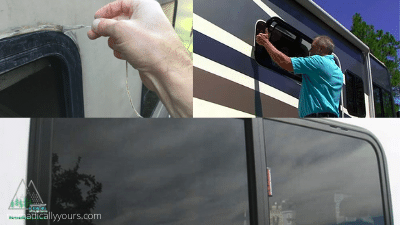
I am quite sure you have heard about the water damage we have been talking about. Another excellent access point is the same one through which sunlight passes: all of your RV windows.
It is one thing to keep them shut, but those seals also play a huge role in keeping the interior of your rig dry. Other sorts of damage to RV windows are also possible. An accidental stone flung by a tire, for example, can crack or break your RV window glass as you’re driving down the highway.
The good news is that repairing or resealing RV windows is rather straightforward. A screwdriver and some decent RV sealant are all that is required. Just make sure you get the right windows when you’re ready to replace them. It’s a good idea to double-check your measurements.
Working With Faulty Awnings And Canopies
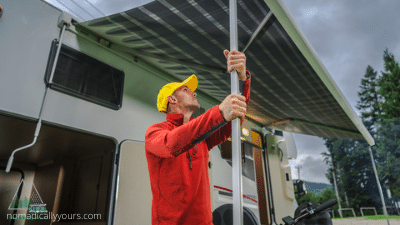
Awnings on your RV may appear to be a luxurious luxury, a quick and easy way to add a shady, outdoor patio to your living space. However, for those who camp in hot climates, which is the majority of us, especially in the summer, those awnings serve a far more practical role.
Shading the windows can help keep the interior temperature of your RV lower, reducing the load on your HVAC system. Furthermore, the LED lights on modern RV awnings can direct you back to your campsite after evening excursions, which can help you avoid safety hazards, especially if you’re boondocking or wild camping.
In other words, your awning does a lot of heavy lifting, and as a result, it’s critical to look after it. Replacing your awning, on the other hand, is very doable, and with some of the fancy, pre-lit, automatically-unrolling types on the market, it is a fantastic opportunity for an upgrade.
Burst Water Lines And How To Deal With It
Broken water pumps and broken water lines are common RV issues, but they can be prevented if the RV is properly stored throughout the winter months. Remember to drain the water tanks on a regular basis. If you’re one of those people who forgets to empty the water tanks for a few days, keep an eye on the weather forecast.
Also, make sure the tank is empty before the first freeze. If you are not going to use your RV during the winter, you must take special care of the water lines before storing it. You can lubricate the seals with sealing lubricant to ensure that they continue to function properly. If it continues to leak, consider replacing it.
Common RV Problem: Living, Cleaning, And Hygiene
Just like any other form of housing or shelter, we can also experience problems regarding the cleanliness and hygiene in our RV. Here are some of the problems that you might experience and some solutions you can use to solve the problems.
Clogged Toilets And Other Plumbing Problems In Your RV
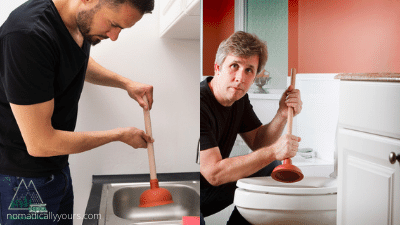
Many RV plumbing concerns are, fortunately, simple enough to resolve on your own. Simple user mistake, for example, is a major cause of RV toilet blockages and backups: too much toilet paper or too little water might prevent your camper potty from flushing properly. Assuring that everyone understands how to “go” will go a long way toward preventing any issues.
If you have a sewer connection, another typical mistake is to keep the black water drain line open all the time. However, this is a horrible idea since it will allow all of the liquid waste to flow first, resulting in a sticky, sludgy clog in your holding tank or sewage drain pipe – just the kind of obstruction you don’t want to deal with while on vacation.
In some circumstances, the clog will be severe enough that you’ll require professional assistance, regardless of your plumbing skills at home. If you do not have enough confidence in your own skills, calling a plumber is the best option.
We do not want to risk ruining a simple clog to the plumbers by scrimping and doing things on our own. If you cannot do it, there are people who would be happy to do the dirty jobs for you.
Leaky Pipes And Replacing Damaged Pipes
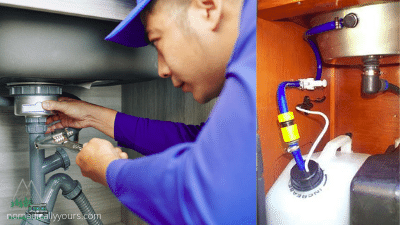
Leaky pipes, which may be over-tightened in the case of PVC or flex piping or corroded in the case of old-model metal fittings, are another typical RV plumbing concern. If you can remove and replace pipe fixtures in your home, you’ll probably be able to do so in your camper as well. Keep in mind that your system may require custom-made parts that can survive the motion of an RV without cracking or breaking.
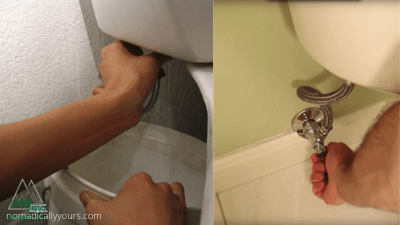
To begin, figure out where the leak is coming from. Check to see whether water is dripping from the toilet’s upper part during the flush cycle, whether the bowl is full, and if there is water around the toilet’s base. Each of these symptoms has a different meaning and necessitates a different reaction. The float seal in the vacuum breaker is frequently the source of a leak from the upper area of the toilet.
Depending on the type of toilet, you can either purchase a kit and replace the float seal yourself, or you can disassemble the toilet and clean it. It could just be a cracked and dry toilet seal. If this is the case, consider applying Vaseline to the seal before deciding whether it has to be changed. This is something you should do anyway as a precaution.
Check for cracks if the RV toilet is leaking when the bowl is full with water. This is more common in plastic toilets than porcelain toilets, and it usually happens after the toilets have been winterized.
A leak from the floor at the base of the toilet is sometimes the source of the leak, which is most evident after a flush. The flange, which is made of wax or paper and sits between the toilet and the floor, may need to be replaced. It is also possible that a leak is coming from the water connection behind the toilet. Check to see if any connections are secure.
Checking Your Toilets If Their Water Valves Need Replacing
Whatever the reason for the problem is, it is a good idea to go over the user manual for your toilet. If you do not have a handbook, you should be able to get one online if you know your toilet’s brand and model. If you are not sure what kind or model your RV toilet is, it should have a label on the back that tells you. By lowering the seat halfway, check for the label on the center front under the rim or behind the seat. Otherwise, you can look over the models on the Thetford or Dometic websites to see which one looks the best.
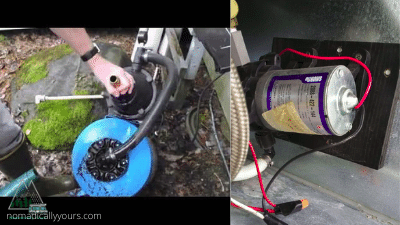
Cleaning Your RV’s Sewerage Systems Effectively
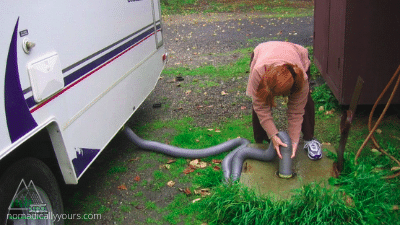
This advice on how to dump RV tanks will be useful whether you have a regular RV waste tank system or a portable waste tank. We start planning our next dump once our 40 gallon black tank is two-thirds full. We use the black tank indicator since our 60 gallon gray tank never reaches 2/3 capacity before our black tank.
If the ground is uneven to the extent where we won’t be able to empty our tanks due to the angle, we will lower the jacks and level the RV sufficiently to empty the tanks. Close all the windows and turn off the fans to keep your camper from smelling like an RV dump station.
When dumping the holding tanks, keep a nice pair of disposable gloves and disinfecting wipes in the camper. Keep these in a convenient location and have them ready before you begin dumping. For RV dumping, there are reusable rubber gloves and heavy-duty disposable gloves available. Before you find the best RV dumping gloves for you, you may need to try out a few various pairs.
Learning How To Maximize Your Interior Space

Moving into a small space can be jarring, especially if you are used to having a lot of space. You might complain about having a smaller leg area or your arms hitting the ceiling or the walls more often than you do when you were living at home.
But, much as in a home, you eventually become acclimated to the space. It begins to feel normal, and it can become larger than you require. Keep only what you require and discard the remainder. RV hacks can help you maximize storage and build systems to make things flow more efficiently and smoothly. Take a vacation from your RV if all else fails. You still require them, just as you do in everyday life.
Other Common RV Problems
Here are some of the other problems you might experience when living or staying in an RV, and tips and tricks on how to solve and prevent these from happening again.
Dealing With Your Tire Problems

Anyone who drives a car is familiar with the problems and complexities that come with having tires, particularly the all-too-common flat tire. Your vehicle will not be able to transport you anywhere if the tires are not working, yet they are sensitive to a variety of road conditions.
Due to the fact that RVs are so heavy, they are particularly vulnerable to tire problems like tire blowouts.
Fortunately, there are steps you may do to keep the damage from getting out of hand. You should always check your tire pressure, avoid bumps or potholes wherever possible, inspect treadwear, and keep a spare tire on hand. Ensure that the weight of your items is distributed evenly throughout the RV to prevent the chance of blown tires.
Dealing With The RV Slide Out Problems
Despite all of the advantages that RV slide outs can give, this technology does have some disadvantages. For starters, all of those moving parts are prone to rust, corrosion, and plain old wear and tear.
On the one hand, it’s understandable that a room’s movable part would be a hotspot for technical troubles. The very feature that makes this technology so incredible also puts it at risk of malfunction. Regular maintenance, like so many other aspects of RV repair, can help maintain your slide-outs in good working order for many years to come.
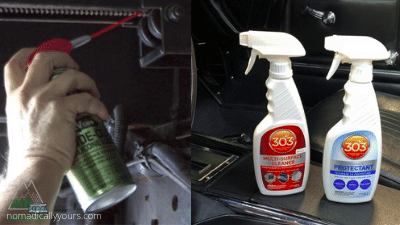
For starters, make sure to grease your RV slide out arms whenever possible. This will ensure the moving parts’ lifetime, which will go a long way toward minimizing sticking problems. A cheap, commercially available substance like WD-40 can do the trick, and you’ll undoubtedly discover plenty of other uses for it throughout your vehicle.
Leaks are another prevalent RV slide out issue. All of those seams and seals are begging to be invaded by unwelcome water, which is every RVer’s worst enemy. Keep your slide out seals greased and soft to help them last longer. Each time you run your slide out, a few squirts of UV-resistant 303 work wonderfully. Of course, over time and use, all seals will harden and crack, and you’ll need to replace them.
And, as with all other aspects of your rig, it is a good idea to check for water damage on a regular basis. That way, if and when it does appear, you’ll be able to repair it before it spirals out of control.
Repairing And Dealing With RV Brake Problems
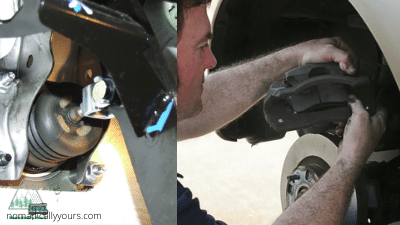
Stopping is critical while driving such a large vehicle. Stopping is vital regardless of the vehicle you are driving, be it an SUV, a motorcycle, an RV, or even a huge truck. It is also a well-known truth that various brake components wear out over time. That is how the friction that causes you to halt in the first place is created.
If you are comfortable doing mechanical work on other vehicles, you can easily convert those abilities to your RV. From topping off your brake fluid to actually replacing the braking shoes, drums, or rotors, if you are comfortable doing mechanical work on other vehicles, you can easily convert those skills to your RV. Of course, you will need the right tools, such as a sturdy jack to lift your travel trailer.
Making Your Appliances Work Once Again
One of the main reasons you use your RV is because of the appliances. You wouldn’t need an RV if appliances were not important, because you would be tent camping.
If you have a power connection and your appliances are not working, the connection may be broken or under voltage. You can check the voltage to see if the proper power is coming through if you keep a voltage meter handy.
If your electrical source is out of commission or damaged, keep in mind that without direct power, many of your RV’s appliances will run on propane. If you have switched to propane and your appliances are still not working, you may have an empty propane tank.
How To Stop Leaking Water Near The Waste Water Valve
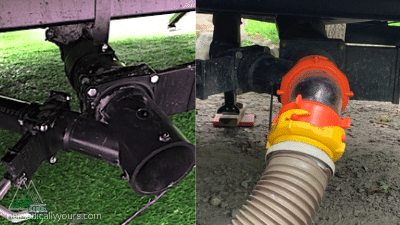
Nobody enjoys dealing with waste water, especially when it is leaking. A leaking valve is almost always the result of a faulty seal.
Seal lubricant, such as petroleum jelly or Plumbers Grease, can help prevent a failing seal. If the seal on your toilet has failed, they are simple to replace. Simply unbolt, slide out the old valve, replace it, and bolt it back in.
A leaking waste water valve or dump valve means that the waste tank’s ability to contain water is compromised. If waste water leaks or pours out the moment you loosen the cap, you will know there’s a problem. This means you will have to figure out which valve is broken first. Second, completely drain both waste tanks. After that, remove four bolts to allow the T handle and valve to be removed.
The good news is that waste water valves are nearly identical on nearly all RVs, so when purchasing replacements, simply select the “small” or “large” model. Check that the new seals between the sections are in the proper position before running water to test the new valve.
The Updated CDC Guidelines For Living Outdoors
Living outdoors is even more challenging nowadays due to the coronavirus pandemic, but we do not want to take away the charm of living in an RV from you. Thus, here are the updated guidelines for living healthily outdoors according to the CDC.
Always Clean And Disinfect Your Living Spaces Thoroughly
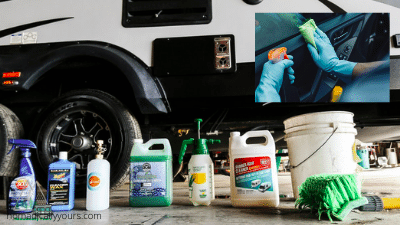
Your van counts as your home because you live in it, so therefore, you must do what the CDC mandates you to do when it comes to cleaning and disinfecting your living spaces to prevent getting and spreading viruses such as the coronavirus.
Always disinfect everything that you touch or you stay at — that means from the door and window handles, to the steering wheel, the driver’s seat, and of course your living spaces. Always use cleaning products approved by the CDC in cleaning and disinfecting your van, and check if these products are enough to keep you safe. Clean not only the interiors but also the exteriors of your vehicle since it is the most exposed part of your van.
Avoid Spending Time With Sick People As Much As Possible
Campgrounds and parks can be a place for campers to connect with each other. However, the CDC is discouraging gatherings in public for more people, so do your best to keep your van socially and physically distanced away from crowded places.
Avoid talking to sick people for a long time, especially those who show symptoms similar to COVID-19, such as cough, colds, fever, flu, and other contagious illnesses. If you need to talk to someone but they are sick, take advantage of the social media apps and use them to talk to them. This is the safest way of communication for now.
Never share your living spaces with someone who is sick. Never let them use your personal items and share your personal spaces with them, such as your bed and pillows. Always wash your hands and never touch your face and neck without washing your hands yet, as it is one of the most common ways for the virus to enter our body.
Stay At Home If You Are Sick And Not Yet Vaccinated
If you or your family member or friend is sick, do not think about going outdoors in your van and stay at home. Separate your clothing and personal items from them, and wash them separately. Do not use the same sponge, cleaning materials, and other products side by side with their dishes, linens, and laundry.
Wash their clothes with warm water and detergent approved by the CDC to effectively kill the viruses in your clothes. That way, you can avoid spreading the virus to other people and make them sick accidentally.
Unless you are vaccinated already, always wear your masks and practice social distance at least 1.5 meters away from each other. These are just precautionary measures but they always work if you continue exercising these for the sake of your safety as well as the others.
Conclusion
Living in an RV sure has its perks but it also comes with problems and issues that you encounter on a regular basis. From leaking windows to tire problems to electrical problems, you have to deal with those problems the way you deal with these problems at home. Always remember that if you cannot do it yourself, do not be hesitant to call someone for help. Do not risk the safety and security of your RV just because you want to save a few hundred bucks.


