

When you lived or traveled in an RV during the winter season for a while, there’s a big chance that you’ve experienced sweaty windows. This is called condensation, and it forms when warm moist air meets any cool surfaces in your RV. Droplets are formed on your RV walls, windows and make things feel wet. Not only that, it can cause a lot of problems.
Now, how can you keep RV windows from sweating? Purchase dehumidifiers, crack a window open, monitor humidity, install vents, skip the propane heaters, and shower and cook outdoors are what you can do to prevent sweaty windows. These are just some of the ways to prevent condensation.
Preventing condensation will be significant for your health and can prevent mold from forming inside your RV. Ensuring your health is at its optimum peak is important, especially when we’re in the middle of a pandemic. This article will provide different tips and tricks on how you can remove sweat in your windows and other parts of your RV. I will also talk about why you should be concerned about sweaty windows. Lastly, I will also talk about the leading cause of condensation and its dangers to your health.
Different Ways to Remove Sweat in Your RV Window

When you have sweaty windows, you have condensation. Condensation is the process where gas changes into liquid when it touches cooler surfaces. This usually happens on any cold surface. Usually, tiny droplets form on the ceiling and even on vertical surfaces such as windows, walls, and mirrors. The following are some tips and tricks on how to get rid of sweat in your RV windows.
Monitor the Humidity Inside Your RV
One of the most important things that you need to watch out for when owning an RV is the humidity inside. The humidity inside your RV should stay between 35 to 50, or else condensation would happen. Thus, it would result in sweaty windows inside your RV. Keeping the humidity between these percentages, you can ensure you are preventing mold from happening.
To monitor the humidity inside your RV, you should purchase a humidity monitor tool. It will alert you when the humidity level escalates. Now, there is no need to panic when the humidity suddenly hits 70 percent. However, if you let this happen over and over without doing anything about it, it can give mold time to grow.
The risk would be higher, and you will have to worry about dealing with it in the future. This means that you have to spend more money to fix the problem. So, it is better to prevent it from happening that way, and you don’t need to worry about any extra costs.
ThermoPro TP65: The Best Humidity Monitor Tool
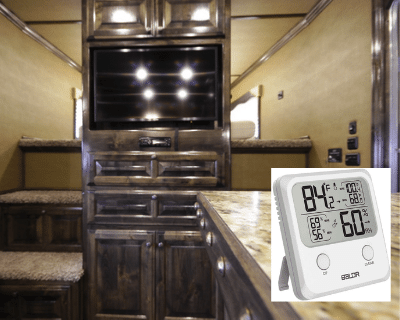
The ThermoPro TP65 is the best humidity monitor tool that you can purchase in the market. It is battery-powered and needs four AAA batteries, which are already included in the package when you buy it online. It has a large backlit touchscreen with four inches LCD. With the backlit touchscreen, it will be easier to read in dim light conditions.
This humidity monitoring tool is simple and easy to use. Not only it measures the humidity, but it also measures the temperature inside and outside your RV. The ThermoPro is capable of displaying readings from up to three outdoor remote sensors.
It records 24 hours maximum and minimum temperature as well as humidity percentages recorded. The humidity gauge is also displayed on the LCD screen with trend arrows that indicate when it’s more humid in your RV. It has a range of 200 feet or 60 meters and is capable of strong signals.
You can also have multiple placement options with this humidity monitor tool. It features a magnetic back, so you can easily attach it to metal surfaces. You also have to hang holes where you can place it on hooks, making it great for any layout. The cost of the ThermoPro TP65 is $24.99.
Crack a Window Open
Cracking a window open is probably the easiest thing that you can do to prevent windows from sweating. Now, this is advisable if there is more air humid inside rather than outside. Opening your windows or doors can help some of the humidity escape outdoors. You need to keep in mind that hot air rises.
With this said, installing a vent ceiling might be a better idea than cracking a window open. If you still want to go the window route, make sure to do this for about an hour or two each day. Make sure you always allow the moist in the air to escape and dry outdoor air in.
Purchase a weather station such as the ThermoPro TP65 that’s mentioned above to keep tabs on your humidity percentage.
Dehumidifier is the Key!
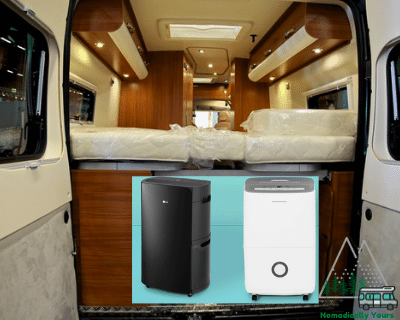
Simple appliances like dehumidifiers will reduce humidity significantly, and they will come a long way. Unlike before, dehumidifiers are not huge, heavy, or clunky. You can get a small portable dehumidifier that is a perfect fit for your RV. There is a small dehumidifier that is as big as a gallon of milk!
There are also mid-size dehumidifiers that you can keep in your living area, covering more space than the small ones. You can keep the small dehumidifiers in your bedroom instead. Now, if you want a desktop dehumidifier that doesn’t use electricity or batteries, there are ones that use silica gel technology.
The following will discuss the different dehumidifier that you can buy in the market that is perfect for an RV setup.
Mid-Size Dehumidifier: MIDEA Dehumidifier
The Midea Dehumidifier can cover up to 1,500 square feet and can collect 20 pints of water a day. It can adjust the humidity from 35 to 85 percent and maintain a 45 to 55 humidity range. However, this would depend on the climate in your area.
It also has innovative features such as an auto-restart function that you set up on your own. You can choose a particular setting as soon as the power is restored. It also has an auto-defrost function that prevents the collected water from being frozen. This is an excellent feature because it can prevent harm from the machine.
The Midea humidifier is quiet with a maximum 51-decibel limit. It is quite enough for the people around it to have a conversation. This unit features continuous dehumidification mode, which is designed to keep your RV at the proper humidity level throughout the entire day.
It has an easy to empty tank, with a capacity of 0.8 gallons, making it easy to maintain. The Midea humidifier also has a reusable filter that perverse air quality without the need to have expensive replacement parts. Midea is a well-known and trusted brand, so by buying this dehumidifier, you can ensure it won’t let you down.
The cost of the Midea humidifier is $169, which is worth every cent.
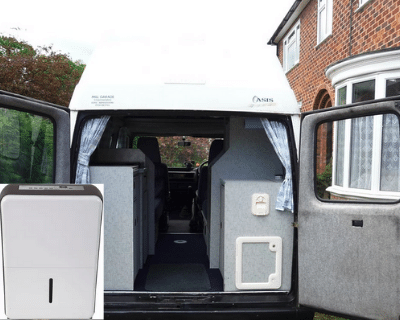
Small Size Humidifier: Eva-Dry EDV-1100 Electric Petite Dehumidifier
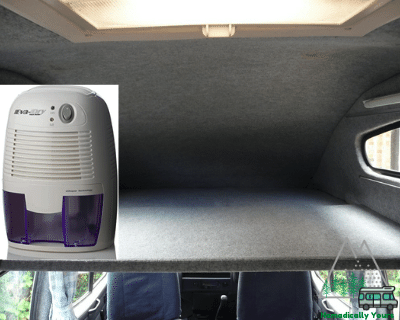
The Eva-Dry EDV-1100 Electric Petite Dehumidifier is perfect because it won’t take up too much space in your RV. It measures 6.5 x 8.5 x 5.3 inches and weighs one pound, which is very light. It is a little louder than the Midea humidifier with 53.2 decibels but can generate less noise to provide a good night’s sleep.
It provides maximum portability and can be easily moved and tucked away in a designated place in your RV. The Eva-Dry is one of the smallest and lightest thermo-electric dehumidifiers in the market. It has lower power consumption at 22 watts.
The Eva-Dry is made from high-quality and superior materials that absorb musty odors from stagnant air. It eliminates odors and fungus that may be lingering inside your RV. It is a plug-and-play setup that is very easy to use and can immediately start dehumidifying.
The best feature of this dehumidifier is letting you know when the condensate collection bucket is full. Once the condensate collection bucket is full, the ‘FULL’ LED light would turn one, and the humidifier will automatically shut off. The cost of the Eva-Dry EDV-1100 Electric Petite Dehumidifier is $47.99.
Mini Dehumidifier: DERMA Small Dehumidifier
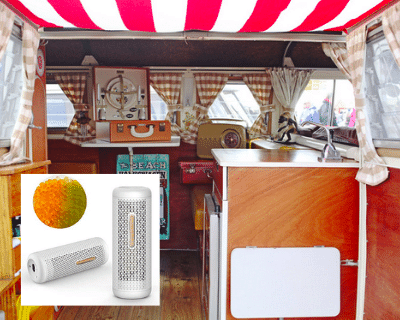
If you are looking for a mini dehumidifier, the DERMA Small Dehumidifier is the perfect fit for you. It measures 8.11 x 2.95 x 2.95 inches and can cover up to five square meters. Unlike the first two dehumidifiers that I’ve mentioned above, the DERMA is made from silica gel technology. It is non-toxic, safe, and spill-free.
It is great at absorbing damp and moisture from the air, providing you dry and fresh air inside your RV. The DERMA is renewable and reusable which needs to be plugged in for 12 to 15 hours to dry out the silica gel beads. After each renewal, it can absorb damp and moisture from the air, which is great for two to three weeks of use.
The crystal beads will turn into dark green from orange to help you determine that it needs replacing. The DERMA is compact and delicate, making it great for tabletop spaces. It has a cylindrical design so that you can expect no leakage and spillage. This is not your traditional dehumidification box since it is great for absorbing moisture.
The cost of the DERMA Small Dehumidifier is $31.06.
Make Use of Your Vents

As I’ve mentioned above, installing vents in your RV would be a great help. When you have vent fans, it can help your humidifier lessen condensation inside your RV. If you are installing vents in your RV, you should place them above your stove so the steam that comes from your cooking will go straight outside.
Adding another one or two in different parts of your RV ceiling is also one way to lessen the condensation in your RV. Just like cracking a window open, make sure that you open the vents and turn on the fan a couple of times a day or whenever it feels humid inside.
Opening your vents and turning on the fan while cooking or showering would be a great help. Vents would come in handy if you can’t cook outside because of the cold weather. You just need to remember not to let the steam settle inside your RV.
Get Yourself Some Moisture Absorbers
Now, getting moisture absorbers is the cheapest option, especially when you don’t have the extra budget to buy humidifiers or install vents. It is a great option if you are looking for a quick fix. Moisture absorbers offer moisture control inside your RV. As per the name, it absorbs moisture to whatever it comes in contact with.
You can place this in cabinets and closets where there isn’t any room for the moisture to escape. Closets are also great at collecting moisture since they are not kept open for long periods. When you keep your shoes, purses, clothing, etc., in your closet, it is best to use moisture absorbers. It can also be placed in bathrooms where air doesn’t circulate as well as other parts of your RV.
The containers that the moisture absorbers are placed are disposable. All you need to do is toss them out when they have reached their expiration point. As I’ve mentioned above, you can also keep silica gel packs tucked in smaller compartments such as drawers.
DampRid FG50T Moisture Absorber
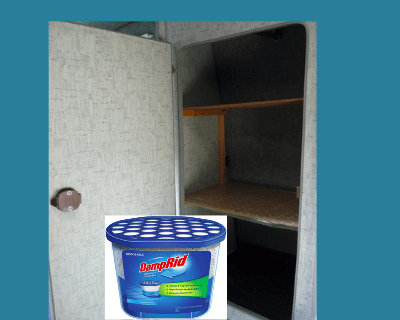
The DampRid FG50T Moisture Absorber is the best choice for you. It can cover a 1000 square feet area which is perfect for RV use. The moisture absorbers attract and trap excess moisture, eliminating musty odors from damp areas in your RV. It also has a high capacity design feature where it has a unique moisture lock spill resistor.
The DampRid can be sealed safely and best for a mess-free solution. When purchasing the DampRid online, it comes in two four-pound buckets, which can last up to six months. However, the time frame would depend on the temperature and humidity levels.
It is available in both scented, which costs $26.98, and Fresh fragrant smell for $30.71.
Install Dual-Pane Windows
Another great way to prevent condensation in your RV is to install dual-pane windows. These types of windows leave a pocket of air between them and act as an insulating barrier. The air inside the RV hits the window, and it won’t be enough of a temperature shock that causes condensation to form. Now, installing dual-pane windows can be expensive.
There are DIY options, but it will involve using plexiglass and a bit of elbow grease. When it comes to this option, you will save money on labor costs, but the materials you will need can get expensive. The glass layer in between the panes provides extra insulation, which cuts down the condensation in your RV.
The cost of dual-pane windows ranges from $250 to $600 per window. The downside to these types of windows is fogging, which can be a big problem as well. The layer of glass between the two panes leaks out, and the window will fog. It is also not ideal for those who are conserving weight and improving travel as well as gas mileage. The extra weight shouldn’t be overlooked in these cases.
Even though there are downsides to installing dual-pane windows, it is worth the investment, especially for humidity control.
Get Your Cooking Done Outdoor

Depending on the space that you have, cooking indoors can produce a lot of steam, leading to condensation. If you are in high humidity areas and when the weather allows, you can cook outside instead. Now, if you are parked in campgrounds, make sure to use their facilities instead.
If cooking outdoors won’t allow, installing vents is the best way to go. It will prevent the air from being filled with excess water vapor. Also, cooking using lids will reduce water vapor from being released inside your RV. Aside from the vents, you can also crack a window open while you are cooking.
Get Outdoor Showers
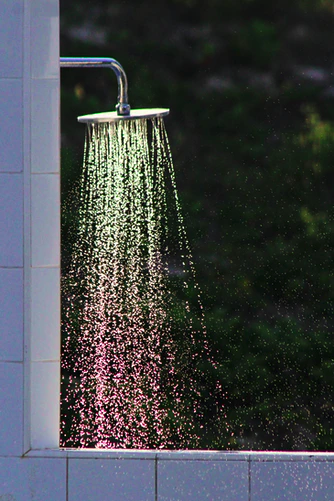
Just like cooking indoors, it is best to shower outside as well. Of course, this would be a different case if you have vents inside your bathroom. You can purchase different outdoor showers when the weather allows. You can also use campground facilities and public showers instead.
If you are trying to avoid condensation build-up during camping and are in the middle of nowhere, it is best to skip showering altogether. A steamy shower in your bathroom can put more moisture in the air, which you don’t want to happen. In my opinion, it is still best to buy an outdoor shower instead to avoid any hassle.
Hang Your Clothes Outside

Now, RV parks or campgrounds don’t have dryers, so hanging your clothes outside is the best way to go. Make sure never to hang wet clothes inside your RV as it can build moisture. This will apply if you don’t want to put a nice sweater or sweatshirt in the dryer with the fear of shrinking.
If you spend a day at the pool, hang the towels outside instead of inside the RV. You can dry them on a drying rack that folds flat when not in use. Great for saving space and can be easily put away. Now, if you are not able to do any of these, it is best to install a clothes dryer vent instead.
The clothes dryer vent is best for RVs and fifth wheels. The moisture will escape outside through the vents, which is perfect if you are avoiding condensation. Here’s a drying rack that you can buy in the market to hang your clothes.
Perfect Clothes Drying Rack: Honey-Can-Do Heavy Duty Gullwing Drying Rack
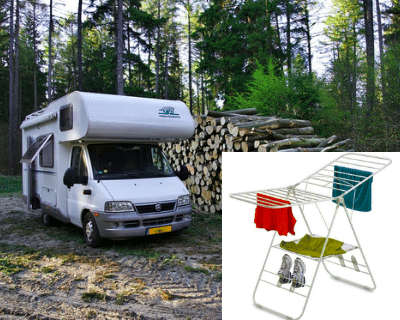
The Honey-Can-Do Heavy Duty Gullwing Drying Rack measures 57 x 23.5 x 37 inches. It is a floor mount type and made out of steel. It can be configured into six positions and has 46-linear feet of drying space. It folds flat for compact storage, so you don’t have to worry about it taking up too much space.
It has a steel support arm handle and can support heavy garments as well as large loads. Lastly, it has a sweater shelf and a drying rack which is perfect and can fit any clothes that you may have. The Honey-Can-Do Heavy Duty Gullwing Drying Rack costs $35.50.
LED Lights is Also A Good Solution
Instead of using incandescent lights, it is best to install LED or fluorescent lights. Incandescent lights produce more heat and can contribute to condensation in your roof when you use them for long periods of time. Now, LED lights may be expensive, but they are longer-lasting lights and provide less heat, saving money in the long run.
Acegoo RV Ceiling Lights
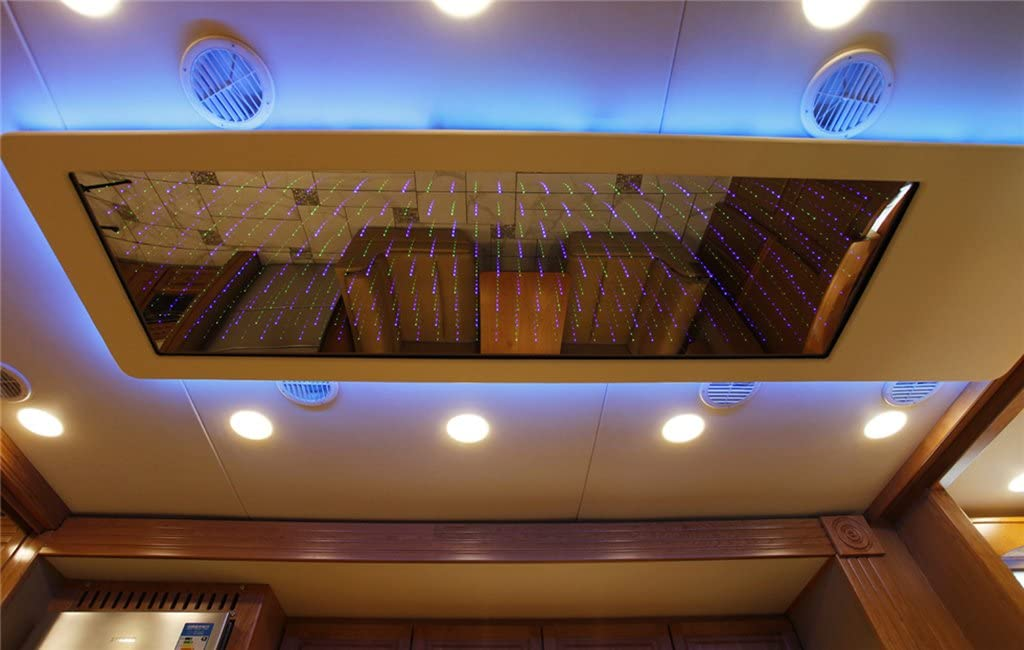
Image Source: amazon.co.uk
The Acegoo RV Ceiling lights are super slim with a thickness of 0.52 inches, making them lightweight and compact. This LED light is perfect for narrow places and energy-efficient since it is 12 volts. It is made out of full aluminum, which keeps radiating heat away from the LED chipboard.
The Acegoo RV Ceiling Lights consume the lower power of your vehicle battery. It has a recessed mount and spring clips that provide a neat finish after installation. It is available in four colors which are White finish, warm white, White finish, cool white, Silver finish, warm white, and Silver finish, cool white.
The cost of the Acegoo RV Ceiling Lights is $29.99.
Don’t Use Propane Furnace
If you are looking for something to keep you warm during the cold weather, make sure to skip the propane furnace. Instead, you can purchase electric space heaters that will keep everything nice and dry. Propane produces about four cubic feet of water vapor with every cubic foot of propane gas it uses. Keep in mind that propane heat is moist heat which will lead to condensation.
Lasko Ceramic Heater
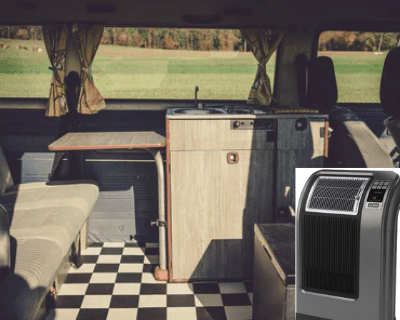
The Lasko Ceramic Heater is the perfect heater for you to use during cold weather. It measures: 5.7 x 3.7 x 9 inches. It has three quiet settings, which include high heat, low heat, and fan setting. This heater is great for warming up different areas in your RV. You can adjust the thermostat to 1500 watts and have 11 different temperature settings that you can choose from.
All you need to do is simply turn the dial to the heat setting you prefer and enjoy heat comfort. It is also convenient, easy to move around, and compact so that you can easily store it in your RV. It also has a built-in safety feature which is called overheat protection. This ensures the heater doesn’t overheat when left for hours at night.
Another great feature of the Lasko Ceramic Heater is the cool-touch exterior. It allows the body to stay cool even when it is on high. It is fully assembled, and when you take it out of the box, you can have it working in minutes. All you need to do is plug in the heather, select your desired heat, and enjoy the warmth.
The price of the Lasko Ceramic heater is $30.78.
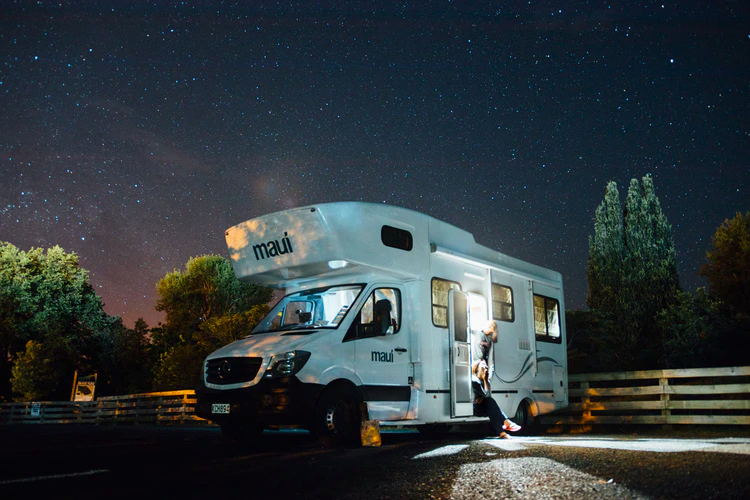
Plan Your Route

Lastly, make sure that you plan your route before hitting the road. Avoid winter months because colder conditions are prone to condensation. The colder the air outside means, the greater the temperature difference between the heat inside and outside air. This would trigger more condensation.
Not many RVers want to crack open their windows and doors opened during the cold months. So, if you don’t have specialized insulation on your RV, it is best to stay in warm places instead or wait for things to thaw before traveling. Remember, always plan your route carefully!
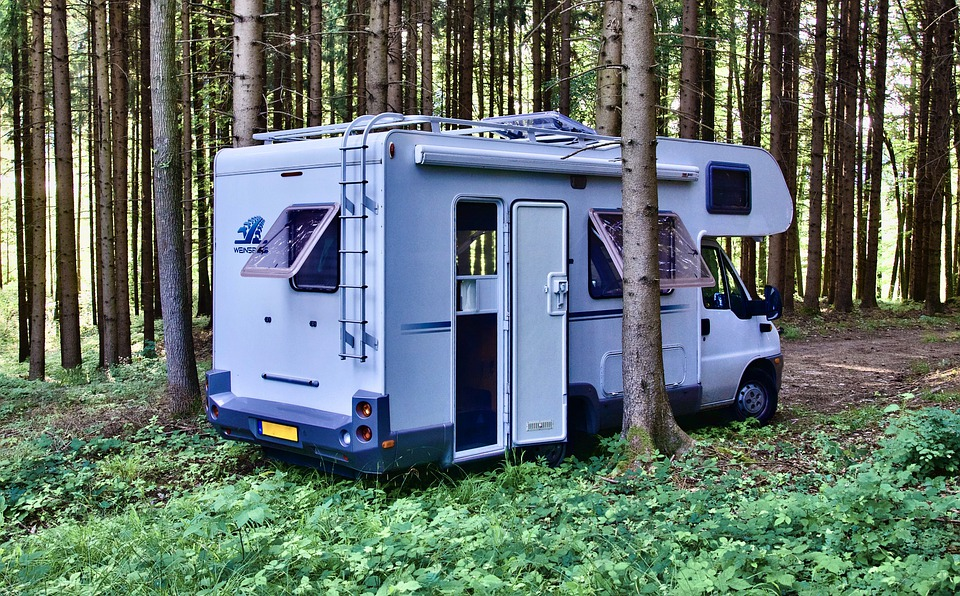
Why You Should Be Concerned With Sweaty Windows

Image Source: vehq.com
Now, as the water vapor cools and becomes liquid, it will result in condensation. You may notice condensation showing up on your windows, metallic parts, and sometimes the floor because condensation tends to stick on cold surfaces. When it is cold outside, there’s a lot of vapor in your RV air, which creates condensation to stick to windows.
It is essential to be concerned with sweaty windows because the water hanging out in your trailer can lead to different issues. It may not be bad at first, but if you prolong your RV moisture, it can lead to mold, rotten wood, corrosion, and water damage. Mold can start to grow on walls, under your shower, mattress, or floors. These are some of the places that you don’t see every day.
Remember that it is always best to take care and reduce condensation as well moisture as soon as possible. Make sure you follow the tips I have provided above to get rid of those sweaty windows.
Main Cause of the Sweaty RV Windows
As I’ve mentioned above, cooking, bathing, and propane accessories are some of the leading causes of sweaty windows. Other factors are doing laundry, the weather, and breathing that can lead to sweaty windows. When you are doing laundry with warm or hot water, it creates moisture leading to condensation.
When it comes to weather, humidity measures the amount of moisture the air can hold. With this said, the higher the humidity level, the more moisture there will be inside your RV. It will not only affect the air outside but also inside your RV.
Now, I know that there’s nothing that you can do about breathing. It is just to make a point that many factors can contribute to condensation. When you breathe air in, it is warmed by the body. So when you exhale warm air, it collides with the cooler air outside your body, and moisture is released.
Dangers that Condensation Poses on You
It would be best if you didn’t take condensation lightly because it can be a danger to your health. So it’s not just the sweaty windows you need to worry about and can be considered a minor nuisance.
The first thing you need to worry about is mold. Excessive moisture can lead to mold and mildew, which can cause unpleasant odors. It can lead to allergies and other serious health problems. Now, mold-infested materials can be removed, replaced, and cleaned. However, the best way to deal with mold is to prevent it from happening. Always remember that just because you don’t see mold, it means it’s not there.
Second, delamination is excessive moisture that breaks down the adhesive bonds on two surfaces. This is where your interior walls bubble up, which pulls them away from the framing. The same thing goes when you have painted and wallpapered surfaces.
The last thing that you need to worry about is rotting, which is the extreme end of the spectrum. The excessive moisture that is left untreated can lead to rot, and repair costs are expensive. It can keep you out of the road for days, weeks, or even months, depending on the extent of the damage.
Conclusion
Sweaty windows are just the tip of the iceberg when it comes to condensation. If you let moisture stay inside your RV, it can lead to mold and other extreme causes that possess dangerous health conditions. Following the tips that I’ve mentioned above is the best way to avoid sweaty windows in your RV. Always be safe, especially during this pandemic, know the proper way to remove the moisture inside your RV! Ride safe, RVers!


