

A lot of people buy old RVs because of two things: cheap price and size. Present RVs in the market costs more, and if restoring an old one means saving a few thousand bucks then it’s a done deal, but I had to make sure I’m making the right decision. I wanted to know what I should consider, like how much it will cost me to pay someone to do the job, or if I was the one to do it. I have several unanswered questions so I hit the keyboard and did some thorough research.
What do you need to assess before rebuilding an old RV? Check the RVs current state: tire quality, engine status, plumbing, drainage, water damage and electrical system. Remember, buying an RV is only a third of the cost of your restoration. There will be a lot of fixing and you’ll need construction equipment like saws, pliers, hammer, grinder machine, chisel, mallet, and fasteners like nuts, bolts and screws.
Old RV restoration requires persistence and dedication, and after thorough research I realized how picking the right RV plays a big role in the restoration process. In this article, look forward to learn about what to expect in old RV restoration, how to pick the right RV, equipment you’ll be needing if you go for DIY, the cost breakdown of restorations, a step by step guide in restoring an RV, professional fees, costs on repair and restoration, and what you must consider overall.
What To Expect In The Restoration Process
Before anything else, I need you to prepare yourself. It’s not going to be an easy ride and let me be straight– you won’t finish it in a month. Give yourself time and schedule the right moment where you can be flexible. Remember you’re trying to restore an old RV to its former glory, and when we talk about “old” we’re referring to RVs from 1950-1990. These RVs existed almost half a century ago! You’ll find it exciting and fun in the first few weeks, but endless repairs and touch-ups will happen, and you’ll probably end up beating yourself for it, so you have to be emotionally prepared to get it done no matter what. That is why you have to be smart in picking the right RV, because once you buy one, you’ve reached the point of no return.
Picking The Right Old RV For Restoration
Recreational Vans or RVs are divided into 4 different class types: Class A, B, C, and B+.
Class A
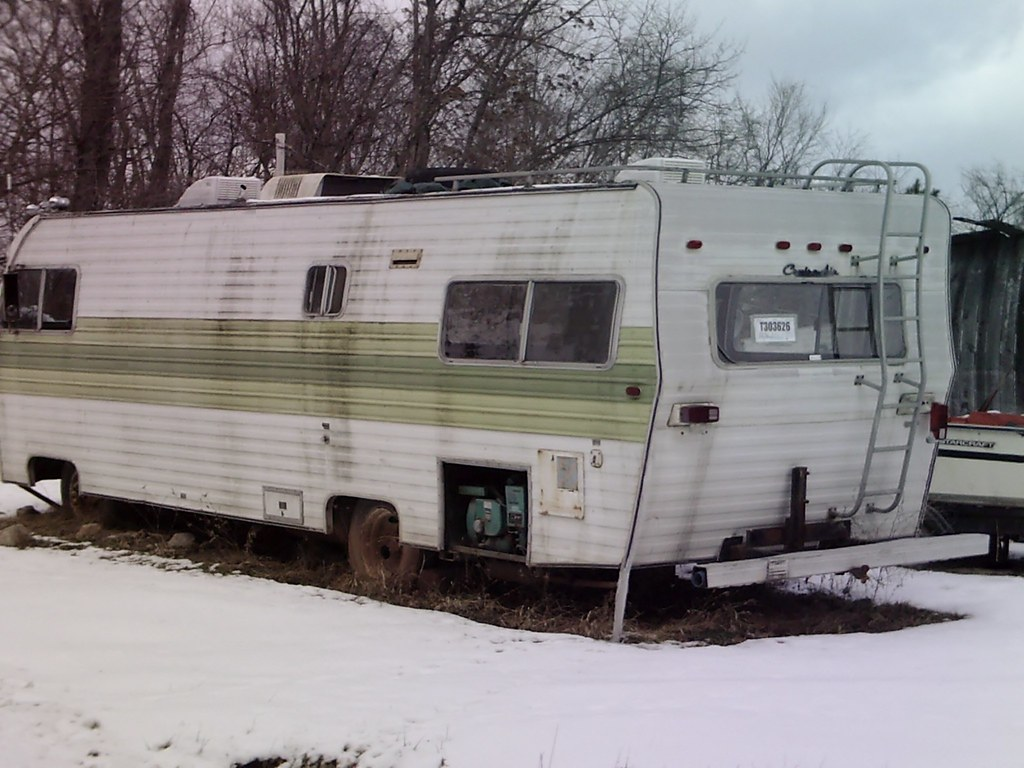
Image Source: “OLD RV IN NOBLE CO. OHIO” by sub35089 is licensed under CC BY-SA 2.0
Built with heavy-duty frames often used with bus chassis and ranges from 29-45 feet long and can sleep up to 8-10 passengers. Because of its size and weight, Class A RVs are not found to be fuel-efficient and challenging to maneuver.
Class B

Image Source: “DSC01178 Old RV” by Bisayan lady is licensed under CC BY-NC-SA 2.0
Also known as sleeper or campervans, it’s one of the small RV classes, ranging from 18-24 feet long, and is often bought by RV enthusiasts because of easy maneuverability. It is perfect for couples and can house up to 3 people maximum.
Class C
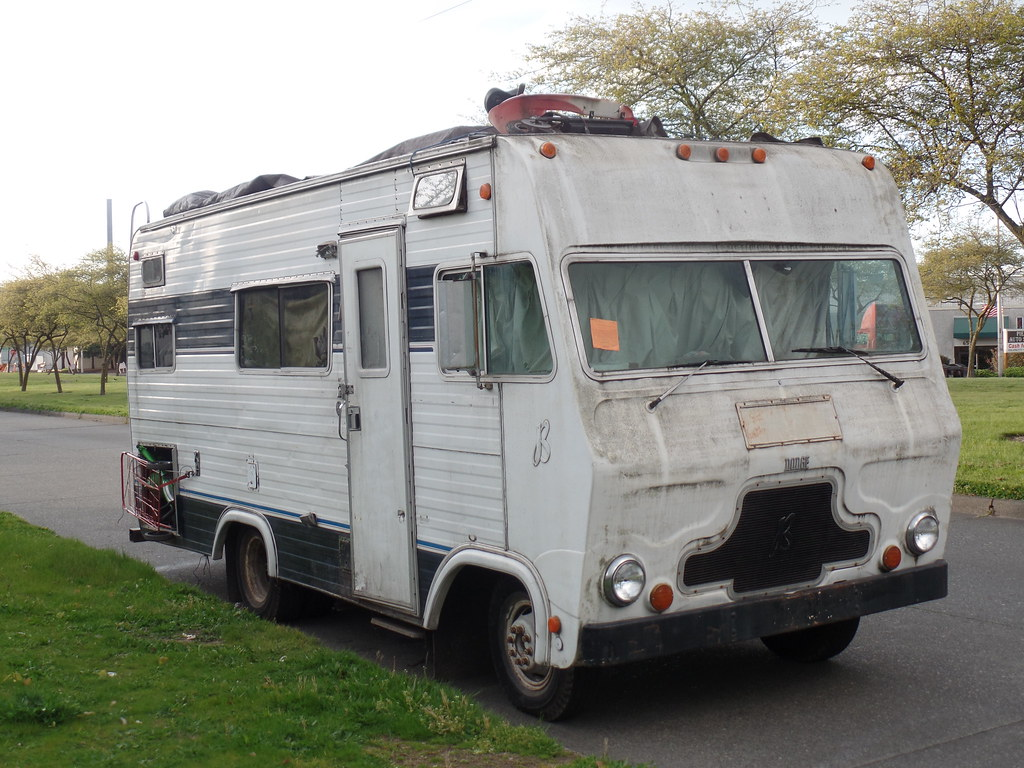
Image Source: “One of the many old RV’s that make their home in SoDo.” by rutlo is licensed under CC BY 2.0
The middle ground between Class A and B motorhomes. It ranges from 25-35 feet long, has more space than Class B, and can house almost the same amenities with Class A.
Class B+
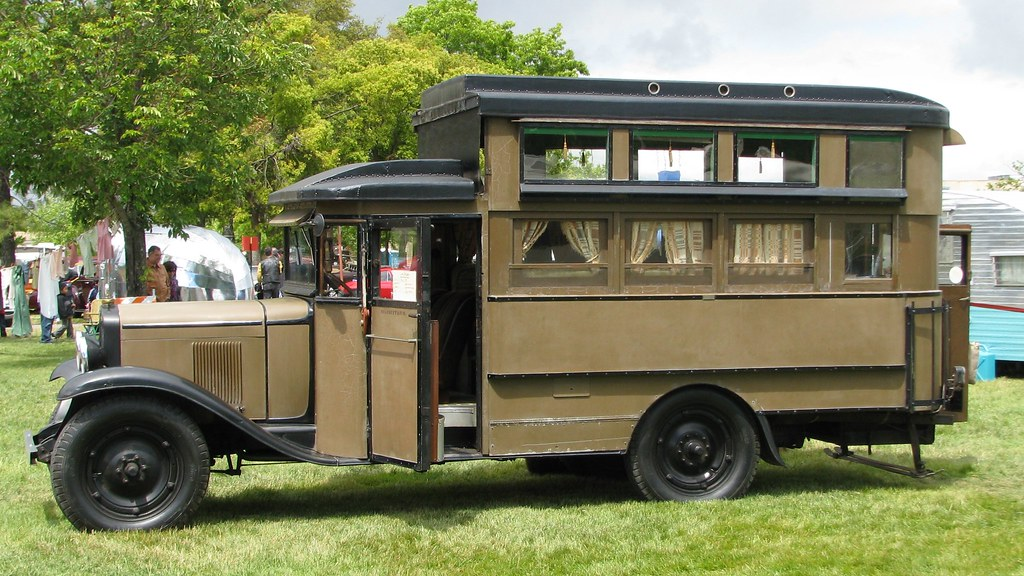
Image Source: “1929 Chevrolet Arthur A Thompson House Car (1 of 4 built) 1” by Jack Snell – Thanks for over 26 Million Views is licensed under CC BY-NC-SA 2.0
Most “retro”, “vintage” or “old” RVs are designed under the B+ category because of its hybrid between Class B and C. It can range from 17-24 feet long and there are no worries of driving it because it’s light and easy to maneuver. In the 1920s, RVs can range from 12-24 feet, but its popularity rose in the 1950s where most of the highest quality trailers were built. In fact, the Winnie Brave RV was so popular that the company recreated it again in 2015. Its original price in 1977 is only $4,000.
Know Your RV
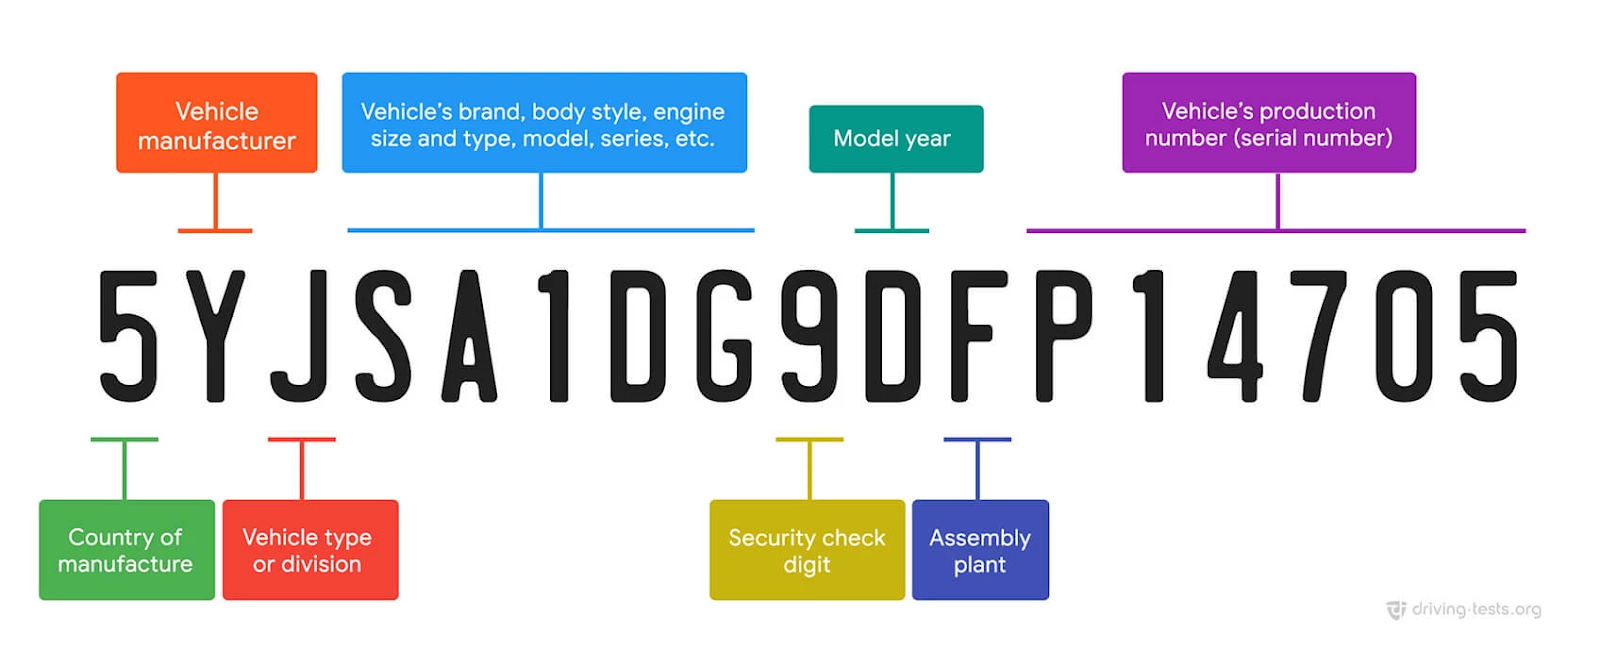
Image Source: driving-tests.org
Identifying the year and model of your old RV is no easy feat, but you can do so by looking at the vehicle identification number or VIN. It identifies the model year and serial number of the RV. Today’s standard VIN is 17 characters long but for vehicles manufactured before 1981, shorter ones were used. The last 6-digits is the serial number and the 10th character is the model year.
Model Year Character Codes
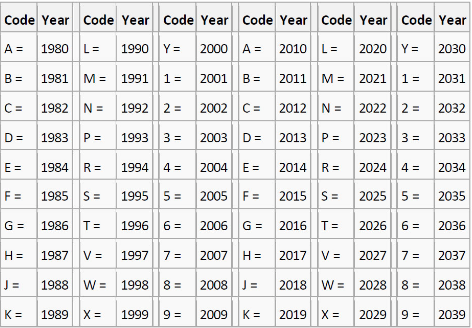
Image Source: airpower.com
Spot-checking Your Chosen RV
When revamping RVs, we are more drawn to the cost than what it looks like because hey, you’re not paying much, when in fact you can actually get more than what you pay for. Remember picking the right RV is very important because this acts as a blueprint to your nomad life.
RV Paperwork
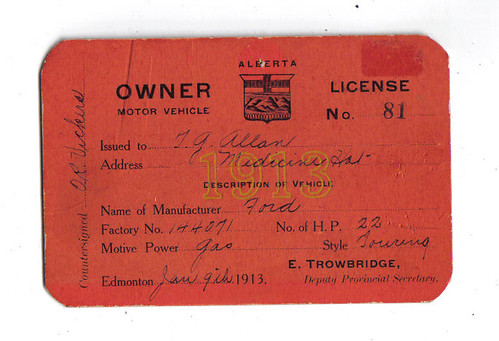
Image Source: “ALBERTA 1913 MOTOR VEHICLE REGISTRATION CERTIFICATE for license plate #81 Front Side” by woody1778a is licensed under CC BY-SA 2.0
Not all states require a title, but you have to confirm the legalities of the RV you’re purchasing nonetheless. All recreational vehicles (RV) are required to register their vehicle, and you will need several papers for that. If the seller does not have a title nor has it registered, ask why. You wouldn’t want to be arrested for theft if in case the RV you’re buying is a stolen one nor would you like your RV to be towed while you’re having your fun life on the road.
Remember, you will have to register the RV under your name for a licensed plate, , or else you’re spending thousands for another addition in your garage. Since every state has its own rules with RV legalities, I suggest checking your state’s vehicle registration and licensing website and identify what are the possible outcomes if you buy an RV with no title, and if you can have one registered without it. Sometimes a notarized bill of sale is enough, but you can never be too sure.
Check The Roof
The roof of your RV protects everything inside it, and this is what we overlook. Check the roofing material for any tears or worn spots that might be susceptible to leaks such as the seals of your RV. Press for any soft spots or holes as even good looking seals could sweep small amounts of water too. Open all overhead cabinets and look at the top corner where the wall meets the ceiling. If there is any soft spot or discoloration, this could mean there’s a leak at the seam where the sidewall and the roof attach.
Water getting inside your RV is your number one enemy, especially when it stays inside the walls. Mold is created out of this, and mold can add organisms that eat wood, leaving you with a costly fix. This can easily be identified by checking the roof down to its side, front and rear walls. Bubbles and creases on the RV’s fiberglass are results of moisture being trapped between the membrane and insulation. If possible, ask for any hose around so you can spray it over the RV to test for drips.
Check The Ceiling
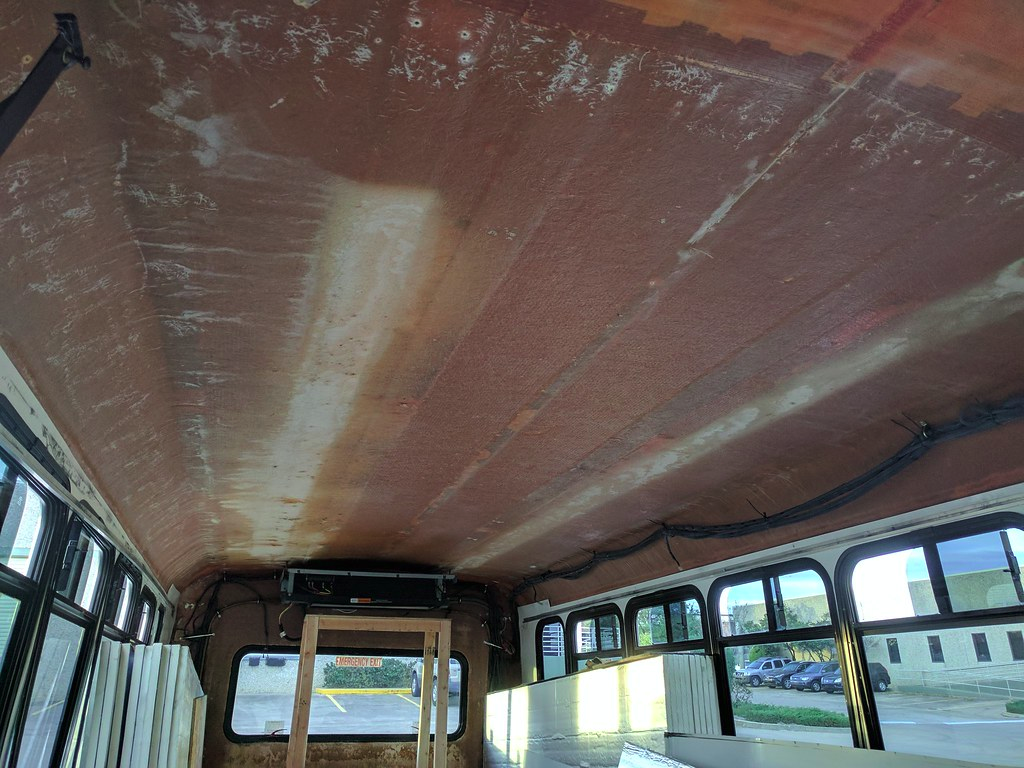
Image Source: “Ceiling” by IAmDriverDan is licensed under CC BY-NC 2.0
Cracked or torn ceiling panels are a major no-go because this will take a huge chunk of your time in renovating which involves endless measurements, cuts, and several other things to consider such as wirings and pipes that run all the way up to the area. Another thing to look out for are signs of water damage. If your RV ceiling is caved-in, has brown spots and discolored areas, you might want to rethink your purchase. Feel for any soft spots around roof vents, air conditioners, windows and slide outs because this is where water could seep through, especially during wet weather. You can also check for water damages not visible to the eye such as the ceiling. Soft spots could indicate that water has penetrated into the rig’s wood and insulation.
Water Damage
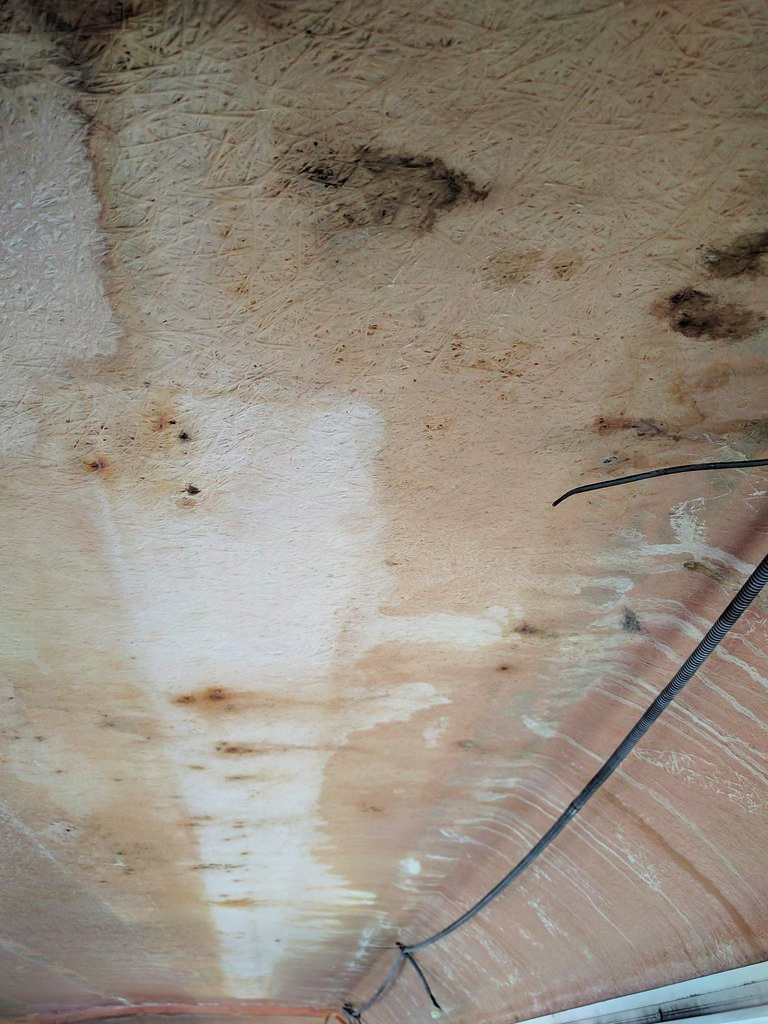
Image Source: “Ceiling water damage” by IAmDriverDan is licensed under CC BY-NC 2.0
Water damage is every RV owner’s enemy, not only because it often leads to complicated renovating, but because it’s always bigger than it looks. An RV wall corner can have 5 inches of visible water damage, but what it is underneath is 10x more. You’ll have to replace that corner, or end up replacing the entire area altogether. Visible signs of water damage are lumps on the floor and evident molds. These are often found on areas where water is present and moisture is created such as windows, cupboards and corners of the wall. Bad odor is also another telltale sign as this signifies molds, and molds can travel through air and cause serious health problems. However, if the odor is strong and foul, this might be a sign of sewerage problems.
Chassis Integrity
The framework of the RV is often overlooked because most buyers are focused on the interior and exterior without considering the weight capacity of the rig. Overloading your RV will cause serious damage to the chassis system such as the wheel and axle. Look for the GVW or Gross Vehicle Weight usually found on the front of the trailer near the driver’s side or on the inside of the entry door that states the ideal weight for safe operation of the RV. Before going on a trip, consider going to truck stops and have your RV weighed.
RV Stabilizer and Leveling
The last thing you want is a wobbling RV, and most RVs have built in stabilizing jacks to prevent this from happening. You can check the stabilizing status of your RV by walking back and forth and moving a few pieces of furniture. Remember, the lighter the RV, the more stabilizers it needs, so best to check it before purchasing so you’d know whether you should buy an extra leveling device.
Batteries
Your RV is run by batteries which is a critical component for the RV’s set-up to power several areas. Do not hesitate to ask whether the engine’s battery has been changed or maintained to avoid unexpected stops. Check for the status of your rig’s batteries to power the electrical system to avoid dry camping issues, and if the old RV you’re buying comes with solar panels, ask when it was bought and if the batteries are cared for because batteries that have remained idle for some time get damaged.
Electrical System
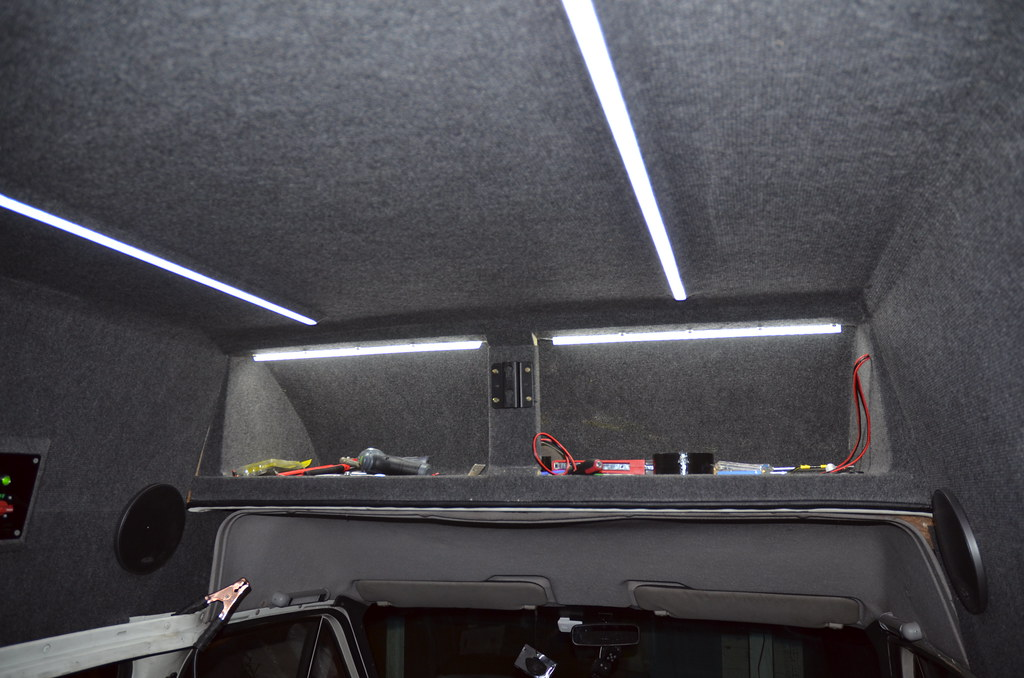
Image Source: “Mission Control – Build Progress 15th April” by Sascha Grant is licensed under CC BY-NC-ND 2.0
Wirings are placed behind the walls of your RV and you wouldn’t want to spend the next few days removing it, especially if it’s in good condition. First, ask where the circuit breaker or fuse box is, and check for any signs of corrosion and deterioration as this can ruin connections between the service cable and branch wiring, causing increased resistance and heat, which might ignite a fire. Next, check every switch and flip it on and off to check if it’s still working. Lastly, check all the visible cords and wirings for cracks, cuts, or breaks to avoid electric fires.
Engine And Brake System
Your RV wouldn’t be a steal if its engine and brake system isn’t working. Not only are you spending thousands for replacements, but surely you’d want to own a rig that’s ready for a drive around town, therefore ask for a test-drive. After which, check the engine fluid oil and ask what the RV requires, but most vehicles should not be on the minimum level. If it is, check the radiator, heater hoses and clamps for leaks. Next, ask for your rig’s brake system and its current status. Most common brake systems are hydraulic and air.
Hydraulic System- Check the brake fluid which is the lifeblood of your brake system. It should be clear and transparent. If it’s dark, it needs replacement.
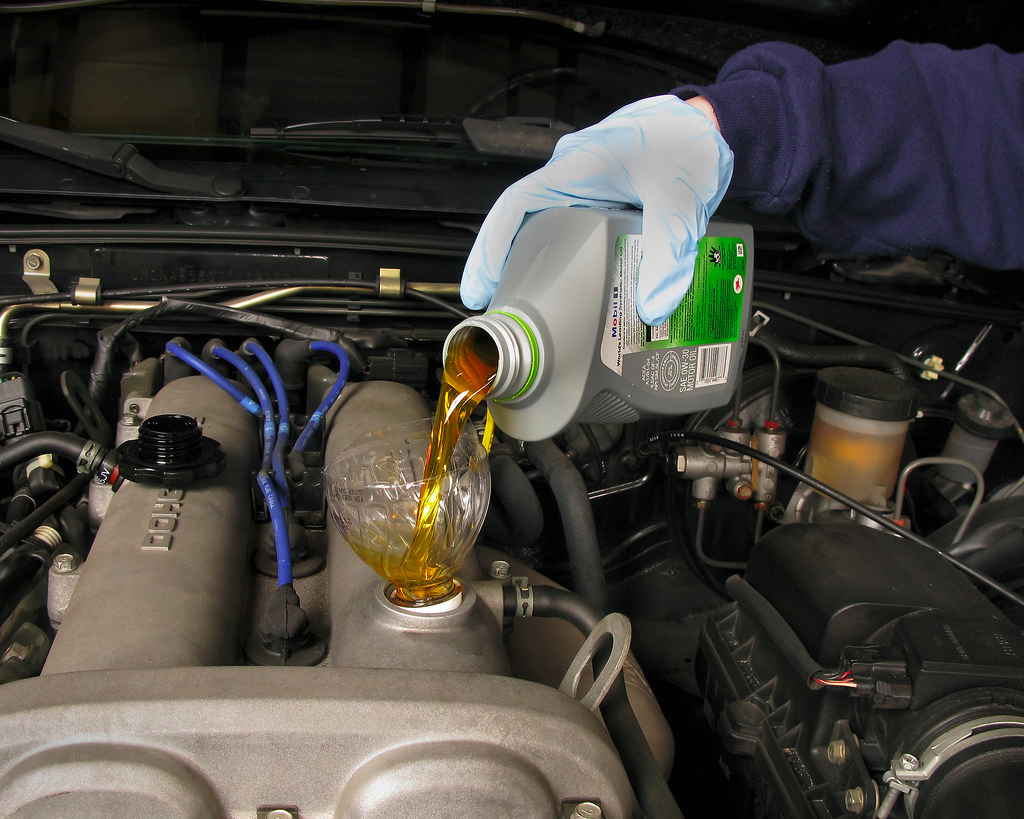
Image Source: “step 5” by Robert Couse-Baker is licensed under CC BY 2
Air Brake System- Check the low warning device activation by lowering the air pressure to 55psi. If it doesn’t activate between 55-60 psi, it’s defective.
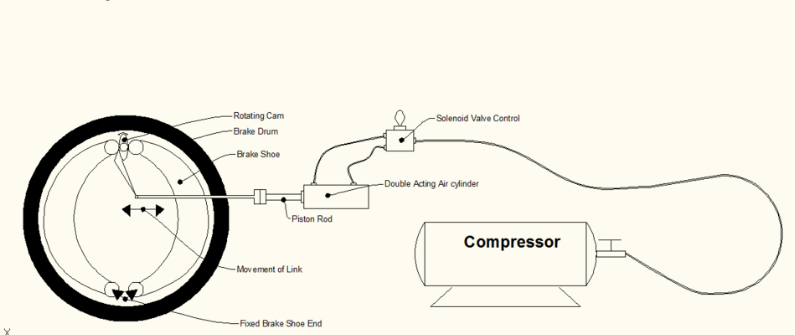
Image Source: grabcad.com
Tires
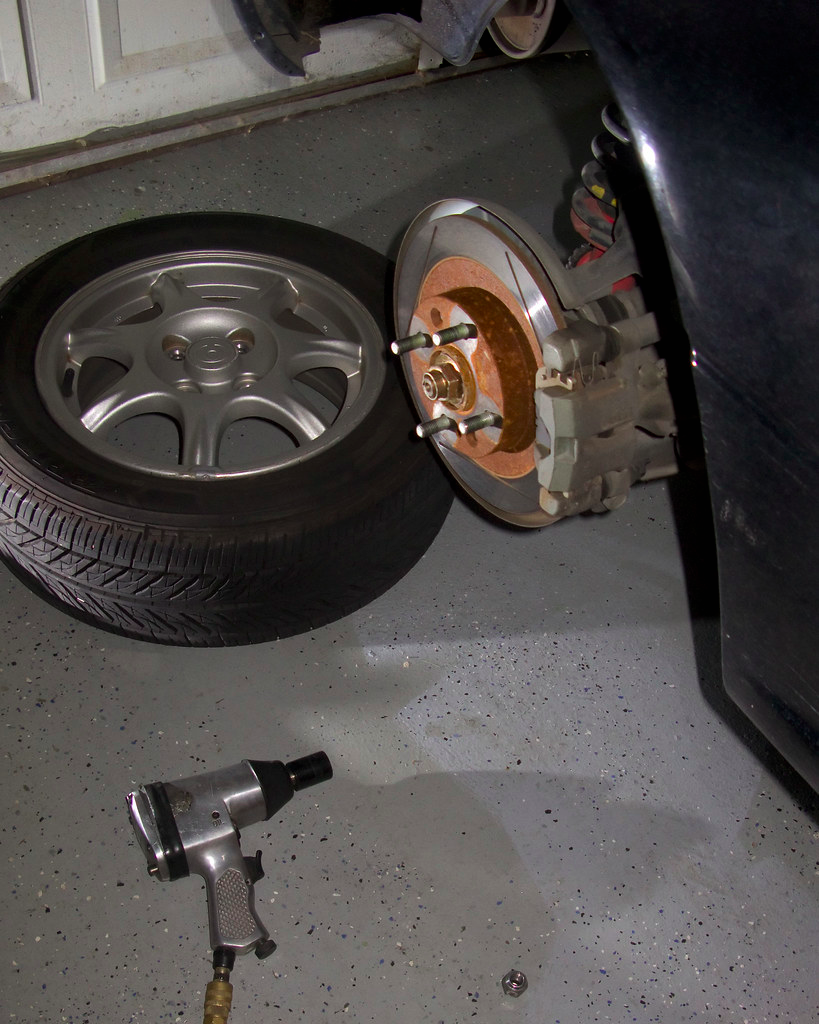
Image Source: “step 1” by Robert Couse-Baker is licensed under CC BY 2.0
Tires are expensive to replace, especially if your rig’s wheel size is outdated and not available anymore. Ask when it was replaced, and double check by checking the tire’s manufacture date: first 2 digits are the week of manufacture, and last 2 digits are the year. Do not forget to check signs of sidewall cracking because worn tires are susceptible to punctures, and you’d rather really save that expense for interior renovations of your rig.
Axle

Image Source: “Thru-axle hub adapter” by Haulin’ Colin is licensed under CC BY-NC 2.0
Driving a rusty axle is very dangerous as this could lead to vehicle accidents. Check this by test-driving. Any bumping, clicking, grinding or vibration are signs of transmission failure, velocity axle failure, or axle-joint damage. If your RV doesn’t go fast even if you press the accelerator pedal, that is a sign of a broken axle joint. Also check for leaks: grease underneath the vehicle or tire edge means a leaking axle boot which can cause moisture and dirt to get in and contaminating CV joints which is vital in transferring power and force to the RV’s wheel.
Note to writer: Include a section called “others” and mention in passing that you also need to check the chassis integrity of the RV. Also include the stabilizing and leveling system if the RV has any that is permanently installed. Batteries should also be checked, both for the engine and the solar set-up if the RV has one.
Plumbing
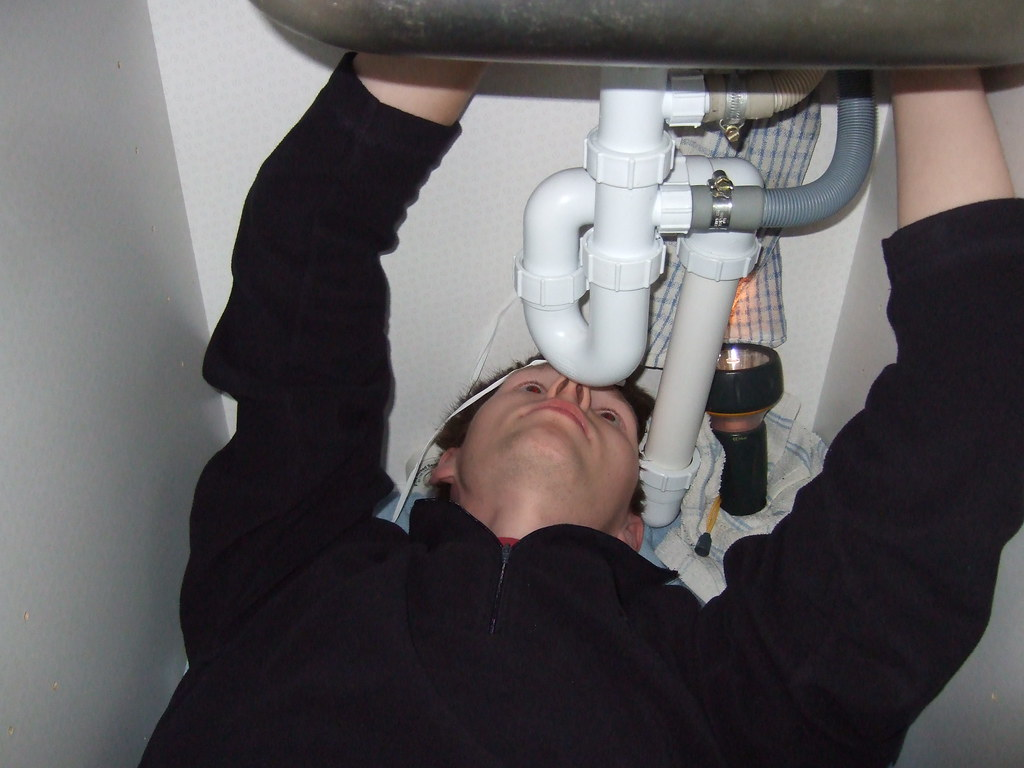
Image Source: “Simon wearing plumbing tape” by Haxxah and KraZug is licensed under CC BY-ND 2.0
Always check the plumbing before buying an RV. Check for running water by switching all faucets and flushing the toilet. Plumbing issues are not something to be side-looked at because some pipes connected to your toilet, bathroom and kitchen are held by your rig’s interior walls, and you really don’t want to end up skinning your RV for that. Check for leaks by tracing the water pipe from internal to external while applying pressure to the water source. If possible, ask for a drain hose to test drain connections on Grey, Black and Fresh Water Tank. Any issues with regards to drain connection could lead to a nasty smell in your rig.
Grey Water Tank: Holds water waste from your shower and kitchen
Black Water Tank: Holds waste water from the toilet
Fresh Water Tank: Holds fresh water that comes out of your taps
Equipment For Restoration (DIY)
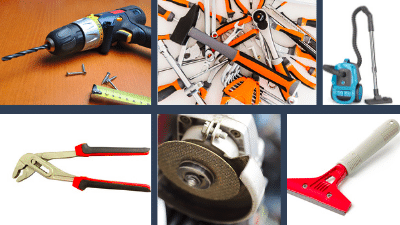
Image Source: nomadicallyyours
There will be a lot of gripping, cutting and sawing, so prepare yourself for an intense workout. This will involve a lot of damaged wood removal from water exposure, molds, adhesives, among others. Do not forget to wear goggles, face mask and gloves because there is some nasty stuff you really wouldn’t want to smell or get your hands on. In the 1970s, old RVs were insulated with asbestos due to its fire-resistant qualities and able to ward off generated heat.
However, the problem begins when it deteriorates and its fibers can be inhaled or ingested which could lead to cancer. I suggest cutting a portion of the insulation and have it tested just so you know what you’re working on. Now, back to work. These are your tool must-haves:
Angled Multi-tool
Lets you sand, saw and cut depending on the attachment used
Drill/Driver
Used for drilling holes and driving screws into wood or metal
Reciprocating Saw
Cuts through lumber and all common forms of metal like steel, aluminum, copper and iron
Heat Gun
Operates in different temperatures to strip, heat, dry, bend, soften and thaw out materials like paint, film, wood, adhesives and plastic
Mallet
Used to knock pieces together or give additional force
Pneumatic Staple Gun
Used to install hardwood and flooring underlayment
Slip Joint Plier
Used for gripping and bending
Water-pump Pliers
Used for good gripping, and to turn and hold nuts, bolts
Needle-Nose Pliers
Used for cutting, holding, bend and snip wires
Vacuum Cleaner
Used to collects dust and small particles
Floor Scraper
Used to removes adhesives, tiles, carpet or rubber
Flat Pry Bar
Used for sliding, gripping and removing nails, tacks, and staples
Chisel
Used for shape cutting and carving
Laminate Floor Cutters
Used to cut laminate flooring
Electric Grinder Machine
A handheld power tool used for cutting
Nail Gun
Used to drive nails into some or other material
DIY Estimated Cost Breakdown
I collated the most common bought appliances, furniture, exterior and interior materials to give you an idea of how much you will be spending. However, the cost of your old RV restoration will depend on the RV you’ve chosen. This is why picking the right RV is important. If you skipped that part and went over to know the prices, then scroll up and go over it again.
Appliances & Furniture
Do not just buy furniture and appliances without measuring your floor area, nor should you just move furniture from your home to your RV. RV furnitures are made of lightweight materials because any additional weight will have an effect on your RV.
Living Room/Dining Area
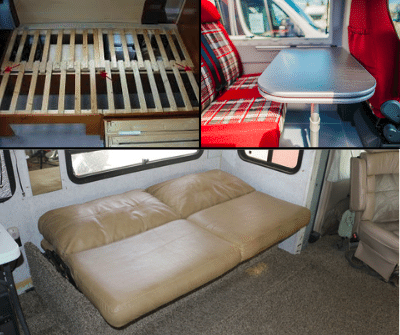
Image Source: nomadicallyyours
RV Sofa Bed $688-$2,000
RV Pull-Out Bed Frame Customized $229.99
Bluetooth RV Radio/Speaker/Player- $200-$500
Television $129-$240
RV Table $74-$250
RV Dinette Set $899-$1,300
Slide Out Cabinet Organizer $32-$79
Bathroom
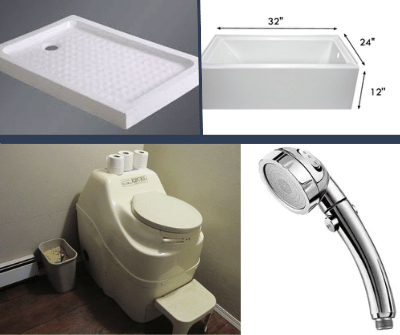
Image Source: nomadicallyyours
RV Bathroom Faucet $17-$50
RV Bathtub $150-$250
Shower Head $94-$110
Shower Pan/Base $200-1,200
Sliding Door Track $58- $230
Composting toilet $230-$500
Bedroom
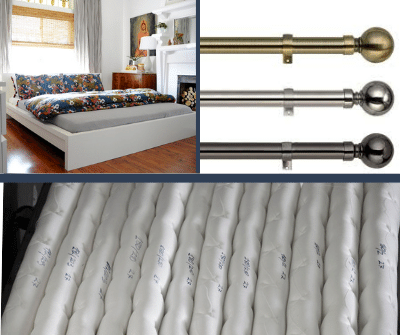
Image Source: nomadicallyyours
Bedroom Roller Blinds $71-$200
Bed Mattress $214-$700
Curtain Rod $14-$40
Other
Window Frames $8-$60
Tempered\Laminated Glass Window: As low as $240
Solar Kit $300-$2,000
Wallpaper $6.99-$23
Interior Paint $30-$60
Fiberglass Protectant $11-$20
Exterior RV Led Lights $14-$150
Here are some legit sites you can purchase your RV Furniture and Appliances from:

Image Source: nomadicallyyours
(Maan:see if we can find affiliated accounts for these stores)
Cost Of Repairs Outside Your Expertise
As much as you want to do everything on your own, some needed repairs are discovered in the middle of renovation that requires a professional’s helping hand.
Engine Tune-Up And Minor Repair $150-$400
Includes inspections of spark plugs, emissions, wires, oil, oil and fuel filters. Prices vary on the damage; if it requires replacement such as electrical wires and emission system, hourly labor rate is anywhere between $40-$150.
Axle Repair $170-$1,100
Axles are used for steering, driving and braking. Repair price will depend on the severity of the damage. The technician will have to begin by assessing the situation and identifying the damages. Axle installation and repair labor rate cost could range from $140-$200 on top of the repair or replacement cost.
Air Conditioner Repair & Replacement $600-$3,500
Includes checking/replacement of roof vents, air filter, condenser, and evaporator coils. However, RV air conditioner prices depend on the style and unit. Hourly labor starts at $100 to $600.
Choosing The Right Interior Design
Now that you have an idea of the cost breakdown, it’s time to choose the right interior design. Your RV is an extension of yourself, and think of it as a huge canvas where you can express your true self.
Interior Design Themes
Rustic/Country
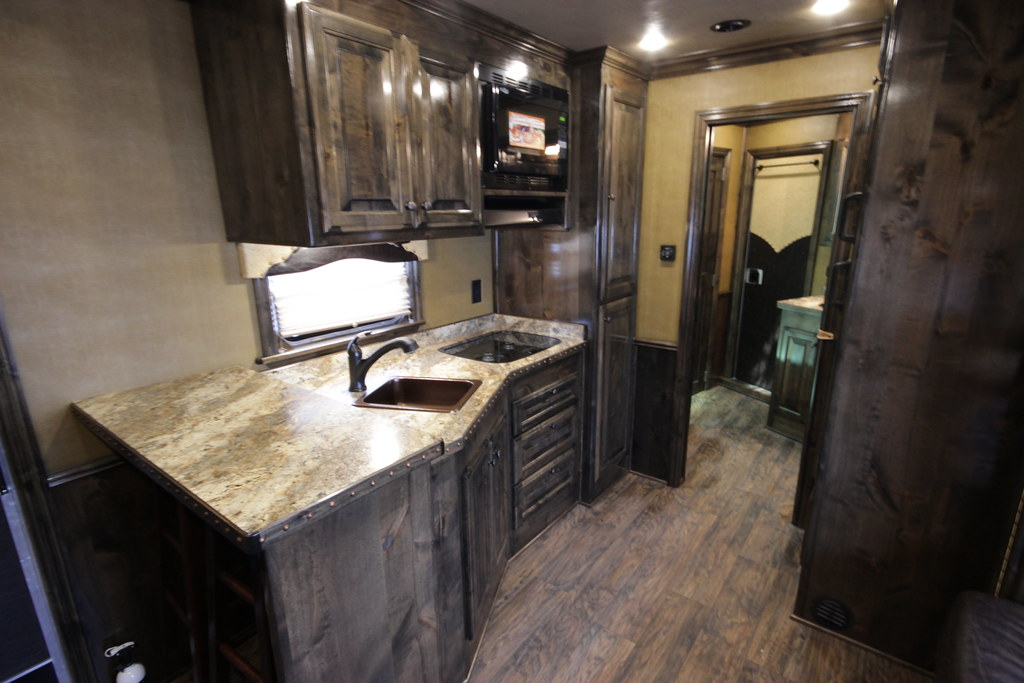
Image Source: “Horse Trailer with Living Quarters Video Walkthrough – 2015 Cimarron Norstar” by Trailers of the East Coast is licensed under CC BY 2.0
Rustic or Country interior design focuses on the use of natural materials. This means no usage of modern furniture like flashy or geometric lighting. Instead, your interior should be dominated with wood, stone, clay and metal furniture, fabrics and including the accent color of your ceiling and walls. For example, you can start with painting your RV walls with an earthy brown color and your flooring with honey maple or special walnut wood stain vinyl planks.
Color schemes: earthy colors like brown, green and other warm, cool colors like dark red, gold, peach, gray
Modern
Image Source: nomadicallyyours
Modern interior design follows clean, fresh looking designs that involve clean straight lines with no curves or swirls. You can also include wood in your furniture but it should be minimal. Instead, it should be leaning towards the minimalist style following the “less is more” rule. You may also put fake/real green plants to give it a fresh modern vibe. For example, you can color your walls with gray and provide better lighting in your RV by enlarging the windows or installing lights in the ceiling.
Color schemes: Neutral colors like Black, Grey, Brown, Green, mixed with pops of color like blue, red, orange
Modern Rustic
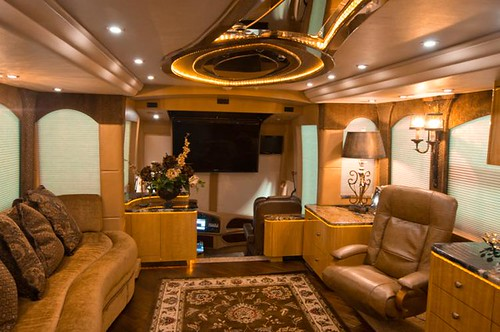
Image Source: “2013 Millennium H3-45, Triple Slide Prevost, #1943” by MillenniumLuxuryCoaches is licensed under CC BY-NC-SA 2.0
Modern rustic interior design is the perfect blend of modern and rustic. It incorporates modern and contemporary features in a log cabin/farm house. The most important element that could give any RV that modern rustic vibe is the use of wood accents such as wooden cabinets or chairs, stones, jars, bricks, mixed with modern furniture exposing natural architectural elements such as shapes, symmetry, pattern, color and contrast. For example, putting light blue throw pillows on your RV couch with straight line patterns.
Color schemes: All hues of brown, white, black, green and other pop/warm colors such as yellow and orange
Bohemian
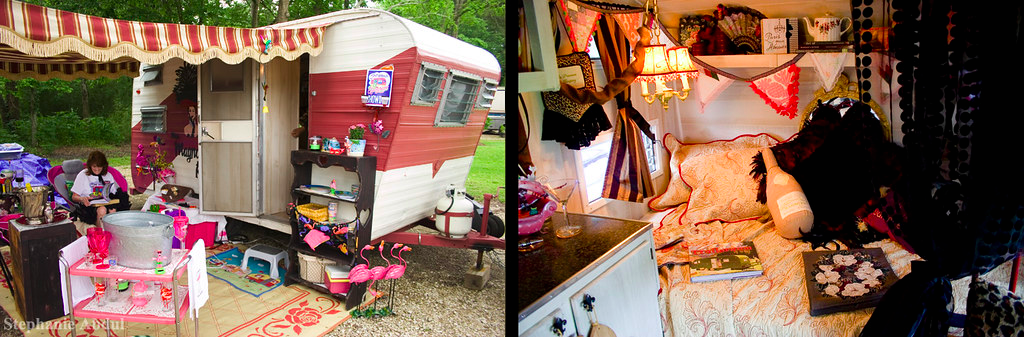
Image Source: “A Vintage Burlesque Mini Caravan for Travel” by cleverfoxphotography is licensed under CC BY 2.0
Bohemian interior involves free-spirit animal design where pattern, texture and color dominates the area. Decorate your RV with botanicals, carefree pattern furniture such as pattern pillows, blankets, curtains and vintage pieces. For example, you can decorate your walls with patterned wallpaper, or by using a real or faux fur carpet.
Color schemes: Warm earthy, metallics mixed with pop colors like purple, orange, electric blue
Scandinavian
Image Source: “2008 Regal H3 S2 Prevost” by MillenniumLuxuryCoaches is licensed under CC BY-NC-SA 2.0
Scandinavan is more of minimalism, simplicity and functionality. It is often dominated by the use of leather, light wood and warm textiles. It’s close to modern but more of a cozy vibe because of its clean muted colors and clutter-free space. For example, painting your RV walls white, and layering your kitchen sink wall with tiles, and installing a light colored wood vinyl flooring.
Color schemes: Neutral colors, light colors or black and white combos, gray and earth matchy tones
Step By Step Guide For DIY Old RV Restoration
Restoring an old RV requires a whole lot of dedication on top of sweat and flying debris here and there, so I’ve decided to write a step by step guide to lessen your old RV renovation worries.
Insulation: Reflectix, R-Value, and Areas to Insulate
Most old RVs use fiberglass insulation from walls to their ceilings, but while glass is not a good conductor of heat, thus making it a good insulator, it does not work well with moisture. Mold can develop if it’s not maintained.
R-Value
Insulation is always related to R-value. It is the rating system of the material’s resistance (R) to heat flow.
There are several ways to insulate your rig, from wool, denim to cardboards. Wool, for example, is a good insulator and has an R value of approximately 3.5-3.8 inch, but if moisture seeps into your walls, wool can make your rig smell like an old sweater. This is why most motorhome users are using reflectix to insulate their rig.
Reflectix
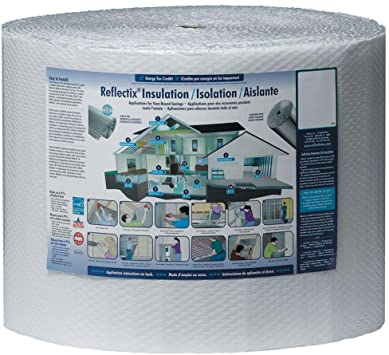
Image Source: amazon.com
There are several types of insulators from wool, old denim and spray foam among others, but perhaps the most common of them all is the reflectix. It is a thin bubble wrap with reflective coating that acts as a radiant heat barrier and has an R-value of 4.4 per inch. When applied correctly, it can produce an R-value of 20-30.
Reflectix Installation
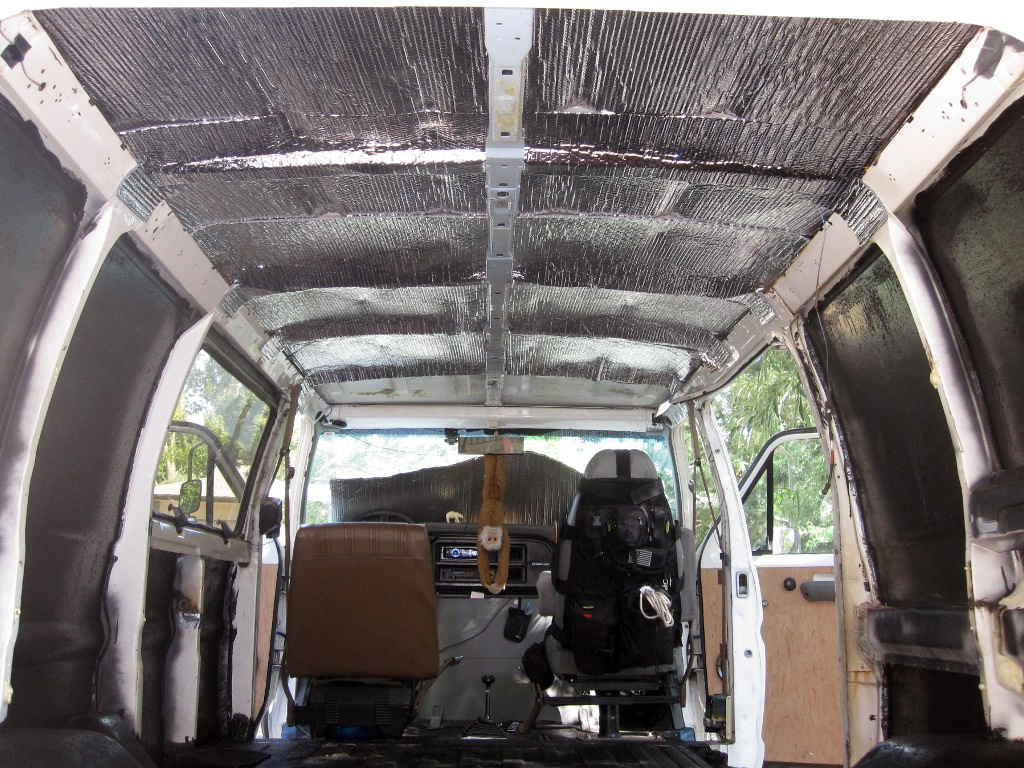
Image Source: “Reflectix On Cieling From Rear” by Zaskoda is licensed under CC BY 2.0
Ceiling
If you’ve decided to totally remove the original insulation of your rig, then you’re up for another additional task. You can use a cardboard with 6cm thickness as an initial layer of insulation, then put a reflectix after that. However, you need to be specific with the ¾ space between the cardboard and the reflectix. In a coordinate plane, your cardboard is on the ¾ of the y-axis, and the reflectix on the origin. Attach the reflectix on the ceiling’s structure using a staple gun.
Extra Insulations
Windows
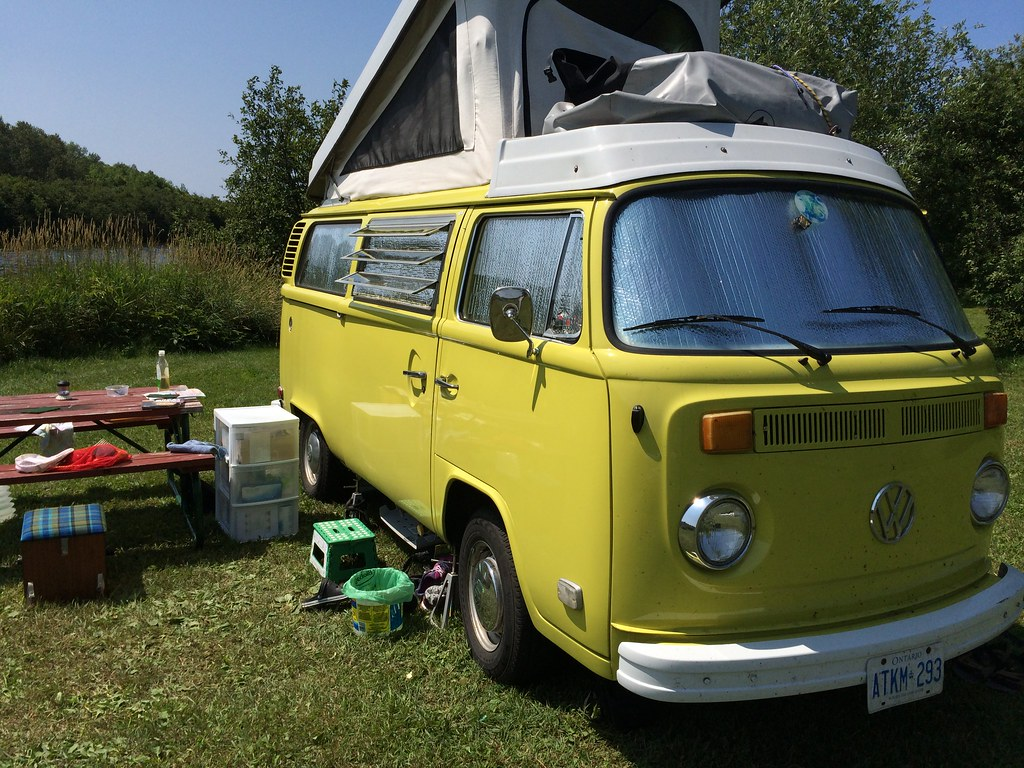
Image Source: “Reflectix bus beating the heat” by thekenshow is licensed under CC BY-NC 2.0
There is what we call radiant heat also known as thermal radiation which means heat can be transferred without any contact to a heat source. For example, when it’s summer and we feel hot, this is the effect of radiant heat on our body from the sun. This is exactly what happens to your RV’s windows. Most of the heat is coming through the windows and you can lessen this by installing RV awnings, or by attaching a retractable reflectix inside your RV’s window. When attaching a reflectix, do not attach it using liquid nails as this will leave a stain and not be enough to hold the reflectix.
Instead, buy a cup hook and do not screw it on the wall, instead tape the tip of the hook into the wall, with the hook shaped like an inverted question mark. Next, cut two pieces of 3-inch duct tape. Locate the center of the reflectix and put the first tape on the left side of the reflectix’ center while maintaining an inch distance from it. You should only tape the first inch of the duct tape into the reflectix, leaving the rest of it on air. Repeat the same process on the right side. Next, put the string onto the sticky part of the tape that’s not stuck to the reflectix, and fold the duct tape over.
The duct tape should now fold over the string, leaving the middle part of the string available to use as a hanger that you can hang on the cup hook. Now, you have a hanging reflectix that can keep the heat out. You can cover it with your window curtain for added insulation, or just to maintain your RV’s good looking interior design.
Cabinets
Cabinets are also good conductors of heat because your cabinets are attached to your RV’s walls, and your walls receive the heat from the Sun. To keep the heat off, cover the inside of the cabinet that’s connected to the wall with a reflectix. You wouldn’t worry about it looking off because no one will see that, and besides you’re going to put clothes or stuff in there.
Ceiling Vents
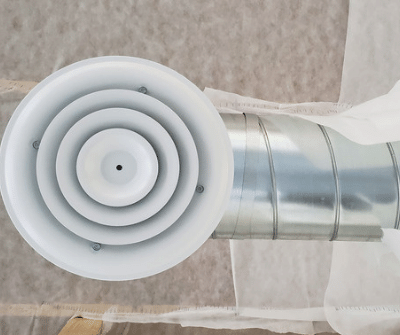
Image Source: nomadicallyyours
Vents help increase airflow in your RV and keep the air fresh, however while this can help the airflow, it is also a very good conductor of heat. You can insulate this by putting reflectix to cover the vents and skylight, or you can insulate it using a foam board such as the ones from Camco.
All you have to do is stick it inside the vent and it snugs perfectly. It has 2inches of foam inside which can block the heat, meaning it’ll keep your RV cool during summer, and warm in winter.
Vent Fan Installation
Proper air flow is important to live comfortably, therefore you need a good vent fan to spread the cool breeze throughout your rig. Aside from parking under the shade of the trees, you can install a Fan-tastic Fan to increase air circulation. Before doing so, check the measurement of your vent to replace the fan inside it, or measure the vent fan you’re buying so you can drill a hole or opening on your rig’s roof with perfect accuracy. Standard vent opening for an RV is 14×14 but it wouldn’t hurt to check your measurements.
Note from Anne: You guys are talking about insulation here so I think it is best that you also include ventilation of the RV. Most old-RV’s have minimal or no ventilation system installed. Look into some DIY ventilation systems you can do for the RV. Include a section that talks about how you can install a ventilation system and the types of ventilation system you can choose from.
Flooring: Clean-Up, Repair And Installation
Old RVs are often installed with linoleum which is very susceptible to damage. The reason why water damage occurs because if not maintained, the linoleum loses its water resistance. You’re in luck if you’re very confident that your decades old RV flooring is in good condition, but if you aren’t, well, there’s only one way to find out:
Rip The Carpet/Remove The Old Linoleum/Laminate Flooring
First, cut the carpet/linoleum/laminate flooring using a utility knife and remove the nails using a pry bar. It would be great to bring a floor scraper along because there are stubborn adhesives that would require such force.
Water-Damaged Subfloor
There are parts of the RV floor that you’d want to keep, and that’s fine, but if you can see planks crowning or creating a hump, that is a sign of water damage, and do not even think twice of removing that area! This could delay you a day or two, but hey, this is your future home so best to get it done. Once the carpet/linoleum is off, you will see the damaged subfloor with wood chips scattering and worse, molds.
Mark this area off with a pencil, and cut using a laminate floor cutter. Because water has seeped through it, the subfloor is a wet wood mess, so you will have to manually chip off the area using a pry bar and hammer it down.
This won’t be an easy knock-off round because subfloors are usually very glued up so be extra patient. Once done, clean the area off using a vacuum cleaner. The damaged subfloor is out and you will see steel and styrofoam or aluminum floor insulation. There are also bolts attached to it, and some of it might be rusty and in need of replacement.
If you do want to, be careful in removing because these bolts might be placed to bolt a storage compartment underneath. You can also grind off the steel area so you can get the rust off, if there is. Now that your area is clean, you can now apply your new subfloor, probably a marine-grade plywood, seal it up using a wood glue and let it dry overnight.
New Floor Installation: Vinyl Planks And Carpet Flooring
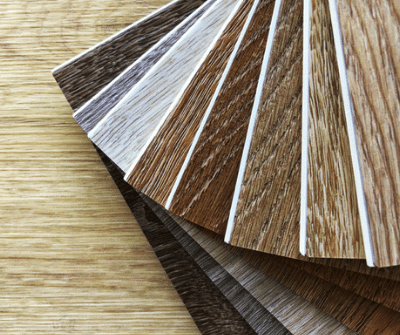
Image Source: nomadicallyyours
There are several floorings you can use on your RV, but I suggest installing vinyl planks rather than linoleum and laminate ones, because of its overall durability and resistance to scratches, scars, and water. It is even said to last for 10-20 years if maintained correctly.
There are several types of vinyl flooring but most used ones are vinyl planks that require vinyl adhesive and loose lay vinyl planks that do not require such. All you have to do is put the loose lay vinyl plank and hammer it down with a mallet for security. Unlike regular vinyl planks, loose lay vinyl planks have groove mechanisms that hold it in place; however, you need to be exact in measurement for secure locking.
Installing the flooring is less hard work compared to treating and replacing damaged areas, but you need to be careful that your planks are aligned, especially when dealing with vinyl that requires adhesives. Measure your floor area properly to estimate how many planks you need, and mark your planks with a dry erase marker for easy marking and erasing. Measure accordingly using a T-square, ruler or tape measure, and cut using a utility knife. Probably the hardest cut you’ll encounter is when you reach the door frames and cabinet areas of your RV.
Those require an exact measurement to fit the vinyl plank. Of course there are some parts that you want to be carpeted, so you’re probably wondering how to transition from there. There are several ways to do it, but the easiest of them all is placing the carpet on top of the vinyl plank and stapling it using a staple gun. A very fast and easy way to transition from your vinyl plank to the carpet.
Framing Windows: Measurement, Cutting, Painting And Attaching
Framing windows is very important because the wrong way of framing it could lead to unwanted water vapor, light and temperature.
Measure Your Camper Window
Remove the old window and measure its opening. Get the length and width following to the nearest 1/16 inch for accurate readings. Tape measures have a metal tip which means the first inch is short by 1/16th. Measure the sidewall depth (thickness) using a stiff rule from the interior wall surface to the exterior wall surface for your frame to fit. Remember, window shape and size is important. If you’re working with circle or oblong shaped frames, compute the corner radius or get one by using a compass print or a radius template.
More Measurement And Cutting
Always pick the right wood. Weight is very important when renovating your RV because any added material is also an add-on to your RV’s weight. You can use lighter wood like cedar or pine. If you can’t, then you can use the wood you have now but have it milled down. Your wood shouldn’t be too thin or too thick, so confirm your measurements once, twice, or maybe even four times.
Revealing Your Artistic Side
Painted frames are nice so best use an exterior gloss and oil-based paints which are ideal for woodworks, since most window frames are made of wood.
Attaching the Window Frame
You can use rivets or attach screws, but consider the space of your window. If it’s too small, then a nail gun is appropriate, but if it has enough space for a drill, then screws are okay. Attach the bottom piece, the sides and lastly the top piece. Seal any visible gaps from the window frame to the RV wall to give it a finished look.
Renovate And Decorate: Paint And Wallpapers
RV Wall Paint Preparation And Application
If your RV walls are initially covered with wallpaper, best remove it first to check for mold underneath. Again, mold is an effect of water damage, and you don’t want to just paint over that. However, if everything is good to go, then you may start by putting tape on areas you don’t want painted on, such as window frames and upper cabinets. Sand the walls using a sandpaper or sand sponge to smoothen the surface. Clean using TSP (trisodium phosphate), a powder mixed with warm water to remove stubborn greasy areas, or you can go for natural use of water and vinegar.
TSP
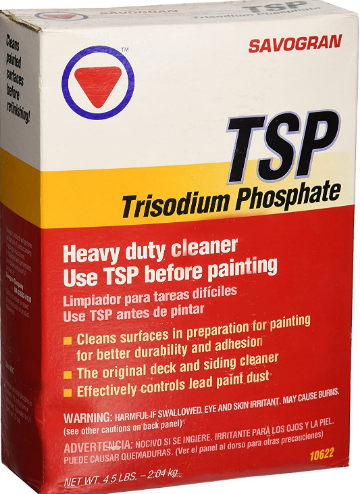
Image Source: amazon.com
Mix the powder into hot water and dissolve. Swab onto the wall and let it dry for 30-60 minutes. Use a sponge to dry the walls after, in case of any left over moisture. Rinse the walls with clean water, and sponge dry again.
Water and Vinegar Combo
Mix ½ cup of white vinegar and warm water in a bucket, and use this formula to clean the walls. After which, rinse the wiped clean wall area with clean water. Next, prime the walls using an oil-based primer, and mix according to its recommended ratio. Standard ratio is 2:1, 2 parts primer and 1 part thinner. I suggest using Kilz Max as your primer because of its anti mold , mildew, fast drying and low odor properties. Once dry, paint the wall with your chosen colors.
Painting Goes A Long Way
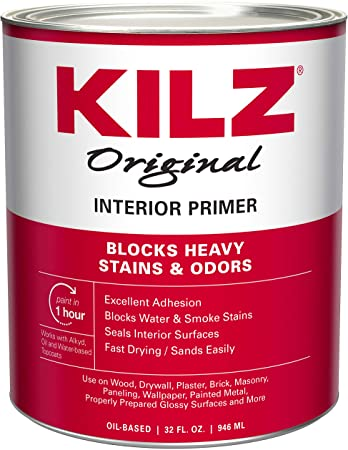
Image Source: amazon.ca
Color is everything. If you find something that fits your RV but not with the theme, then paint on it. However, paint used for walls is not ideal for furniture because it doesn’t give a smooth finish, and you might have to put another layer of coating to achieve the coating a paint for hard and rough surfaces can in one coat. There is no harm in using your extra wall paint, but you don’t really want to deal with chipped paint on your furniture in the future. Here are some highly suggested paints you can use for furnitures:
Gloss Paint
Provides a high-shine finish, easy to clean and ideal for woodworks
Oil-based Paint
Better adhesion to difficult surfaces, and ideal for metals and wood
High Quality Latex Paint
Cleans easily with water and soap, and ideal for walls and ceilings
Satin Paint
Reflective and durable, and is ideal for kitchens and bathrooms
Remember, sanding isn’t just for walls, so don’t skip sanding. It smoothes the furniture making it easier to prime and paint. Don’t worry about spending another dollar for primer, because Kilz Max is versatile and can be used on plastic, laminate, brik, metal and wood.
Wallpaper Yeas And Nays
Wallpapers are easy to remove and install, and probably even the quickest way to glam up walls or areas that seem lifeless, but because of its name, it is generally forgotten that wallpapers are as versatile as paint!
Wallpapering Your RV Wall
There are several wallpaper designs you can choose from. You can put a patterned wallpaper inside your bedroom for an added touch, or a 3D printed brick wallpaper in that empty wall space between the upper cabinet and lower cabinet. First, remove the old wallpaper by spraying water and softening it for 15 minutes. Remove using a putty knife and sand away imperfections of the vacated wall.
Best Types Of Wallpapers To Use
Non-Woven Wallpaper: Most user-friendly because of its tear-resistant , washable and breathable properties. It does not trap water vapour, thus making it mold and mildew resistant
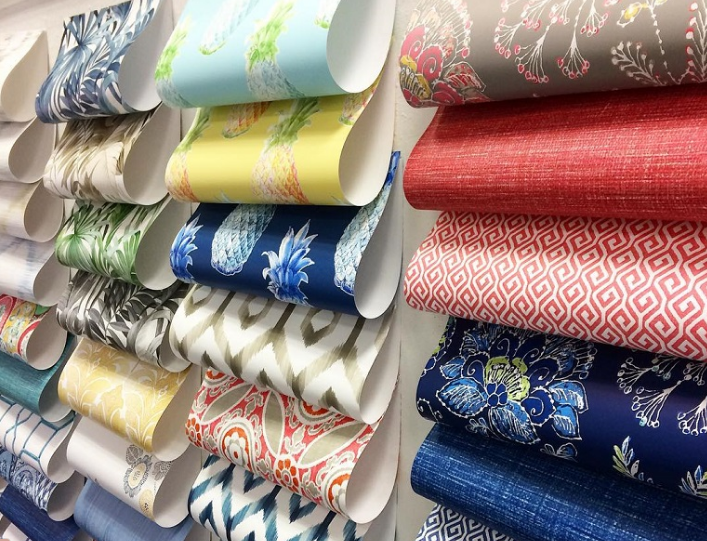
Image Source: wallpaperboulevard.com
Peel and Stick Wallpaper-: Considered to be user-friendly because it does not require soaking or wall pasting. All you have to do is peel the backing and stick it to the wall. There’s a catch though: It can’t effectively stick on non-smooth surfaces
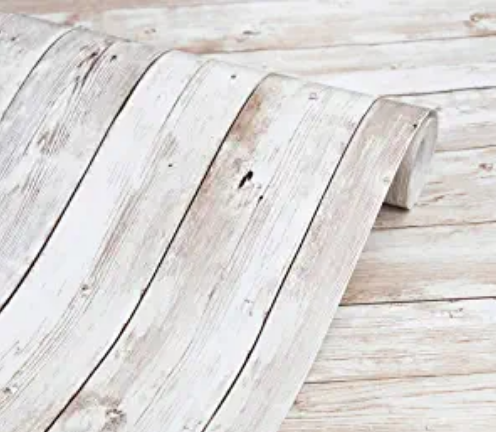
Image Source: amazon.com
Pre-Pasted Wallpaper: Classified as user-friendly because it is installed like an oversized stamp
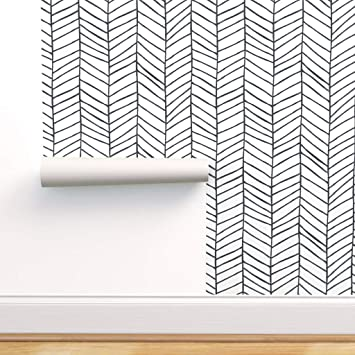
Image Source: amazon.com
Vinyl Coated Wallpaper-: Best known for its scrubbable, strippable ,durable and better resistance to grease and moisture properties, making it ideal for bathrooms and kitchens. You can also clean stains using soap and water, but do not forget to dry it after.
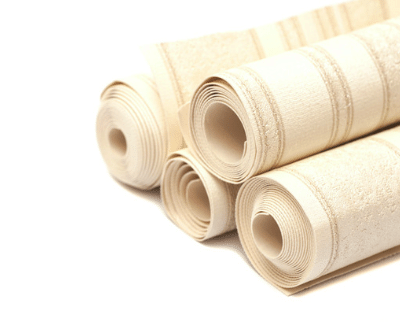
Image Source: nomadicallyyours
Expand your Wallpaper Creativity
I’ve never thought of using wallpapers on kitchen cabinets and closets, but surprisingly it actually works and really gives an aesthetic look to the RV. It’s the quickest way of putting designs that match your RVs interior. You can start off by covering the trims and edges of cabinets, drawers, and closets with wallpaper. In fact, if you’re going for a rustic theme, you wouldn’t have to worry about coming up with the perfect stained wood paint effect on your furniture, because you can just go buy stained wood wallpaper designs.
Maximize Your RV Living Space Hacks
After researching for weeks, I realized that most successful RV renovations didn’t involve tearing their RV to the bone. If the RV you bought has its toilet and shower together making you feel suffocated, do not think of moving the shower on the other side. Instead, think of a way to upgrade its looks and space, such as painting it white and other light colors, or creating your own racks to carry your shampoo bottles and soap.If you have so many things to put with so little living space, make use of the walls. Someone invented hooks for a reason! That’s just a few of what you can do to maximize your RV living space, and here are some of my ideas to get you started:
Maximize And Secure Your Shelf Space
Living in an RV means worrying about your stuff falling when you hit a bump. Instead of worrying about fixing it late, you can make a barrier with only cardboard and double sided tape. Most renovations involve drilling and wood sawing, but this isn’t, so don’t worry about wood shavings to clean after.
First, shape your cardboard into a right angle. Put one side on the left, and the other on the right. Attach the two right angles using a tape, and cover with a wallpaper for an aesthetic look. Using a double sided tape, secure the cardboard inside and repeat this on every shelf. Now you can use every space on your shelf and you wouldn’t have to push it at the farthest end to avoid it from falling.
Old Locker Converted To A Couch
That vintage old locker might just be a perfect add-on to your RV space. Don’t worry about it being vintage, you can simply paint over it to match your RVs interior design. First, check the locker size and area. Buy 2 thick cushions according to how big you want your couch to be. I suggest buying a cushion that’s 1 size bigger so you can perfectly lay on it. Create two frames: free-standing and one that will be placed on top of the locker that will carry the cushion.
The second frame should be shaped like a half of a table, where the side with no legs is drilled into the locker. Brace the free-standing frame on your RV’s wall. That will act as support to the cushion when you lean on it. Next put the cushion on top of the second frame. Lastly, drill plywood inside the locker and make compartments that you can use as a shoe storage or to hold other things.
Over-the-Door Trash Can
Image Source: nomadicallyyours
Get those extra unused wood and make a hanging trash can out of it. Cut the wood following a trashcan’s standard size of 10×9 inches with an area of 5-6 inches. Drill the J-hook onto both ends of the trashcan and hook on the cabinet. Paint or cover with wallpaper as desired to make it look neat.
Cutting Board/Sink Rack
A tiny sink is a headache, especially for avid cooks, but you can maximize your space by making a cutting board or sink rack. First, measure the length and width of your sink, then add an inch or two to the length of your sink. The result should now be the measurement of your cutting board.
For example, if your sink’s measurements are 10 x 8, it’s final measurement is now 12 x 8. Ideal chopping and cutting wood are maple, walnut , and cherry, but I suggest buying a hard or sugar maple wood as it’s considered to be an excellent cutting surface. Use it to put on the side when you’re cutting vegetables, or on top of the sink as a rack.
Solar Installation
(note to editor: link to internal link on the solar article)
Solar Panels are used to gather solar energy from the sun and send it down the wires of the RVs solar controller. If you’re thinking about installing a solar panel on your RV, first you have to consider what kind of RV owner you are. If you’re focused on camping and traveling, solar panel set-up is found to be cost-effective, but for those who stick to campgrounds, it might not be as useful.
For example, a 100 Watts Solar Panel requires 5 hours of direct sunlight where it can produce 500 watts and can power a 50watt laptop for 10 hours.
There is also another energy source such as Portable RV Generators that can last from 8-20 hours depending on the model. Although most generators are known for its engine revving sound, there are now quiet RV generators such as Generac and Westinghouse.
Solar installation is optional and will depend on your camping needs. To check if you should go for a generator or solar, identify how many appliances you have and how much watts it needs to run. You can do this by checking the labels.
Formula: Volts x Amps = Watts
However, if your goal is only to power lights then it’s best to buy a solar light instead. Solar lights give lighting to your rig even if it’s not hooked up to shore power, and will not drain your RV batteries.
Note from Anne: If the buyer will only use the solar energy to power lights then suggest a solar light rather than solar panels.
RV Exterior Painting: Aluminum And Fiberglass
Before anything else, consider the weather. If it’s humid, you might want to put off your exterior painting at a later date. Humidity will cause the paint not to dry efficiently because of moisture that’s present in the air and would take for the water in the paint to evaporate.
Painting On A Fiberglass RV
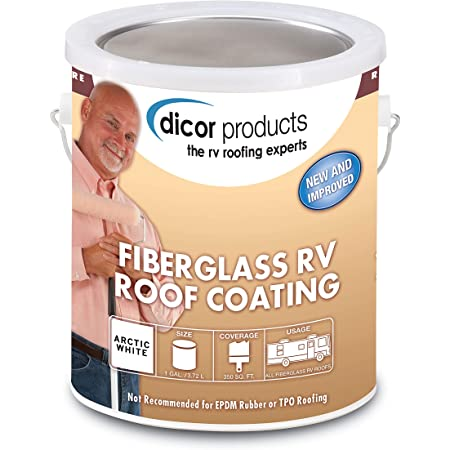
Image Source: amazon.com
Fiberglass is smooth, so you have to prepare your RV’s exterior for it. First clean the outer surface of your RV using detergent/soap water and automotive sponge, or you may also use a Dicor fiberglass cleaner that helps enhance RV roof coating. Next, use a wet fine grit sandpaper (180-220 grit) to roughen the surface. Be careful when sanding because you don’t want to sand it all the way through the gelcoat.
The goal is to dull the gel coat and lose its shine, thus allowing the primer and paint to adhere. Blow the dust and clean the exterior using denatured alcohol to wipe all the remaining grease left. Denatured alcohol is known for its antibacterial properties and is considered to be the excellent choice when cleaning fiberglass because it does not leave any surface residue.
Next, protect the areas you don’t want to paint such as knobs, windshields, mirrors and window panes using masking paper and automotive painter’s tape. Apply an Epoxy Primer using a paint gun, and give it half a day to fully dry. Epoxy primers are important because it gives better adhesion to the paint. Once dry, check uneven areas and scrub it with finer sandpaper to smoothen the surface
and give it a good finish.
Now you may apply your automotive paint using a paint brush or paint gun , and I suggest using paints that contain acrylic, urethane or polyester, such as DuPont, Rust-Oleum and Interlux for better protective coating. Polish the exterior using a soft cloth with RV Wax like Meguiar’s Premium Marine Wax that protects your RV from water, dirt and UV damage. Pour some wax on a towel or a soft foam waxing pad and polish the exterior in a circular motion. Carefully remove the painters tape and you’re done.
Painting On An Aluminum RV
Painting on an aluminum RV has the same steps with how fiberglass RVs are painted, but is strict with the use of aluminum primer and aluminum spray from Rust-Oleum because aluminums have a non-porous surface so the paint cannot sink and stain without it.
Professional Cost And Fees For Restoration
Probably the most quicker way to restore an RV is to bring it to an RV shop and let professionals do their thing. While this may save stress and time, you may end up spending thrice than your allotted budget. I’m not saying you shouldn’t, because if you have the budget for it, then why not, so here’s an overall cost breakdown:
Engine Replacement $2,500-$5,000
Engine replacements generally cost 10%-20% of any vehicle’s price, but when it comes to old RV’s, that percentage may well be the price of the rig itself. It also does not include the labor cost which usually runs from $50-$100/hour.
Exterior RV Painting $8,000-$15,000
Costs of painting involve the size and length of your rig. The bigger your rig is, the higher the painting cost will be. Auto-mobile painting is labor intensive work as this includes painting preparation, priming, painting and waxing. What could also add up to your costs and jack the price up to as much as $30,000 are custom designs such as specific color schemes, shapes and/or pictures.
.
Solar Installation $3,000-$15,000
Solar installation cost will depend on the required electricity your rig needs. Higher wattage means additional solar panels and batteries. For example, a 400-watt system could just cost anywhere between $3,500-$5,000, but 600-watts and above could range from $7,000-$15,000. You don’t have to worry about the labor cost since most companies bundle it into the installation package.
RV Roof Repair/Replacement/Maintenance $6,000-$11,000
Roof repair is labor intensive as this involves removing old coatings, repairing and replacing the roofing membrane, scraping old caulking, among others. The price for this will depend on the size of your rig. For example, a 35 foot travel trailer roof repair may cost anywhere between $5,000-$7,000, but if the roof damage can be best dealt with a roof replacement, then this will be priced per linear foot which is about $300-$400, inclusive of the materials and labor cost.
RV Detailing Including Washing, Waxing Inside And Out $200-$1,300
Includes cleaning, washing and waxing your rig inside out. You can have it a la carte where you can decide which parts you want to be detailed. For example, asking them to conduct an exterior wash that could range from $2-$3/ft, or shampoo interior carpets for $80-$100. However, most RV detailers charge by foot that could range from $9-$35. A small motorhome for total detailing would be priced for $10/foot. This includes interior to exterior cleaning from appliances, to dusting your windows, oxidation removal, shine restoration, among others.
Think First, Then Think Again
Costs will depend on the damages your RV has. It could be a good price for the money at first, but when it is not closely checked, repairs after repairs will arise and this will cause a lot of stress. If I were to name 3 things I should consider before purchasing an RV, it would be:
RV Paperwork
Renovating an RV is already a handful, and I don’t want to get all technical with the papers anymore. Once my RV is restored to its former glory, I would want to be able to tour it around with no worries.
RV Renovation Preparedness
Second, if I am up for the task of renovating it. After watching so many videos, and going over several articles I realized how important it is to really want it, because there will be so much trouble, and I should find it worthy.
RV’s Condition
Lastly, the condition of the RV. Again, this old RV is the blueprint to my life on the road, so I need it in good condition. If it isn’t, then I should be aware of the repairs so I could prepare, not just my pocket, but myself for the challenge.
Thoughts To Ponder
Rebuilding an old RV requires dedication and a whole lot of patience, but I’m sure it would be worth it. Touring around the states without worrying about where to stay and how much each night will cost are one of the few good reasons to pursue this. Like other RV enthusiasts who chose to rebuild their rig’s, I am expecting a lot of situations where I’d feel hopeless, but I just have to remember what my goal is, and keep going. That’s what I think you should do too.
I suggest setting a time and day that you can work on it without compromising your means of living, and asking for your family or friends to help on some days. Once this is done, the effort will all be worth it, and we can all start our life on the road.


