

There is more to the whole van life than great escapes, breathtaking landscapes, and having nature as your daily morning view. Opposite the refreshing ambiance of summer is the biting cold of the winter season – which is something you definitely want to be prepared for! If you have never spent a night in your van while it is freezing outside (and you plan to), then you best be equipped for the occasion.
How to keep warm in the van during winter? Prep your rig for winter through the following ways: insulate your van and wheel wells, cover your windows, install vent fans, bulkhead, and headboard, ready your heaters, layer up, add insulation rugs on your flooring and create a cozy bed setup.
In line with insulating their van for the winter season, many van dwellers also get curious about heaters – which many believe is the number one solution for a chilly van interior. Heaters come in different types and with their own sets of pros and cons. We will discuss heaters further in this article, after getting into the nitty-gritty details of keeping warm in your van during winter.
Preparing Your Van (And Yourself) For Winter Season
Insulate Your Van Interior
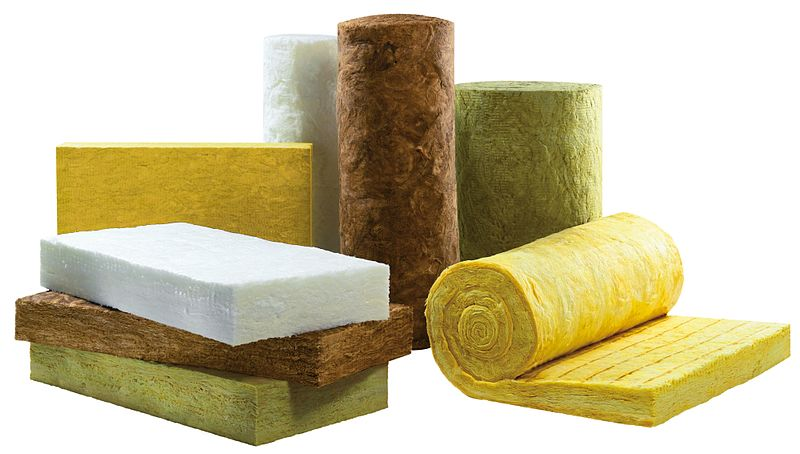
Image Source: FMI Fachverband Mineralwolleindustrie, Creative Commons Attribution-Share Alike 3.0 Germany
Van insulation for winter is ideally done during the van build. Early on in this process, you would want to consider the states you would be traveling to, including the general weather conditions in those areas. Knowing the climates in your desired destinations will help you install the cooling or heating systems your van needs before you gear up and venture out.
There are many materials you can choose from when insulating your van. This includes reflectix, sheep’s wool, rock wool, closed-cell spray foam, polystyrene, denim batts, and fiberglass batts. They come in various sizes, shapes, and costs, and can be applied to all nooks and crannies inside your rig.
In preparation for winter, make sure to insulate everything including the windows, cavities, walls, ceiling, gaps, fill-ins, door panels, and flooring. No matter how much you think you would be able to stand the cold, it is always best to be prepared and not have any regrets later on. Insulating your van would cost around $100 to $300, depending on the material of your choice.
Make sure to also consider your wirings during the planning phase of your van insulation for worry-free power use as you travel.
Cover and Insulate Your Windows
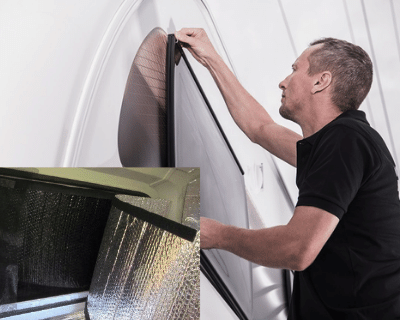
Cold temperatures will have a considerable impact on your windows, so you want to make sure they are all tightly shut, and not just covered but properly insulated. Taking time to insulate your windows will help reduce a significant amount of condensation inside your camper especially once the temperature hits a freezing point.
Many van dwellers swear by reflectix insulation for their windows. The main purpose of this is to act as a radiant barrier. This also reflects the heat in any interior space, which is particularly helpful in enclosed areas (like your rig) during the winter season. Reflectix insulation can be conveniently bought in home depots and hardware stores if you want to buy them in rolls.
You could also ‘DIY’ magnetic reflectix covers to make them fit the exact size of your windows. Overall, this should take less than an hour to finish.
Friendly Reminder:
Make sure that the reflective side of the material is facing your van interiors. Many van dwellers make the mistake of attaching them the other way around, which completely contradicts the purpose of the material. Feel free to cut out the reflectix to get your desired shape. At a reduced size, reflectix insulation is best for window coverings and large cavities inside your van.
Install Ventilation
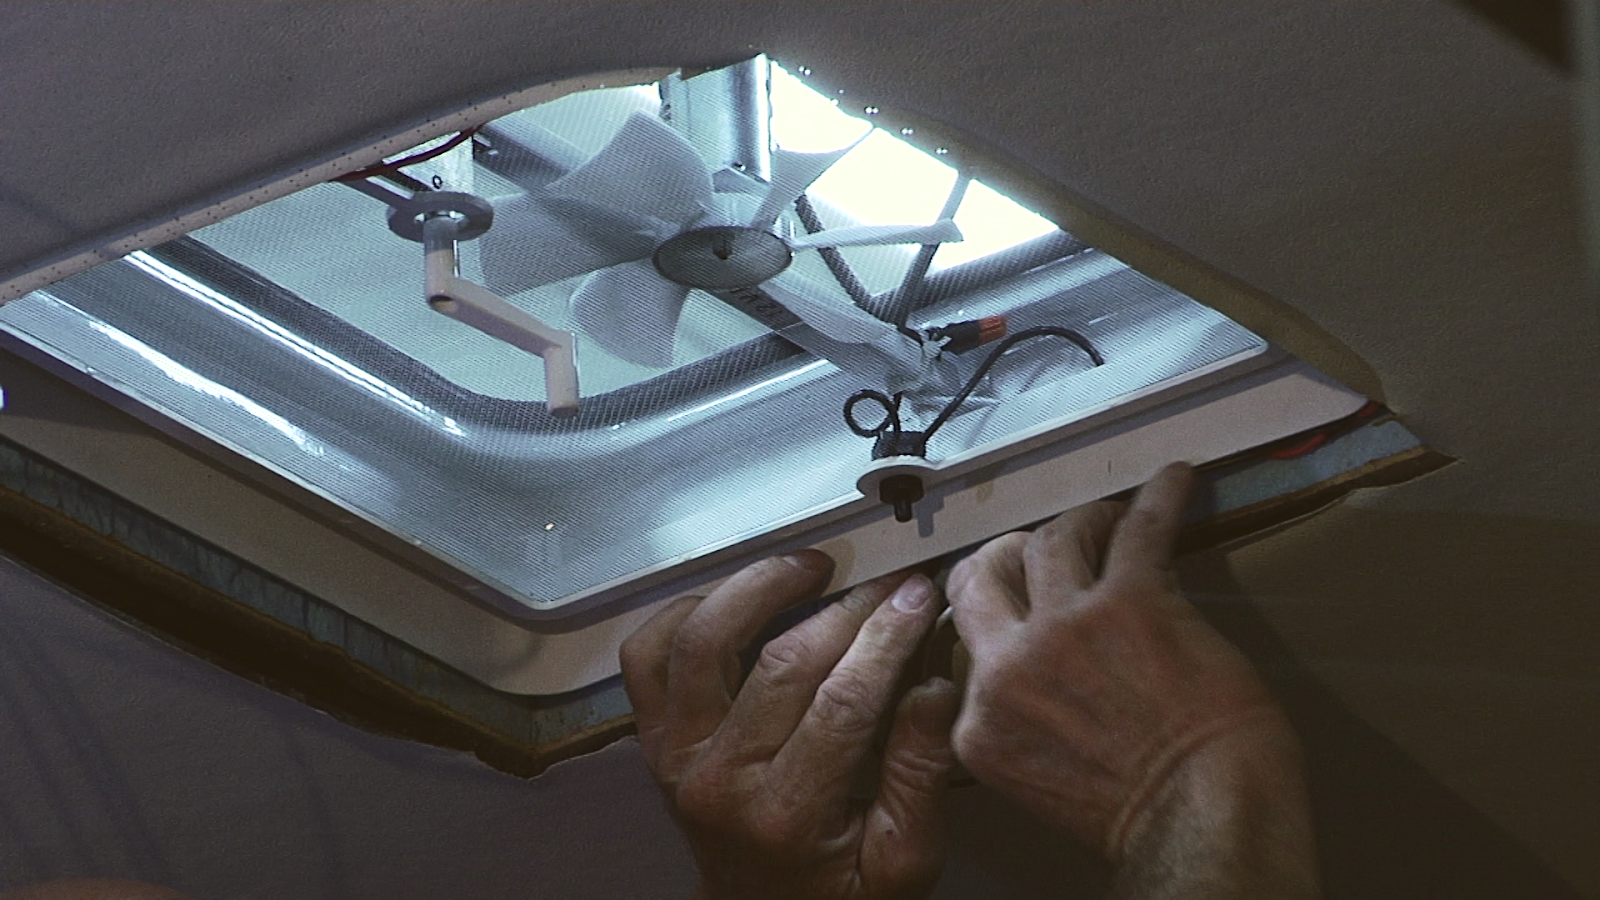
Image Source:rvrepairclub.com
Whether it is cold or scorching hot inside your rig, you want to be equipped with a good ventilation system at all times. This wicks out moisture and helps with temperature control, no matter the season. Since opening your window is not the best choice during winter, you could opt for a roof vent attached to your van exterior.
If you have a knack for general repairs, then you could use your skills to your advantage and attach the vents yourself. To do this, make a hole on your van roof (remember to smoothen and rust-proof the edges!), install the vent, and waterproof all gaps that remain. You only need to fix the wirings if you prefer to install motorized ventilation. The only downside about this is it can be a hassle to use your vent fan when it is raining – if you could use the vent at all.
Ready Your Heaters
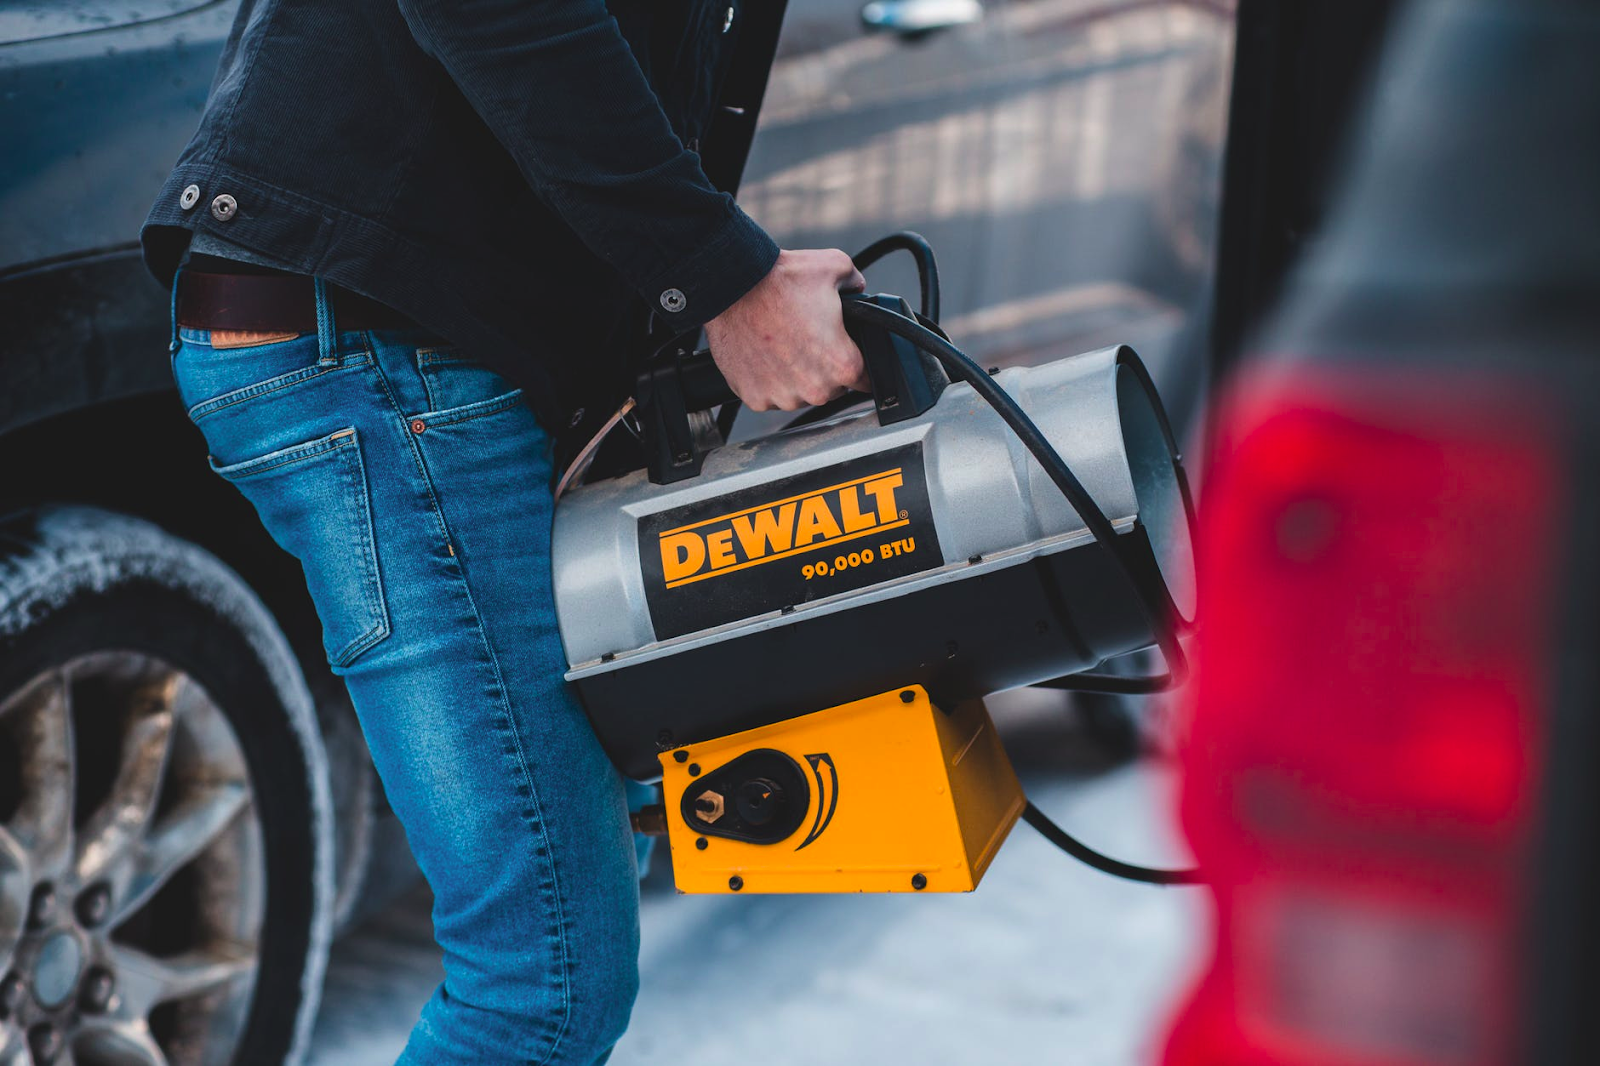
Camping heaters are typically portable and easy to use. They come in different builds, sizes, capacities, and chemical requirements. Among all of them, propane heater is the famous choice among many van dwellers because of its straightforward function and compact size. They prefer this over a propane furnace, which requires effort to install but is considered a great investment nonetheless.
Propane heaters cost between $30 and $600, depending on the unit of your choice. Keep in mind not to run your heater 24/7 inside your van, as this can cause carbon monoxide buildup which is extremely dangerous for pets and humans alike. Make sure that you also install a CO detector inside your rig and constantly monitor your propane level with an LP monitor kit – available online and in physical stores.
Overall, many varying types of heaters are suitable for vans and camping purposes in general. We will discuss more heater types in the latter part of this article, so hang in there!
Consider Installing a Bulkhead
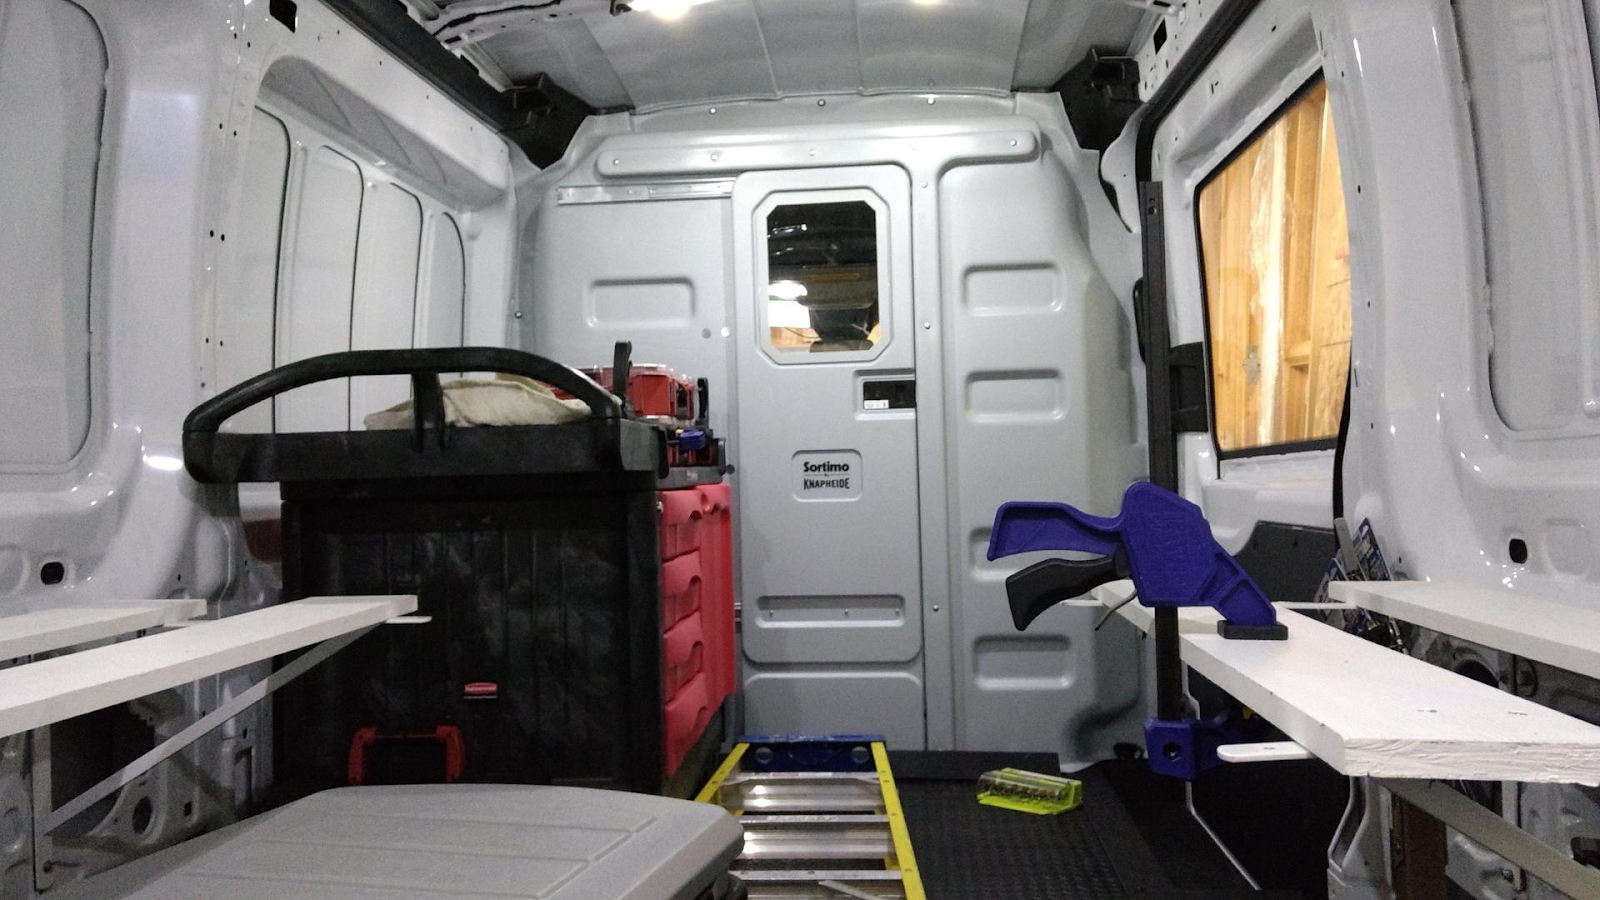
Image Source: fordtransitusaforum.com
The bulkhead is that sweet partition behind the driver and the passenger seat. Vans do not come with this, so you will have to build one on your own. This creates separate rooms for your driving and dwelling spaces, and, as an effect, provides more temperature control and increases your privacy from within. This means no additional chill inside your cargo area every time you open the driver’s door and the other way around.
The only minor inconvenience here is having to walk to the back of your van every time you park and settle in the area. If you do not mind this, then there is no reason for you not to consider installing a bulkhead inside your camper.
On the other hand, there is also a viable fix for this. If you are extra crafty, you can design your bulkhead with a sliding door. Before anything else, clean and clear your working area for smooth workflow and easy installation.
Quick Guide: Building and Installing the Bulkhead
To build your bulkhead, you need to remove the airbag covers first, then build a template using a light cardboard material to fit the entire bulkhead to the unique curves and edges of your van. Then get your plywood and follow the template that you just did. Smoothen out the edges and make them as precise as possible.
You want to make sure that the bulkhead fits snugly against the corners of your van and is completely perpendicular to the floor to avoid as much draft from coming in. The same for the headboard, you want the bulkhead to be completely and securely attached.
Since the headboard does not have a flat surface and only odd contours, you can cut out blocks to mount your bulkhead on. Do the same on the sides of the van and remember to mind the wirings while building your blocks. For the sliding door, install roller guides for the convenient opening and closing of your bulkhead door.
You can purchase commercial-grade sliding door hardware online. They come in various sizes, so be sure to measure your van interiors first before doing any purchases.
Wear Your Best Winter Clothes
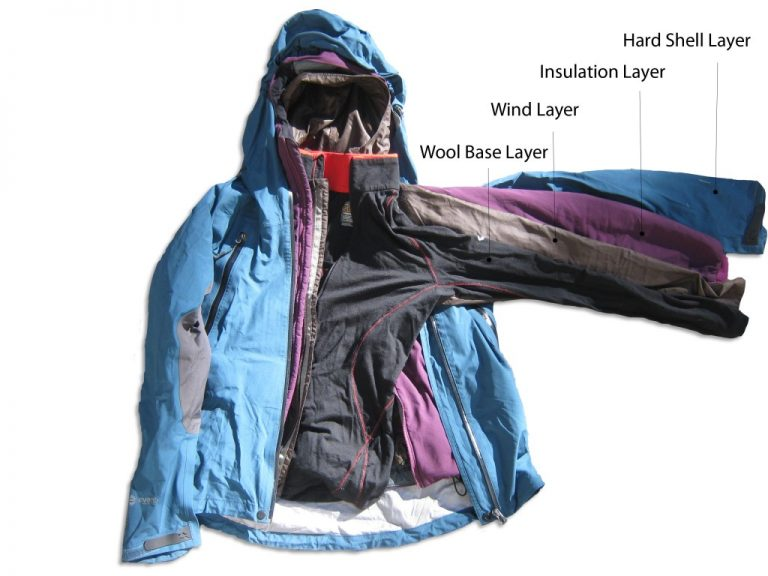
Image Source: zenmountaingear.com
Lounging in the snow and throwing snowballs at each other like what you once did as children are all fun and games. That is until your fingers get numb from the freezing temperature.
Layering up does not necessarily keep your van insulated per se, but it keeps your body temperature controlled. It is a no-brainer solution to keep warm wherever you are. It prevents frostbite and hypothermia in cases of extreme cold conditions. Being bundled up reduces your chances of looking fashionable, but at least you know you are cozy and toasty instead!
Here is a simple layering hack to remember: WWIH. Wool base layer, wind layer, insulation layer, and a hard shell layer.
Winter can affect your facial senses, as well, so be sure to have your beanie, mittens, and earmuffs on whenever you step out. While at it, you can pack insulated slippers as well to have something comfortable to wear inside your rig when wearing shoes is not a must.
Install a Headboard

Image Source: “2013 Millennium H3-45, Triple Slide Prevost, #1943” by MillenniumLuxuryCoaches is licensed under CC BY-NC-SA 2.0
Like the bulkhead we talked about earlier, the headboard is another great DIY project you can install inside your van to control cold temperatures within your rig. While it is not a must, it is a great addition for a temporary winter fix. You can take it down anytime winter has passed and warmer seasons are in.
The headboard is primarily for beds, but for the insulating purpose of your van, you install it against the entire back doors. This prevents drafts from coming in, especially when you position your head by the back doors when you sleep. Once you have measured, cut, built, and installed the headboard, seal it with expanding foam to avoid drafts from coming in all nooks and crannies.
Insulate (and Box) the Wheel Wells
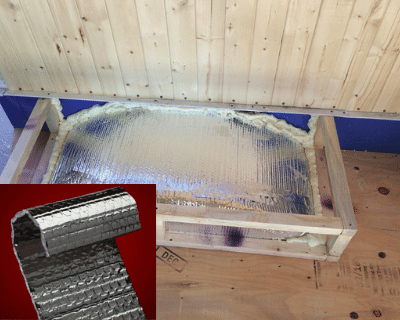
Image Source: nomadicallyyours
For a cheap and quick hack, reflectix is a good choice. You can go as much as do two layers to completely block off the cold and trap all the heat you can get inside your van. On the downside, this does not look like the most appealing fix, so you can do it a different way around and box in your wheel arches.
Quick Guide: Building Your Wheel Wells
First, measure the arches to determine the best fit for the box, then use a ¾” plywood to shape your box then layer with your reflectix insulation. Use wood glue on the sides to attach your wood pieces, followed by a nail gun for a more secure hold. The standard nail and hammer duo would do the trick, too, if you do not have a nail gun around.
Lastly, use an L-shape bracket to attach your box to your van floor. Be sure to mind everything else that surrounds your boxed wheel wells so you can attach the boxes without compromising the designated order of your items.
Plan and Prepare Your Sleeping Situation
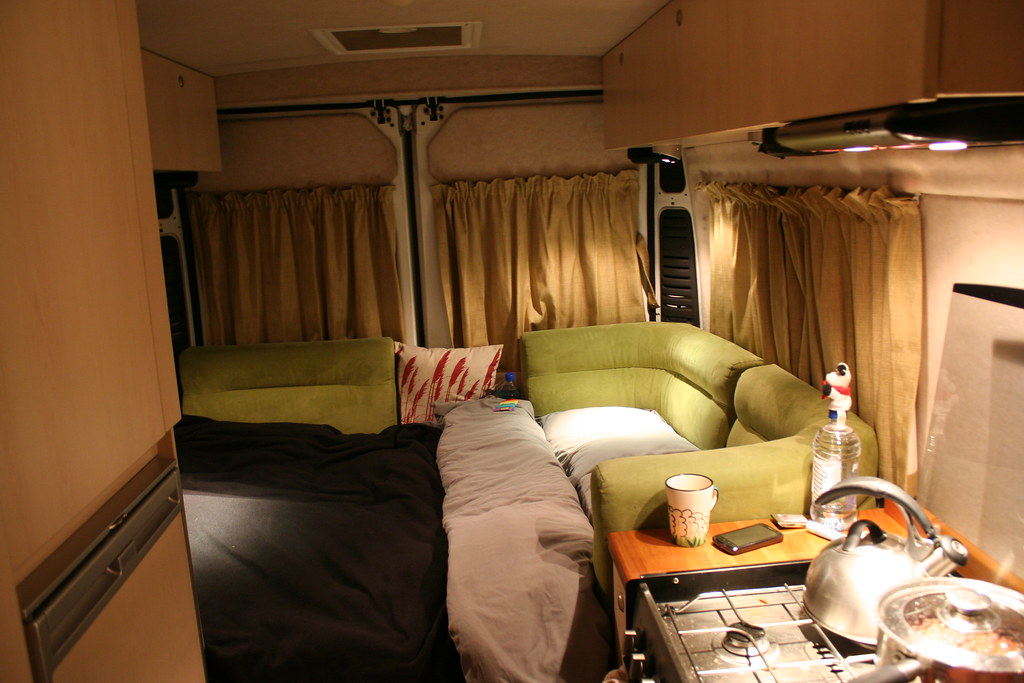
Image Source: “Inside Bertha the campervan” by sezzy_boy is licensed under CC BY-NC-ND 2.0
Wherever you are, optimal rest is a must. This could be a little challenging to attain during the winter season. So to combat, you need to plan out your sleeping situation way ahead. Your mattress’s positioning inside your van affects your sleeping (dis)comfort. On top of this, the kind of mattress and beddings you choose will matter, too.
For the best luxury you can get while on the road, memory foam is the best choice. It is necessary to do layers of winter bedding, plus a winter down comforter to make sure you stay warm, safe, and comfortable at night.
Expect your flooring to get cold as well, so we advise that you raise your bed off of your flooring. Maybe about 12 to 15 inches higher, depending on the height limit of your van. You can use the bottom space as storage for your van essentials. As you do this, your DIY headboard will also help keep the heat inside and ward off the biting cold.
Prepare an Insulation Area Rug
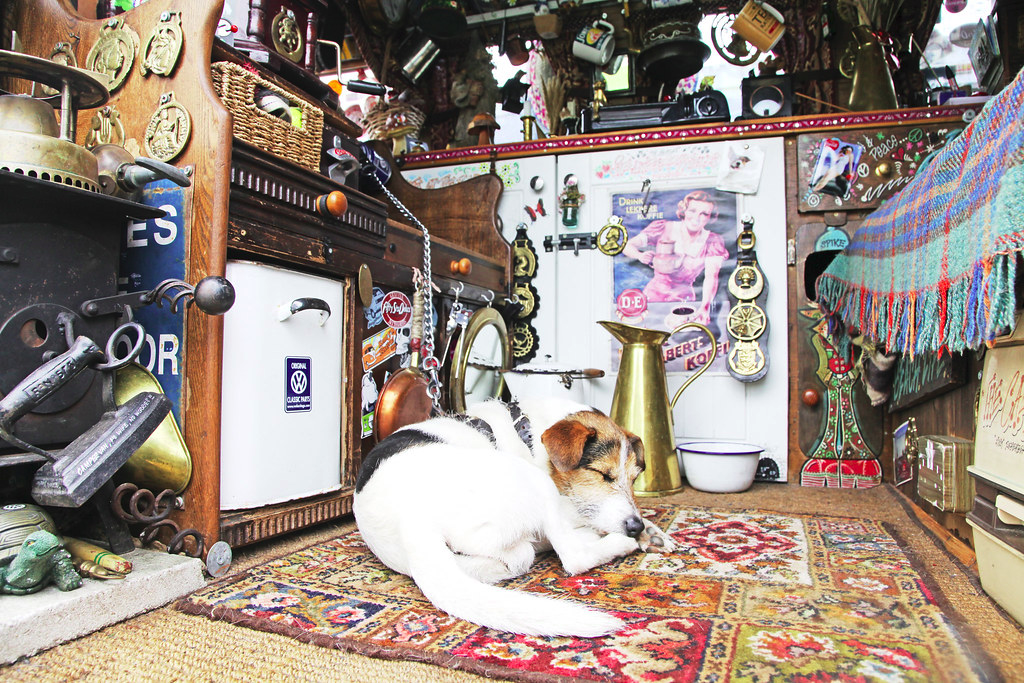
Image Source: “Surf Snowdonia – Dog in Campervan” by Stephanie Riddell is licensed under CC BY 2.0
With all those winter tips followed, one last touch you can do is to add an insulation rug on your flooring. This will give you the comfort and ease of walking inside your rig without getting numb feet and frozen toes. You can just be in your fuzzy socks or insulated slippers. Either way, you can never be too warm in the winter! You can conveniently buy an insulation rug online at an affordable price.
Suitable Camping Heaters For Winter Traveling
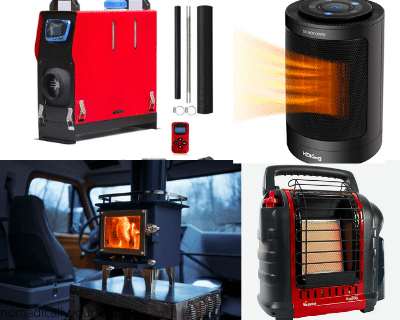
Earlier in this article, we mentioned heaters. There are many kinds of heaters out there, so we dedicated an entire section all about them. In this section, we will discuss each type of heater briefly to give you an idea of viable choices for your van, as well as their respective pros and cons to help you arrive at the best decision.
Diesel Heater
Diesel is easy to acquire and has low running costs when used in a heater. It produces dry heat as well, which helps trap that comfortable warmth inside your rig. The thermostat is there so you can easily control the heat according to your preferred setting. Lastly, they are highly reliable whenever, wherever. When it comes to its cons, diesel heaters can be noisy and expensive.
You could be shelling out anywhere from $220 to $620 for a single unit. They can be a little meticulous, too, and require regular servicing, which is not easily feasible when you are situated in the middle of the mountains. You would also be compelled to consume more power, compared with gas heaters.
Propane Gas Heater
Highly flexible and preferred by many van dwellers, you can use propane gas for cooking, heating – what have you. It is cheaper than diesel and generally useful in different seasons, costing as little as $30 to $120. As much as propane heaters are great at warming up your van, they can pose health hazards when left unattended or if not installed or positioned properly.
For propane furnaces, make sure your exhaust pipes are venting properly and not blocked. Otherwise, this will produce carbon monoxide inside your rig, which is lethal. In any case, make sure you have a CO detector inside your rig, as well as a fire extinguisher in case things go wrong.
Wood Burner
A wood burner is a great choice if you want to recreate that cozy, gram-worthy set-up in your van interiors. The best part of all is being able to enjoy a real fire inside your rig. They have low running costs and are simple to use. Just burn some dry wood and you are good to go! If you are set on trying this out, a wood burner should not cost you more than $200.
Unfortunately, this can produce an excessive amount of carbon monoxide. And because you will need a flue or chimney to pull this off, it is simply impossible to go on stealth mode. Also, consider the setup you need to do every time you want to use your wood burner. You need to stock up on dry wood to keep the firebox grate working and secure a proper ventilation system. Consider these factors before committing to a wood burner in your rig.
Electric Space Heaters
Let us say that you have everything at your disposal, the most convenient way to heat your van is by using electric heaters. They are quiet and lightweight. No installation is required. Fairly affordable as well, costing around $20 to $50. The only thing you need is a power source.
When you are not connected to shore power, then this will quickly deplete your van battery. Suffice to say, it has high power consumption and not an option at all for boondocking purposes. You can put this aside in your van and utilize it once you are situated in a proper RV camp or campground for van dwellers.
Adverse Effects of Cold Temperatures on your Camping Van
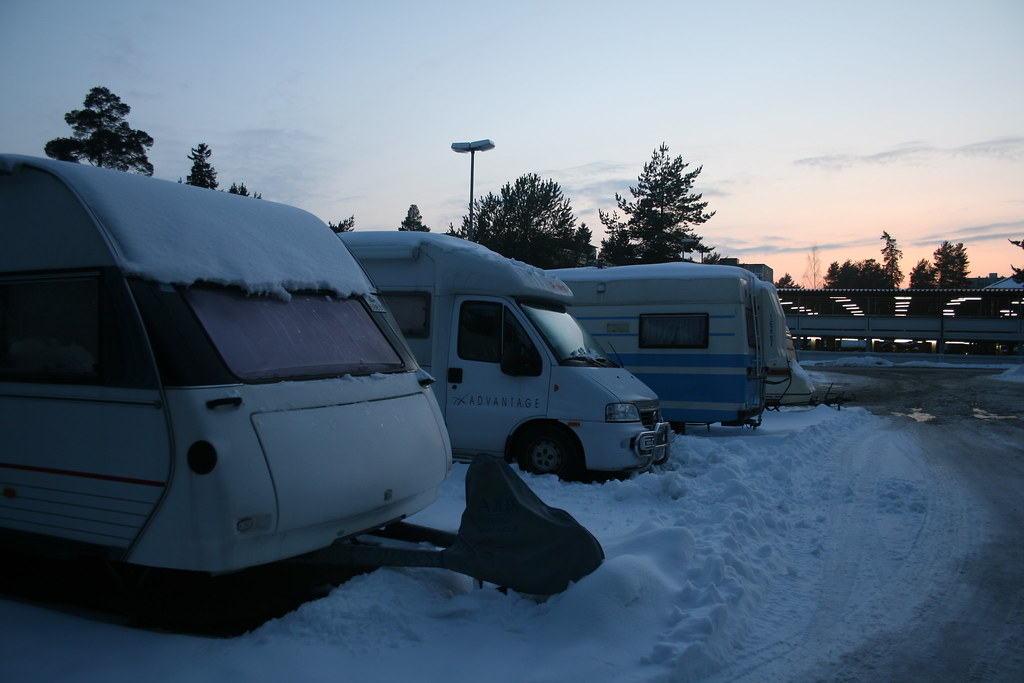
Image Source: “Asuntovaunuja ja -autoja” by wheany is licensed under CC BY 2.0
Before we jump into the details of keeping your van warm, let us discuss the why’s. We know that any extreme temperature can impact your engines, tires, and other car parts. In line with this, it is important to know the right solutions. In this section, we will do a quick breakdown of eight common van problems during winter, and how to address each one.
Faulty Tires
Two common problems when winter hits are that your tires become brittle and deflated. In cold temperatures, the air inside your tired gets cold, contracts, and therefore provides less pressure. This increases traction but makes the van much heavier to drive.
The solution for this is to: Check your tire pressure once a week and do not drive with underinflated tires. This may wear down your tires, or worse, leave major damage that calls for a replacement. For the best solution, switch to winter tires that are more durable and suitable for extremely cold temperatures.
Thickened Oil
Oil thickens in areas with low temperatures. For winter dwellers, it helps to keep in mind that once the temperature hits -20ºC or -4ºF, your engine oil pump starts to struggle and get the oil moving.
The solution: Find a motor oil that is suitable both for (1) your engine and (2) the winter season. Some van dwellers suggest for drivers to simply switch to low viscosity oil when traversing in winter but you might want to take this advice with a grain of salt. Just because it is labeled as low viscosity, does not mean that it is compatible with your engine. Switching to motor oil that your vehicle does not recognize might lead to decreased performance and quick engine wear out.
Stuck Windshield Wipers
If there is anything that is an easy target of the harshness of winter, it is your windshield wipers. Much like your tire hurdles, the rubber on your wipers can easily brittle out and tear or crack. Another concern you might want to keep in mind is the performance of your washer fluid. Not every washer fluid adapts well in cold climates.
What you can do is to replace your windshield wipers with something that is best suited for harsh climates. Try to be diligent about it and replace your wipers every 6 months or when necessary.
Frozen Windshield from Inside
As much as your windshield can suffer from damages externally, cold temperatures can also affect your windshield from the inside. Your windshields do not only become cold to the touch but also become highly dangerous for the driver at an off-chance it cracks and scatters shards of glass all over the rig.
Make sure that your defrosting and general heating functions are working properly before you settle into winter. In case your windshields take a toll on the cold weather and cracks, opt for a windshield replacement. For best results, consult a professional car technician.
Unresponsive/Slow LCD Screen
So you are finally cozy and comfortable inside your camper, feet propped up, ready to call it a night, when your LCD screen randomly decides to stop working. The culprit: low temperatures. LCD stands for liquid crystal display, so those crystals in your screen can be affected by the winter season. This slows down the molecules, which then causes the screen’s laggy state.
Warm-up your van to a tolerable temperature. You could also install an engine block heater once the temperature gets below -15ºC or 5ºF.
Empty Battery
Cold temperatures suck the power out of batteries, including devices, gadgets, and car batteries. Your battery percentage either gets low incredibly quickly or becomes completely dead and unusable.
Use your jumper cables to jumpstart your camper. Replace your old batteries, especially once they hit their 3-year mark. Once you have fresh batteries, make sure the connections are secure, clean, and corrosion-free. For added protection, you could purchase a battery warmer that will only cost you $30 to $70 cheap.
Brittle Serpentine Belt
On to the mechanical makings of your van, your serpentine belt also suffers when exposed to extremely low temperatures. It becomes rigid and difficult to bend. These conditions mostly apply to older belts.
Replace your serpentine belts. This one is quite easy and cheap to do. Nowadays, you can simply rotate the tensioner to replace your old belts with new ones. This would hardly make a dent in your wallet with its minimal cost of $25 to $80.
Ineffective Antifreeze
The antifreeze, also known as the engine coolant, can be unreliable during winter. This may either be too old or contains an improper ratio between the coolant and the water.
Avoid adding 100% antifreeze to your engine. With the absence of water, your antifreeze would result in a high freezing point, which you do not want in your van. You can also purchase a refractometer, which is a device used to monitor the coolant’s freezing point. For preventive measures, empty and refill your coolant every two years.
Conclusion
Living in the van is fun and empowering but can prove to be challenging once the wintertide hits. Fortunately, there are many brilliant solutions you can apply to your van to live comfortably and warmly during this period. It takes time and money, along with proper resources, to prepare your rig for winter dwelling. But rest assured that all efforts will be worth it once you experience the joys of wintry days while staying cozy and safe in the comforts of your four-wheeled home.


