

When it comes to your RV’s roof, the saying “out of sight, out of mind” fits perfectly. Just like a regular home, the roof is one of the most overlooked areas. Now, if you don’t keep your RV roof clean and inspect it once in a while, you can end up with expensive repair or water damages. If you want to get the best out of your RV’s roofing, there are a couple of things that you can do.
How often should you treat your RV roof? Treating your RV roof should be once every three months, no matter what type of roofing you may have. If proper maintenance is not done, wear and tear on your RV roof can turn into major issues such as water damage, mold, and other problems.
The best thing about owning an RV is having a roof over your head while exploring the different places. With COVID-19, RV is the best way to socially distance yourself from others and avoid the virus altogether. In this article, I will talk about the different ways on how to maintain your RV roofing. I will also talk about the different cleaning materials you should keep in your RV and how you can prevent damages to your roofing. Lastly, I will also discuss the different ways on how you can fix the said damages on your rig’s roof.
Keeping Your RV Roof in Tip-Top Shape
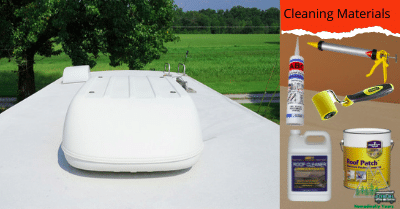
One of the most important parts of living on the road is to make sure your rig is at its tip-top shape. Keeping your roof clean in the best shape possible is crucial. Before hitting the road, you need to make sure that you are stocked up with cleaning materials such as sealant and primer, caulking gun, seam roller, roof patches, and roof cleaner.
As mentioned above, RV roofs should be cleaned several times a year or once every three months. Most RV roofs are made with rubber, so making sure that they are always clean is essential. Maintaining your RV roofing will affect its appearance and longevity.
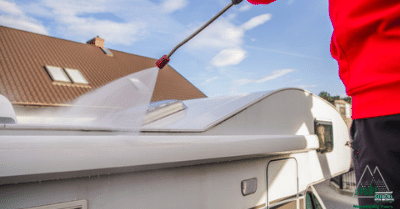
Now, don’t use cleaners that are made from petroleum solvents, abrasives, or citrus ingredients because they can weaken the strength and bonds of your roof’s materials. When brushing your roof, make sure to use a medium bristle brush. These types of brush can remove grime, sap, and mildew that is present on your RV’s roof. When scrubbing, ensure to do it in a circular pattern, three by three areas at a time.
Once you are done, make sure to rinse the RV thoroughly because most of the things that come from your roof will roll down to the sides. If you fail to rinse the sides of your RV, it can result in streaking and discoloration. Also, before doing anything on your roof, rinse it first since it can be slippery.
Inspecting Your RV’s Roof
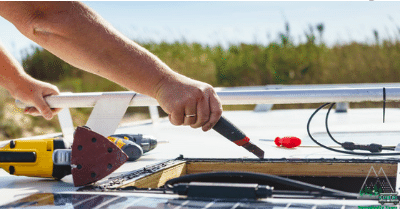
Inspecting your RV’s roofing once in a while is another way to make sure your roof is in its best shape. Inspect all of the seams and sealants because the smallest opening can cause significant damages to your roof. Once you see any rips, tears, or holes, make sure to repair them right away.
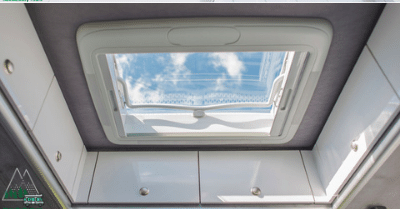
If you have skylights, AC units, vents, ladder, and roof rack, you need to take special care of them. The areas that I’ve mentioned above are prone to accumulating dirt, mold, and cracks. When you are doing anything on your roof, make sure to use extreme caution. Always be careful of slick surfaces and watch where you step. You don’t want to find yourself falling on top of your rig!
RV Roofing Maintenance

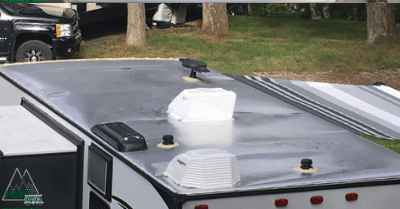
RV roofing maintenance is needed to make sure that your roof is in the best condition. Simple things such as drops of leaves or sap should be removed, especially if you park under trees often. To avoid the leaves or sap, choose a parking spot that is not underneath any trees.
If you are traveling in areas that are warm and moist, mold has a higher chance of forming, which can be dangerous to your health as well as your RV. In this case, cleaning the roof at least once every three months is a must.
Ensure to periodically climb up the roof, inspect it, and be sure to look for tears, rips, cracks, and caulking separations. Always be a step ahead of preventing damaging leaks and expensive repairs. Now, if you are not able to walk on the roof, it is a sign that you need to do cleaning, inspection, and repairs from a ladder rather than stepping on the roof.
Now, cleaning is only a part of the maintenance process so that you can prolong the life of your RV’s roof. The following will talk about the best materials that you can get to make sure you are using the best for your roof.
Best Roofing Sealant: Dicor
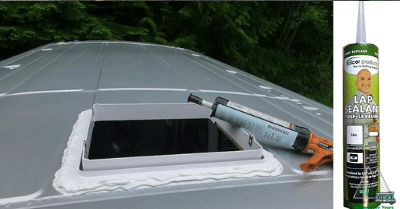
The best roofing sealant that you can use is Dicor. When it comes to an affordable repair option for your RV roofing, Dicor is the best choice for you. It is a self-leveling sealant that adheres to different types of roofing, such as rubber, fiberglass, and aluminum. It can also be used in other materials such as mortar, wood, vinyl, and concrete.
Decor can also prevent water from entering your rig and ensures that the equipment on your roof is properly secured. It is a great material for caulking around roof vents, skylights, and any other areas of your roof. Dicor costs $16.54 per tube.
Best Roof Coating: Heng’s Rubber Roof Coating
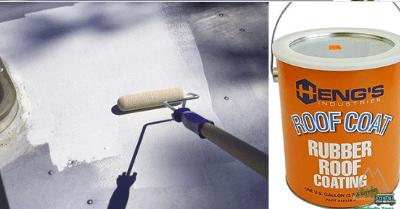
Aside from roofing sealant, you would also need roof coating, especially when you have a rubber roof. As time passes, the protective layers on your RV’s rubber roof eventually become chalky and wear off, which is totally normal. When going over your seams with a sealant at least once a year, it is best to cover your entire roof with a coating.
With a roof coating, it will help further waterproof and weatherproof the entire RV roofing. Now, there are different types of roofs, and coating should be based on each type. Make sure that you know the kind of roof that you have before heading out to the store and buying your roof coating.
The Heng’s Rubber Roof Coating is UV resistant, expands, and contracts with your roof. When applied, your RV roof can resist cracking and withstand any impact. The Heng’s Rubber Roof Coating is non-polluting and non-toxic. It is also available in gallon size at $65.38.
Best Liquid Roofing: Proguard Liquid Roof
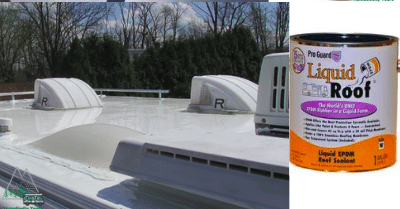
Liquid roofing is another common type of RV roof coating that you should have handy in your RV. It can give your RV a nice and new shine, at the same time protecting it from the weather as well as other elements. This EPDM coating can be applied by painting onto the roof, and when applied, it can prolong your roofing’s life.
Applying liquid roofing provides a protective barrier from the sun’s UV rays, rain, and debris. Aside from that, it can also prevent water damage and mold from forming. The best brand to buy is Proguard Liquid Roof which weighs about 10 pounds and costs $99.
Types of RV Roofing You Should Know
Now, before taking care of your roof, you need to know what type of roofing your RV has. There are different types of RV roofing, which I will be discussing in the following section.
RV Rubber Roofing: TPO and EPDM
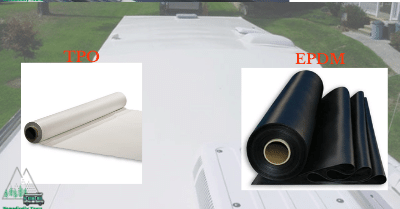
Rubber roofing is one of the most common in RVs. It can be one of two types which are Thermal Polyolefin (TPO) and Ethylene Propylene Diene Monomer (EPDM). The most common option for roofing is TPO because it is cost-efficient and colored white which is excellent for keeping your rig cool.
TPO also has an easy installation process and has resistance to dirt as well as mold. It provides energy efficiency. However, it doesn’t last as long as the other roofing options and doesn’t tolerate being left in the sun for too long. Most RVers with this type of roof find themselves replacing or repairing them more often.
EPDM, on the other hand, is another rubber option that is affordable and easy to install. It is also known as the rolled rubber roofing. Unlike TPO, it is more durable and can last up to 20 years. It doesn’t scuff or scratch easily, and it is less susceptible to leaks. It can also withstand higher temperatures and direct sunlight.
The only downside to EPDM is it’s only available in darker colors which can absorb heat and raise the temperature inside your RV.
Fiberglass Roofing
Fiberglass roofing is made out of synthetic materials and glass fibers which usually come in sheets or panels. It is durable and resistant to fire, rot, and rust. It is lightweight, so if you are a person who is looking out for the weight of their RV, this is the best roofing material to have.
Now, you have to get your wallet ready when you have to do repairs on this type of roof since it’s too expensive to repair. It also doesn’t handle heat well, and prolonged exposure to the sun can result in thermal splits. In this case, typical DIY work won’t do; you would have to entirely repair or replace your roof.
Aluminum Roofing
Aluminum roofing is rare nowadays because it comes with a lot of drawbacks. The only advantage it has is its longevity. However, it doesn’t mean that it will look great in 20 years. When you are in the installation process, it would need to be fastened instead of glued down. It is also susceptible to seam failure and leaks.
Preventing Damages to Your RV Roofing
Maintenance is the key when it comes to your RV roofing. It is better to prevent damages before they happen. Make sure to keep the elements out and don’t leave your roof out in the sun for long periods of time. As you may know, sun, rain, and hail can be brutal, especially when your rig is exposed to it.
To prevent any water or sun damage, you can store your RV in a facility such as garages or storage spaces. You can also invest in a good cover that’s specifically designed for an RV. With a properly fitting cover, it will provide as much protection as possible. Now, it may be a great idea but remember mildew can still grow under the cover since it prevents light from getting into the RV.
Also, an additional concern with the roof cover, it will prevent airflow from circulating. For the following reason, it is best not to keep the RV roof cover for long periods of time. You can keep it during the storage season, and when kept longer, you might find mildew growing on your RV’s roof.
When it comes to your roof cover, make sure not to use tarps because it can reduce airflow, which can result in moisture, mold, and mildew build-up. There’s no air, movement, or breathability when it comes to using tarps as your covers. Now, you can use tarps as a short-term solution but never for long-term use.
A full RV cover is another option that you can consider rather than just an RV roof. It protects not only the roof but also the rest of the rig as well. There are high-quality RV covers in the market with great features such as UV-resistant and waterproof. Owning a full RV cover will help extend the finish of the entire RV and can save the paint job as well as the exterior coat of your rig.
The Best RV Cover: Classic Accessories OverDrive PolyPRO3 Travel Trailer Cover

The Classic Accessories OverDrive PolyPRO3 Travel Trailer Cover is the best full coverage that you can get in the market. It has a universal fit which is perfect for any RV type that you may have. It fits travel trailers and toy haulers that measure 38’ to 40’ along with a height of 124”, from ground to roof.
It has a thick triple-ply top that defends your RV from rain, snow, dirt, and scratches. This travel trailer cover is excellent for all-season protection and has adjustable tension panels as well as elasticized hem corners. It has a custom-like fit where air vents reduce wind stress and inside moisture.
The Classic Accessories OverDrive PolyPRO3 Travel Trailer Cover has zippered panels which allow access to the RV doors and engine areas. It has integrated straps and tosses bag system as well as stuff sacks which are included on all covers and ladder caps. When purchasing this full cover, it comes with a three-year warranty at the cost of $314.30.
Know-How to Repair the Rips and Tears in Your Roof
If you notice a rip on your roof during your inspection, make sure to repair it immediately. This way, you can prevent it from getting bigger and any water penetration that can lead to mold. There are plenty of strong patches and tapes that can reseal your RV. It is best to bring your rig to your local RV repair shop for any extensive damages and let the technicians handle your roof.
In the meantime, here are some repairs that you can do yourself in order to ensure your roof is in its best shape.
Minor Repairs on Your RV Roofing
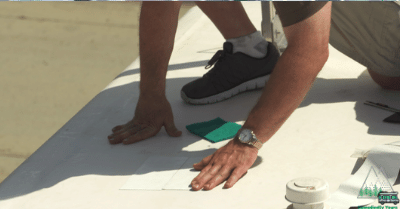
With minor repairs, it is best to purchase a patch kit for your roof. Make sure the kit that you are buying is a perfect match with your roof. There are different kits available for aluminum, steel, rubber, plastic, fiberglass, and wood. When fixing a small area on your roof, you have to clean the area of the roof that’s damaged initially.
When placing a patch on a particular punctured area, you need to make sure it is placed firmly. In order to place the patch flat, you can use a roller to remove any bubbles.
Large Repairs on Your RV Roofing
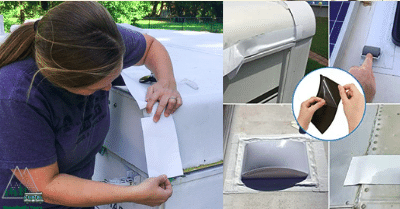
When it comes to large repairs on your RV roofing, you would need to buy a roof repair tape. The Eternabond or Dicor Roof Repair Tape is the best brand that you can use to patch up large damages on your roof.
First, clean the area and measure the puncture on your roof. Cut a piece that is two inches larger than what you have measured. This would make sure this applies on either side of the area that is damaged.
Once that’s done, apply the tape and use a roller to smooth out the patch. Ensure to not pull on the tape because it can cause further damage to the current puncture on your roof. Lastly, seal the corners of the tape with the sealant that I’ve mentioned above.
Conclusion
Cleaning, inspecting, and sealing will not only make your roof look good but will also help it last for years. With the proper maintenance and materials, you can prevent costly repairs and replacement, which can lead to water damage. When you have water damage, it will result in mold, which will be dangerous to your health and your RV. Owning an RV is no walk in the park; making sure that it’s in the best shape possible will keep you safe on the road.


