

Cabinets are a good storage idea for every home, including those in vans. Vans have limited spaces and it is very important that you maximize every conceivable space possible so that you can have a place to store everything you need in your travels. However, it can be a daunting task since it involves installing it inside a vehicle, which is clearly not the same as installing a cabinet in your kitchen at home.
Measure the dimensions very carefully, then make the frame for your cabinets using plywood. You have to attach the cabinet frames to the walls of your camper van, then install the hinges, doors, knobs, and then brackets for heavy materials. Doing this will make sure that you install the cabinets properly in your van.
Consider this article as your one-stop reference for installing cabinets in your vans. In this article, I will discuss the different factors that you need to consider in installing cabinets for your vans. I will also talk about the different materials used in making van cabinets, a step-by-step instruction guide on installing cabinets inside your van, as well as pros and cons of installing the cabinets by yourself, along with some cool DIY ideas, versus hiring someone to install the cabinets for you. Lastly, I will include some tips and tricks on how to make your RV cabinets last longer.
Installing Cabinets: Factors that You Need to Consider
There are several factors you need to consider in installing cabinets inside your vans. You must put these into consideration as these can help you in choosing which cabinets to install and which ones to avoid.
Materials for Your Cabinets: Make Sure You Choose the Best
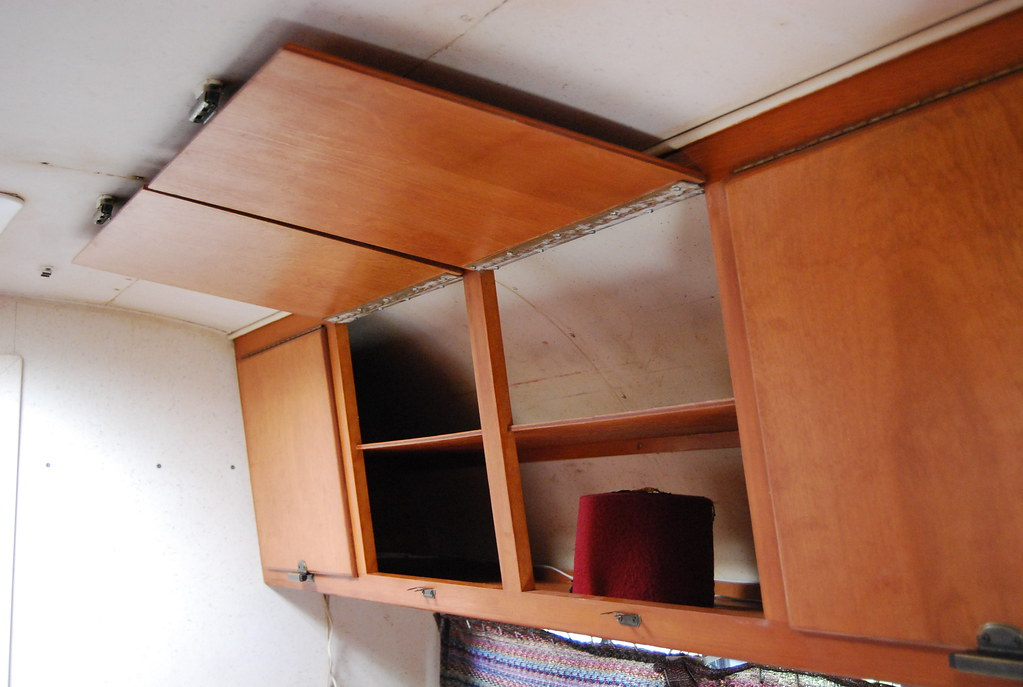
Image Source: “Avion Cabinets” by NCReedplayer is licensed under CC BY-NC-SA 2.0
There are so many types of van cabinets available on the market made from different materials available.
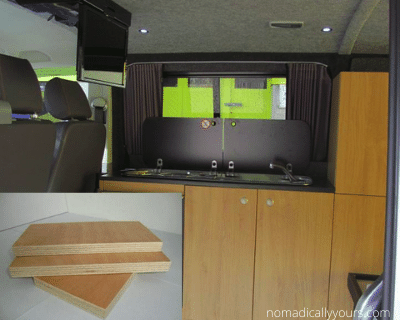
Most cabinets are made of wood, with plywood being the obvious choice of material when building wooden cabinets for your vans. You can use more expensive woods such as cedar or pine but it is not really the preferred choice of material especially if you are more on the budget-conscious side.
You must choose a material that will not make the RV heavier, since it will affect the performance of your van especially when it is on the road. Vans tend to get slower when they are loaded with heavy materials inside, as it is with any other vehicle. Choose a material that is lightweight yet sturdy and durable, and can handle the long hours on the road for a long time.
Weight And Dimensions Of Your Cabinets: The Number One Thing to Consider
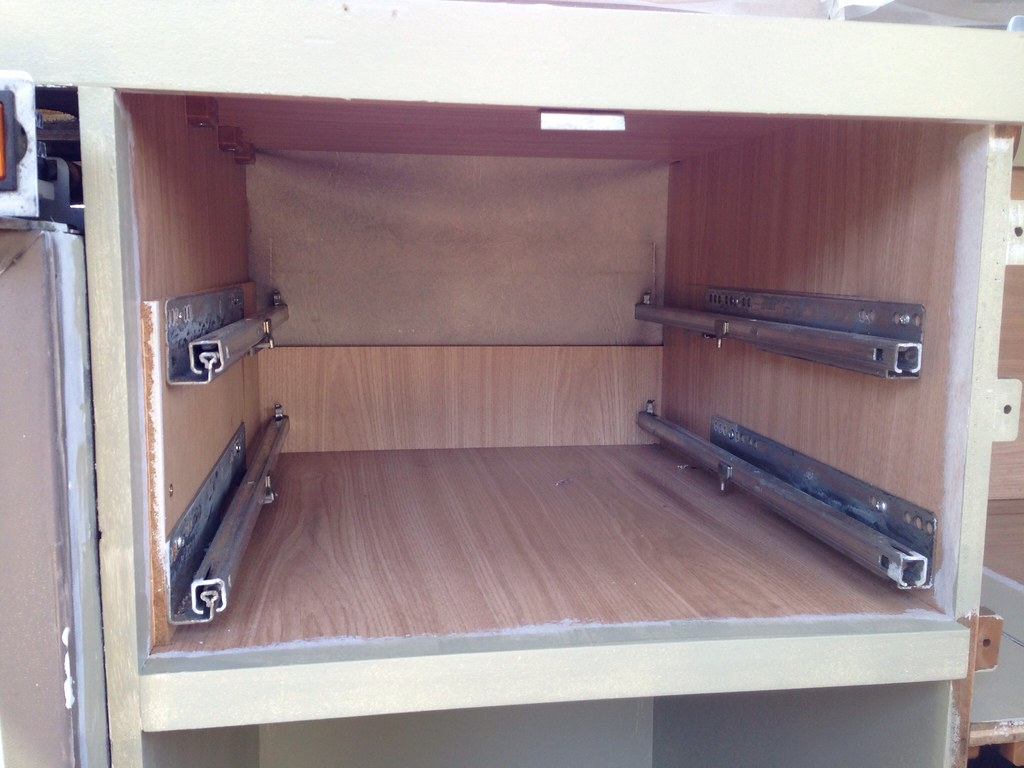
Image Source: “T4 restore interior campervan fittings” by Jim the Chin is licensed under CC BY-NC-SA 2.0
Before buying a premade cabinet or materials in creating your own cabinets, consider the overall weight it might contribute to your RV. Remember that you also have other items and appliances inside your RV so make sure it will not pull your van down in terms of weight.
Always remember to measure everything correctly so that you will not waste money buying cabinets or materials with wrong measurements. It is our goal to create more storage space in our vans without hampering its speed or overall efficiency, so keep that in mind.
The Overall Cost Of Installation, Materials: Crucial for Installing Your Cabinets
Paying for installation is one thing, but if you include the cabinets themselves, you might see yourself spending more money than you ever imagined. Again, you are not required to buy expensive materials or cabinets for your RV.
There are some cabinets out there that are totally affordable yet very sturdy, durable, and can last constant motion while inside your van. If you are more budget-conscious, try to consider other cheaper yet more durable options available on the market. At the end of the day, we must never sacrifice our safety and the stability of the cabinets just because we chose to cut corners.
Different Materials For Van Cabinets
There are different materials that you can use for the cabinets in your van. From wood to aluminum to plenty more materials, your choices are endless. Here are some of the materials for van cabinets that campers have been using for years.
Wood: The Prime Choice For Van Cabinets
As mentioned before, wood is the primary pick for van cabinets. A lot of people have been using wooden cabinets for their campers for the longest time.
Plywood is the most popular choice, but there are also other choices of woods such as oak, cedar, birch, pine, and many others. Plywood is the best choice especially if you are on the more budget-conscious side of the spectrum, as it is much cheaper yet surprisingly strong and durable.
If you have more budget, you can use other kinds of woods available, depending on your preferences. Wood is very easy to use, aside from being a stable and affordable choice. Installing the wood also requires a small number of tools. If you prefer something lighter, you can choose softwood for your camper cabinets.
You can still use other heavier types of wood but you must consider the added weight it might add to your vehicle. Heavier types are also more expensive and some are even prone to warping, unlike plywood.
Moisture resistance is a key point to consider before placing the cabinet in a humid environment. Wooden cabinets are very popular today among campers and home improvement enthusiasts.
It is much better if you use original plywood instead of using any other low-quality boards as cheaper alternatives, such as particleboard, medium-density fiberboard or MDF, and oriented strand board (OSB). If you use any of these alternatives for plywood, you will experience issues such as water absorption, as well as releasing gas from the glue.
Aluminum: The More Lightweight Choice For Van Cabinets
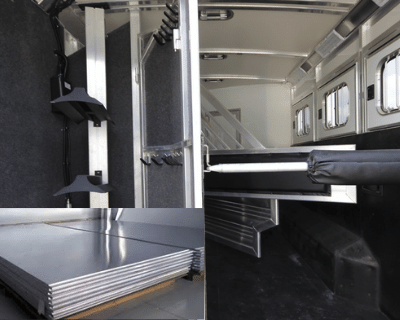
Aluminum is also a great option for your van cabinets, as it has a lot of pros under its belt.
Aluminum is a lightweight and durable material for van cabinets, as it is heat resistant, moisture, and humidity-resistant, and is also great when setting up RV overhead cabinets. Aluminum also does not harbor germs and viruses and is easy to clean and disinfect, which is very important especially these days, with the coronavirus pandemic still happening.
On the flip side, aluminum is an expensive choice compared to wood and other materials.
Personal Recommendations: Choose A More Durable Material
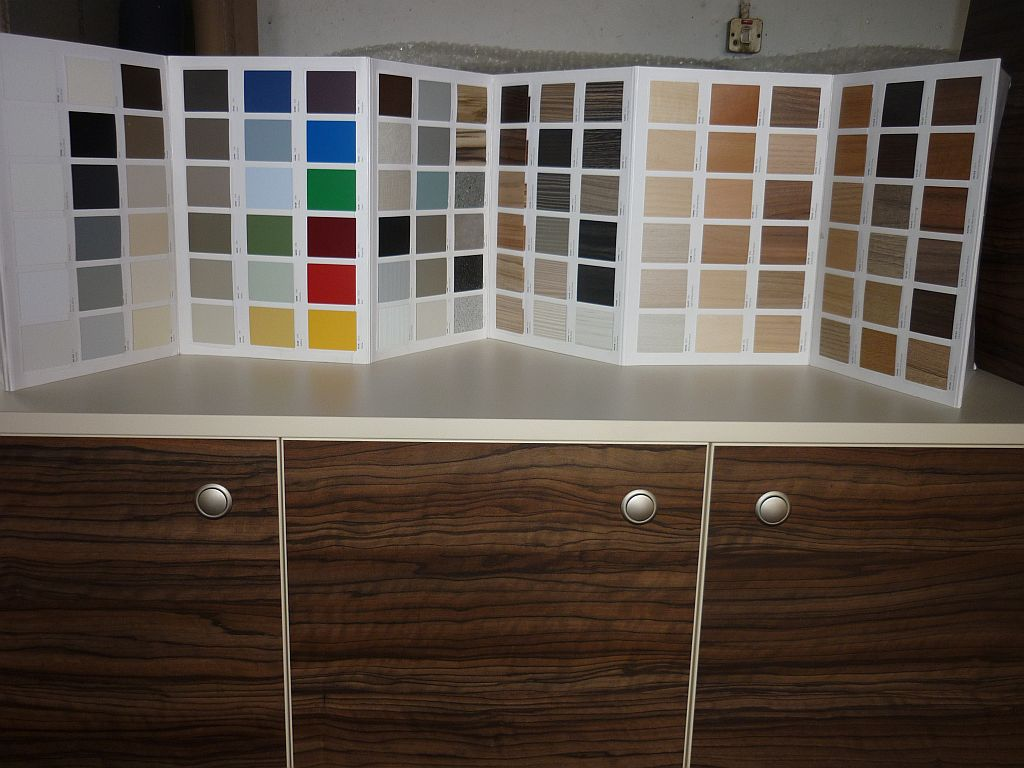
Image Source: “Camper Van Units” by Vanguard Campervan Conversions is licensed under CC BY 2.0
Personally, I have used both materials for my camper cabinets, so I know how these materials pan out for longer periods of time.
I prefer using wood over aluminum since I am also budget-conscious, and it does not require me to shell out a lot of money. I bought aluminum cabinets and they are a bit of a hassle to install, so I had to call a professional to install them in my van, For those who are into doing things by themselves, using wood is a great choice since it is durable and easy to install.
Do note that many people are also on #teamwoodencabinets for years now.
Step-by-Step Instructions On How To Install Cabinets In A Van
If you are installing the cabinets yourself, it is best to know what to do. So, here is a step-by-step instruction on installing the best cabinets for your van. All you need to do is follow the steps below so that you will have the cabinets you need for the best space saver and organization.
Tools And Materials Needed For This Project
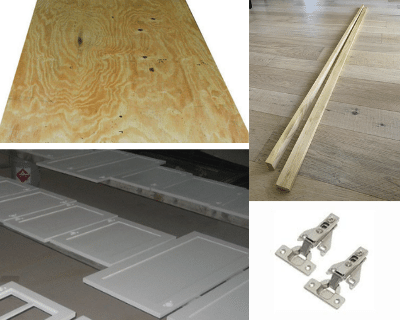
For this project, you will be needing the following: a building square, a level, ⅝” plywood, two 1×2” boards, doors, a cabinet face, and some hinges.
Step 1: Make Proper Measurements First
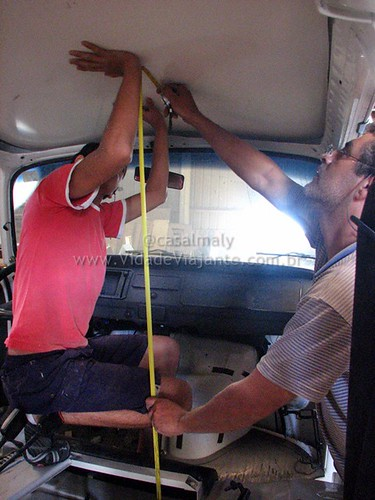
Image Source: “Nascimento da KombiHome Alice – IMG_6843” by CasalMALY is licensed under CC BY 2.0
You must measure and plan everything in the right way to build the cabinets for your RV. You must first make plans for the storage requirements of the camper cabinets before you commence with the construction.
It is also very crucial to maintain the correct weight of the cabinet so that it can be efficient for the vehicle when you travel. Measure the external dimensions of the cabinets to be made. The size depends on how much space is available in the van and your requirements.
You also need to identify which cabinets are needed in a single unit. For a single unit, you can select two or three cabinet sections. For oversized cabinets, you will encounter difficulties during installation so you should pay attention to its size through proper measurements.
Step 2: Making The Frame For The Cabinet

Image Source: “T4 restore interior campervan fittings” by Jim the Chin is licensed under CC BY-NC-SA 2.0
You will use the ⅝” plywood to prepare the frame for the cabinet. Connect the side panels and dividers to the bottom panel. You can use screws or nails to connect these together. You can also use building squares to make sure that the cabinets are even.
Use wood glue to fully secure the connections together. Add two pieces of 1×2” wood to increase the strength of the cabinet frame. One of the wood parts will mount flush with the top, then the other will flush with the bottom.
Step 3: Attaching The Cabinet To The Walls
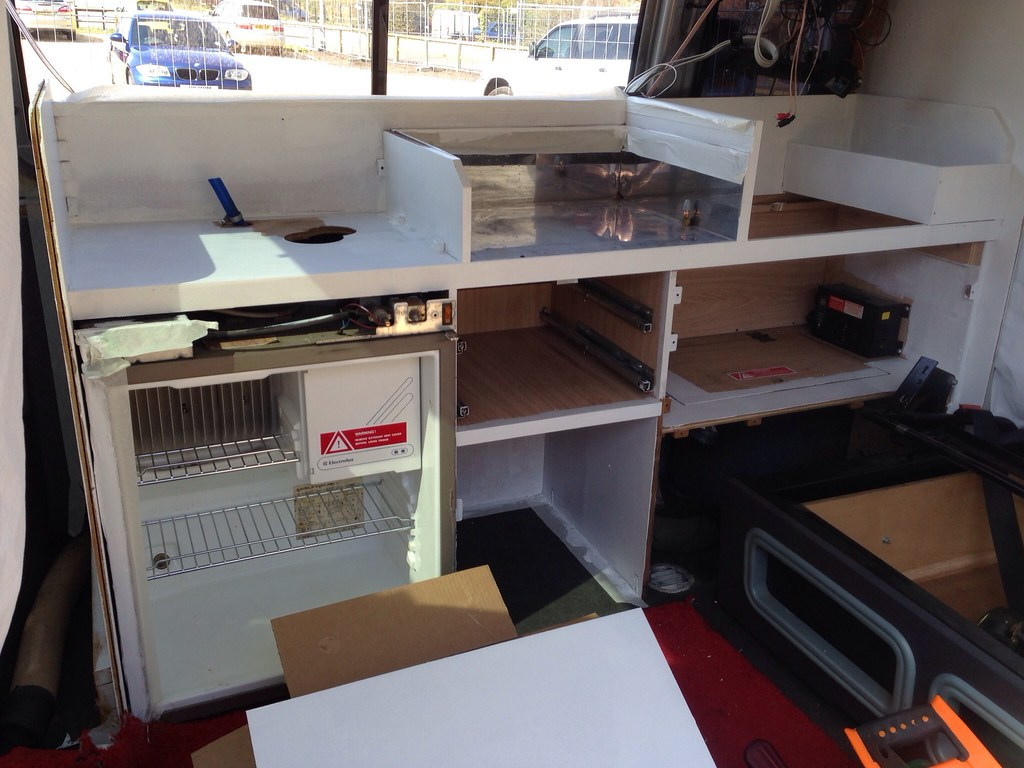
Image Source: “T4 restore interior campervan fittings” by Jim the Chin is licensed under CC BY-NC-SA 2.0
Mount the cabinet frame on the RV wall using mounting brackets. You should also use a level if you want to attach the cabinet frame. Using the level will make sure the cabinet frame will not be askew to the wall.
Then, choose the face wood for your cabinet and then you have to connect the sides with the help of the finishing nails. You must also cut the door opening from the front side of the cabinet.
Step 4: Installing The Doors For Your Cabinets
Image Source: “VW T4 campervan interior restoration” by Jim the Chin is licensed under CC BY-NC-SA 2.0
Next, you have to install the hinges for your cabinet doors. When you install hinges for your cabinet doors, it is very important that you will measure the cabinets and the doors. Then, drill the hinges into the cabinet surface. Check if the door is at the proper height and is working effectively as expected. Add the knobs on the doors, and then you are finally done.
Some Tips And Tricks On Installing RV Cabinets

Make sure you have adequate carpentry experience before venturing on such a project because RVs are costly, and they are not the best places for practicing your carpentry skills. If you are unsure of your carpentry skills or you have zero experience whatsoever, do not hesitate to call a carpenter to do the job, for you or better yet, buy premade cabinets yourself.
Use squares and levels in each step of the process to avoid any construction errors. Consider all the items to be stored in the cabinets and choose the best size for them. Increasing the sizes is not the best idea out there because it can ruin the dimensions of the things in your RV.
Put safety latches on the cabinet doors to keep them closed while you are traveling. This is also done to prevent the doors from opening up and the items inside flying all over your van. Also, add some more brackets for installation if you want to store heavy objects inside your cabinets.
Different Van Cabinet: Do-It-Yourself Ideas
There are so many things on how to create your own van cabinets if you do not have the luxury of buying a premade one for your van. Here are some of those.
RV Storage Cabinets: Best To Maximize The Space
Image Source: “Inside of campervan” by edmittance is licensed under CC BY-NC-SA 2.0
These are cabinets inside your RV that allows you to store anything in it.
The lit-up RV storage cabinet design allows you to add some illumination to the cabinet. This one is very efficient especially for those times when you need to get something inside the cabinets in the middle of the night, without being disruptive to your family or friends inside the RV.
You must have an on-off switch installed to conserve energy and the cabinet interior needs to be bright enough to support the light coming from the outside.
Pull-out storage cabinets give any cabinet more practicality and more function. This is a great option for people who need to have a deep cabinet that is easy to access. Add a locking feature so that it won’t come flying open during trips on steep roads.
Tall storage cabinets are a good option to utilize the corners inside your RV. It is very useful for storing clothes and other items that should be stored horizontally. The tall cabinets can be expanded by joining them with overhead cabinets if there are spaces allowing them to do so.
Sliding door storage cabinets are perfect for those who do not have a lot of space inside their RVs yet needing something to put their items inside. It is very useful in storing canned food, snacks, drinks, and other essential items when traveling.
Slide-out storage cabinets use sliders to make those hard-to-reach areas more accessible. This one offers more efficiency compared to the pull-out storage cabinet design. For this one, you can choose to pull one drawer instead of pulling everything.
RV Overhead Cabinets: Great For Your Ceiling Space
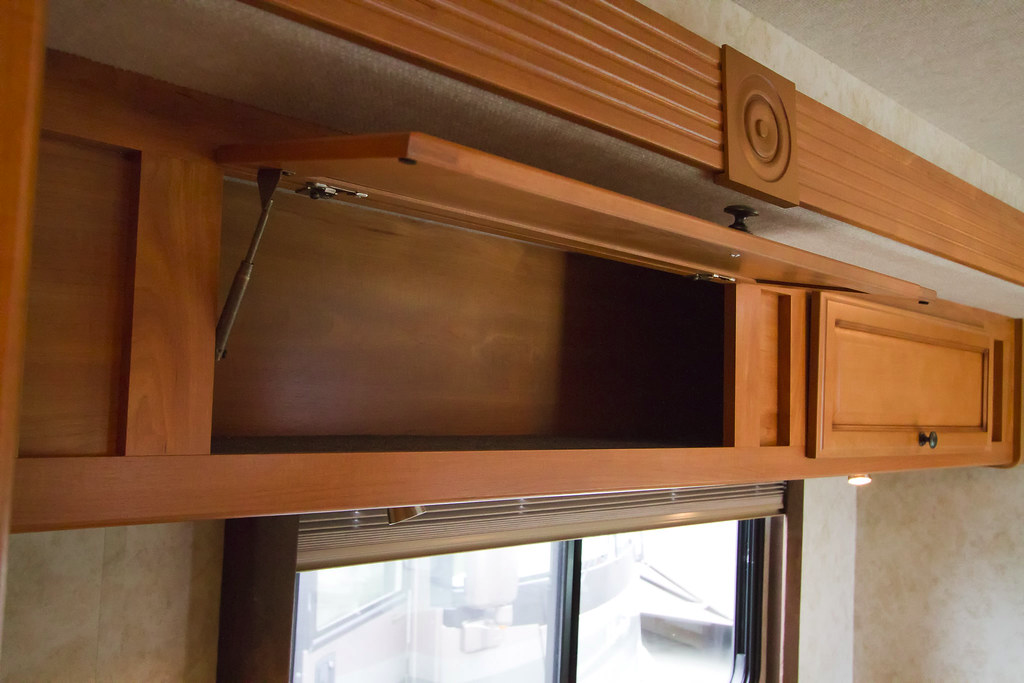
Image Source: “Overhead” by ChrisAn is licensed under CC BY-NC-ND 2.0
These cabinets are very useful in utilizing the ceiling space of your RV.
Standard teak overhead cabinets match most of the current designs available out there. The shape blends well with the modern-style interiors. The color can also mix well with the rustic themes of your RV, if you are into it. The door can remain closed better while traveling since the door hinges are situated on the top side of the cabinet.
Sliding door overhead cabinets offer more possibilities for you as a camper owner. It is more durable than using standard doors with hinges and it also allows you to customize your cabinets even more. You can adjust the material of the door depending on your needs and preferences. Clear glass panels, when used as doors, make the inside visible from the outside.
Double-deck overhead cabinets, with their two-level design, allow you to fit more items inside the cabinet. However, make sure the ceiling for your RV is high enough to allow you to do this. It might cause head injuries since you might knock your head on it accidentally if it is not high enough.
Bathroom Cabinets: Best For Your Hygiene Essentials
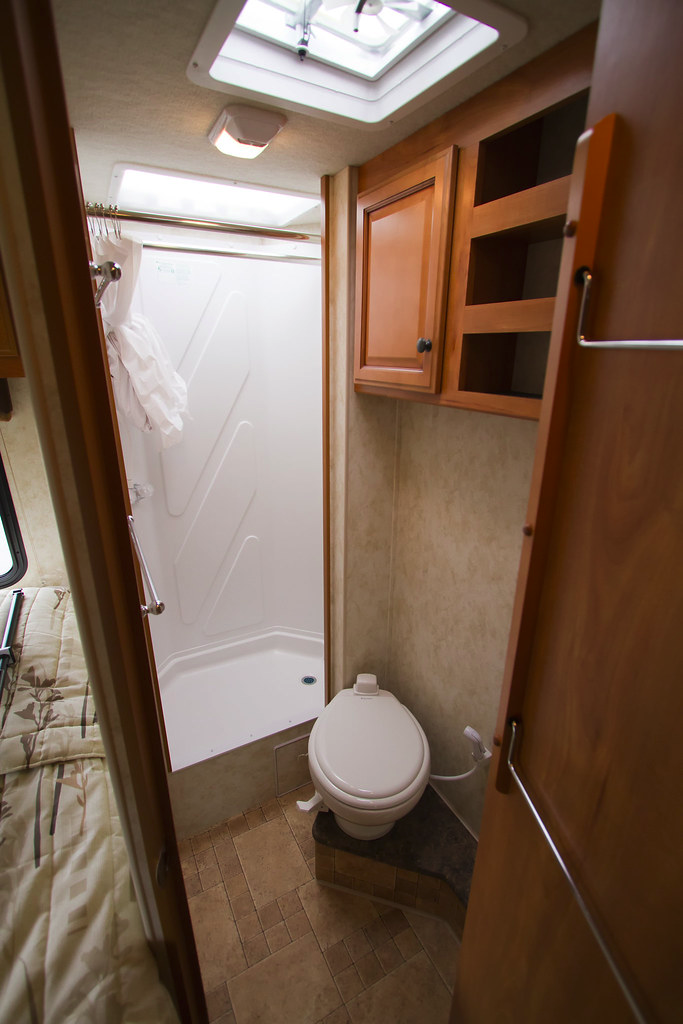
Image Source: “Bathroom” by ChrisAn is licensed under CC BY-NC-ND 2.0
You can also install cabinets as a very important part of your bathroom. This is important since you will need more bathroom and hygiene essentials whenever you travel more, with more people.
Rustic wooden cabinets, with the tall shelving of the cabinets, allow you to store more items such as towels and dry clothes or bathrobes. For this one, you must use water-resistant wood for longer use. You can also add a glossy finish to your bathroom cabinet to give it a more sophisticated look.
Concise bathroom cabinets have this straightforward design that is perfect for people who value function more than aesthetics. It allows you to put more storage cabinets in a small space such as the bathroom. Make sure that these are secure enough whenever you drive to avoid clutter and disaster while driving.
Medicine Cabinets: A Place For Your First Aid Essentials
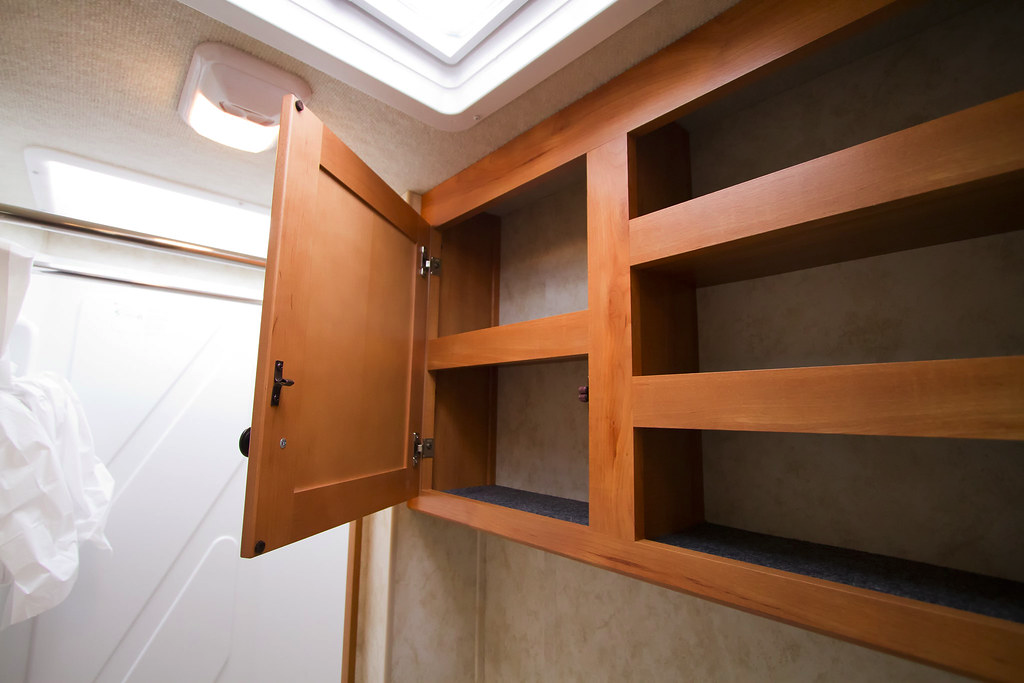
Image Source: “Medicine cabinet” by ChrisAn is licensed under CC BY-NC-ND 2.0
It is very important that you bring medicine and other essentials for first aid such as ointments, bandages, solutions, alcohol, and other supplies, when you travel outside. You can install cabinets in your RVs as medicine cabinets for that purpose. You can add a mirror in front of the medicine cabinet to serve another purpose.
Some examples include the submarine window-style, made from stainless steel, this preserves the medicine inside your RV cabinet even better. You can use tall shelving to fit larger items inside, like those bottles of hydrogen peroxide, rubbing alcohol, and ammonia. Add lighting inside the cabinet so that you can see everything well especially at night.
Do-It-Yourself vs. Professional Installations: Pros And Cons
No one is stopping you to do things on your own, but it will not hurt to ask for professional help in installing cabinets. If you are still confused, maybe this section will help you decide.
Doing Things By Yourself Is Better If You Have Experience
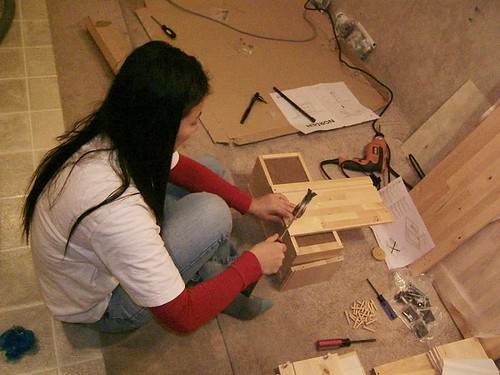
Image Source: “Jacq’s drawer sweat shop” by j2davis2005 is licensed under CC BY 2.0
Without a doubt, doing things by yourself would cost you less money in buying materials, tools, and installing them yourself. However, you should do it if you are confident enough in your skills in carpentry and woodworking.
We do not want to waste money on something that will not work out well in the end. Remember that your van is not a place where you can practice your carpentry skills as it is very expensive. Once you damage it, it will require you to fix it immediately to prevent it from ruining even more and it will cost you money.
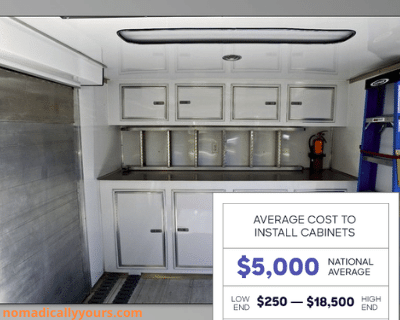
Professional Installation: Costs And Pros
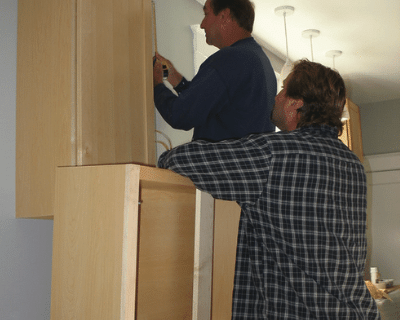
Asking a professional to install your cabinets for you is the best choice if you do not have any idea how to do it or if you are not confident enough of doing it by yourself. Depending on where you are, installations may cost you from $50 to $250 per linear foot.
Custom cabinets require more time and effort so it might contribute to the rates as well. However, installing it by a professional is still the best choice especially if you have the budget to pay for it. They will assure you that the installations will be handled in a professional manner and you can be rest assured that they will do the best job for your cabinet needs.
Personal Recommendations: Stick To What You Feel
Based on personal experience, I installed the wooden cabinets by myself but I asked someone to install the aluminum ones for me. Installing the wooden cabinets for me is very easy since I have skills for it and it felt personalized for me.
However, handling aluminum is not my forte so I asked someone for help and trust me, it was the right decision for me. Seeing the way he installed it differently from me makes me think that I saved myself the trouble and hassle of installing them by myself and failing miserably.
Some Storage Organizing Tips For Your Cabinets
Storage is very important in our van cabinets, so we have to maximize everything to our benefit. Here are some storage organizing tips that I have been doing for years now.
Utilize The Space Of Your Doors
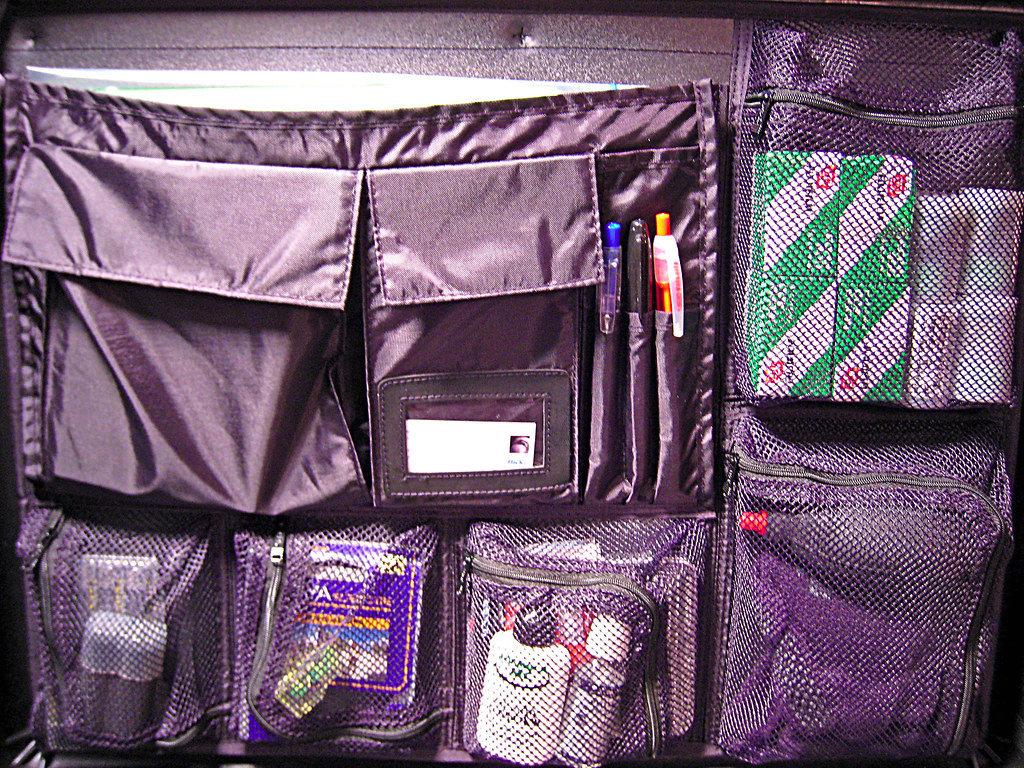
Image Source: “Pelican 1609 Lid Organizer” by fensterbme is licensed under CC BY-NC 2.0
Fitting a lot of items in a limited space is very challenging indeed. You need to maximize the cabinet space to avoid letting some of the items laying around the roll out of your cabinets while you are driving on the road. Surely you do not want to fumble around with jars and bottles flying out of your cabinets when you hit the road as it might cause injuries and accidents.
Utilize the space on your doors by hanging organizers or baskets. It offers extra storage and it also provides flexibility. You can place them either on the front side of the cabinet doors or the inside. You can also put them on the empty walls and even the bathroom door.
Make Use Of The Top Part Too
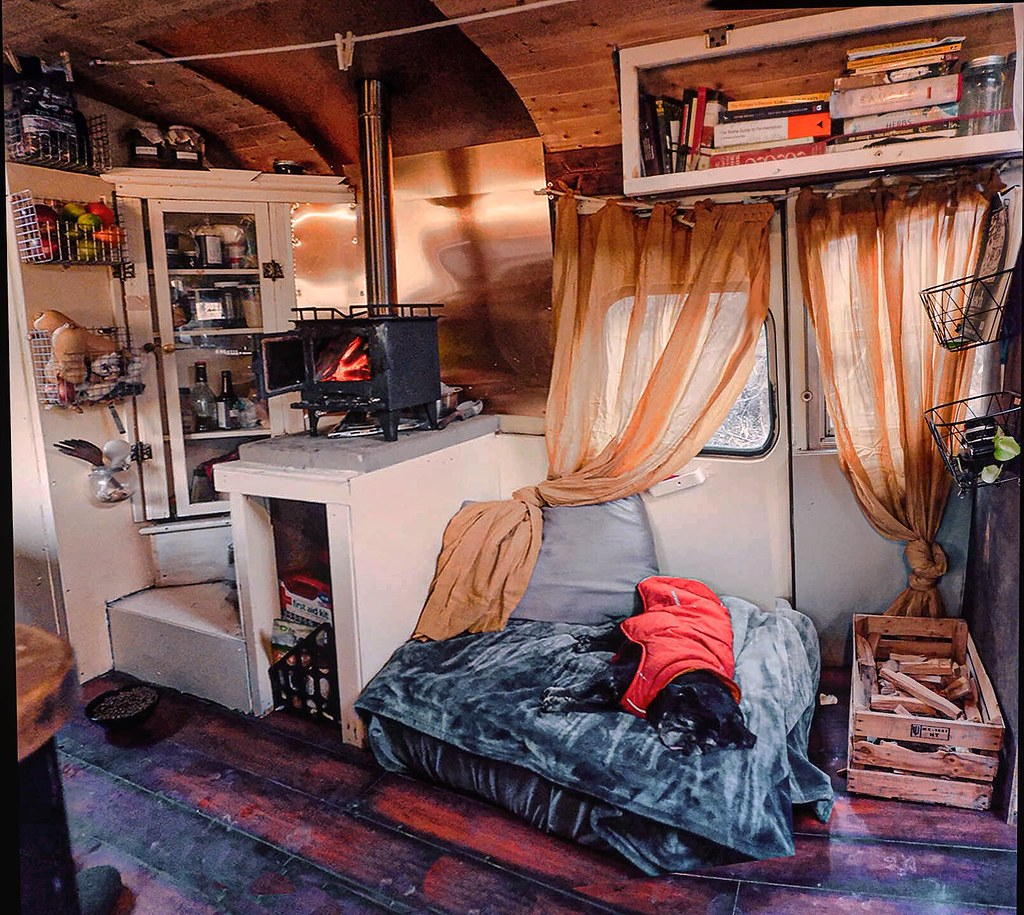
Image Source: “Skoolie Conversion Cozy” by Lauren Gardenbelle Fritts is licensed under CC BY-SA 2.0
The top part of the cabinet is often left unused since we usually put items from the bottom. Utilize the area by installing a hanging rack from the ceiling of the cabinet. You might find it difficult to put different items in that cabinet, however, so consider it carefully. Measure everything so that it won’t be a waste of time putting it in.
Adding Sliding Features For Hard To Reach Areas
Image Source: “Skoolie Conversion School Bus Living” by Lauren Gardenbelle Fritts is licensed under CC BY-SA 2.0
When you maximize storage space, it often makes certain items hard to reach, especially if they are placed all the way to the inside. You need to consider the solution to make every single item easy to find and effortless to take out. Think of adding a slider below the bottom panel to solve the problem. That is a nice solution to make everything within reach without trying too hard.
Installing Tension Rods To Keep Everything In Place
Install tension rods in cabinets with fragile items inside. This is done to prevent them from breaking or spilling out of their containers and out of the cabinets. This is done for extra protection as well. Tension rods prevent collision against each other, which is very important especially when we are driving on rough roads while traveling.
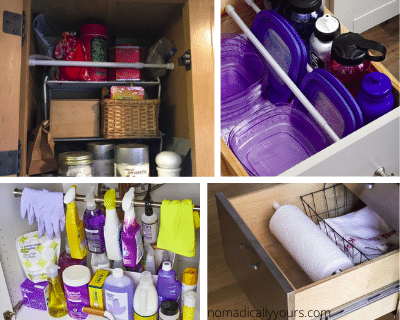
Storing Things Vertically To Maximize Storage
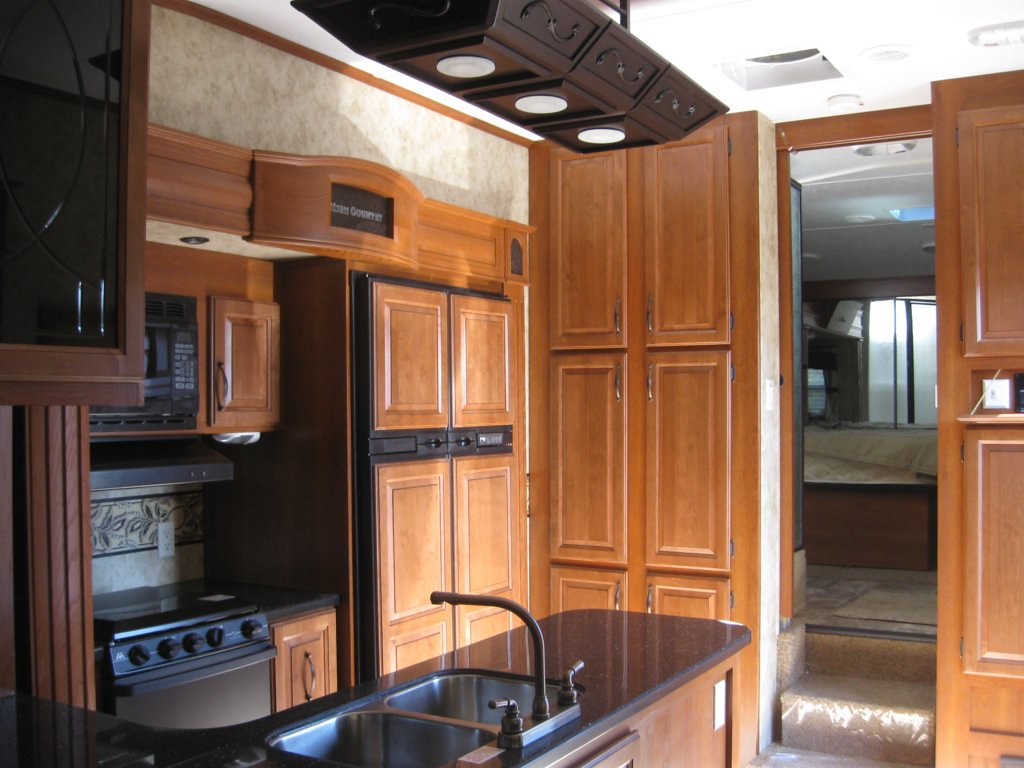
Image Source: “RV Living” by Kathy McGraw is licensed under CC BY 2.0
There are items such as plates, pans, and baking sheets that can be hard to take when they are stored horizontally. Flat-shaped items such as these should be considered for a vertical organization. By storing them vertically, it makes them easy to reach and take out of the cabinets. It also maximizes space, which allows you to put more things inside your cabinets.
Conclusion
Storage is something everyone should value, especially in small spaces such as vans. Cabinets offer a long-lasting solution to organize and store everything you need properly, especially when you are traveling on the road for a long time or thinking of living in your van for long periods of time. There are a lot of available options out there, so be wise and choose what you can capitalize on later, instead of choosing something just because it looked aesthetically pleasing but did not serve its purpose in the end. If you want to know the frequently asked questions when it comes to van life, here is an article that I have written for you.


