

Flexible LED lights are used worldwide in various commercial, residential and industrial projects, including mobile homes like RVs. Their flexibility, low profile, and helpful accessories make them the most popular for DIY projects, and of course, the most significant advantage is how easy they are to install. PuttingLED Lights on RV can be a helpful change or shift to a more efficient energy-saving trick in your RV life, therefore knowing how to install it properly for whatever reason you may have is a must skill for RVers.
How to install LED lights on an RV? You’ll begin by selecting the appropriate LED lights, then measuring and cutting the strips to fit in the location you like to place them. After that, all you have to do is connect them to the power source.
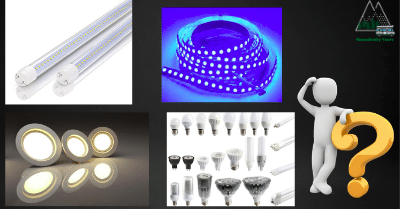
The advancements in efficiency, color possibilities, and brightness in the world of electricity are fascinating, making LED lighting popular among architects and lighting designers. There are many LED lights available, and there isn’t one product for all (depending on what you want). Yes, DIY projects like this can seem daunting, but with the right tools and tips, this will be as easy as pie. In this article, I will share with you step-by-step the process of RV LED light installation. Also, some tips that I wish I’d known before.
The Basics of RV Installation: Major Things You Must Do
Before installing your LED light, make sure to follow these basic steps to have a smooth process. Generally, all RV LED light installation follows this.
Get Ready! Wipe Clean The Surface
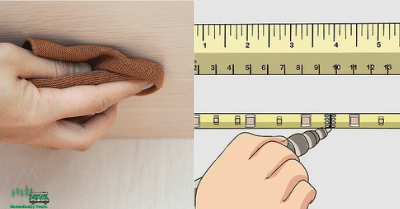
Whether you are installing LED lights under, on, or above the RV”, you’re going to need to clean the surface first. You can use many simple products with the most common cleaning solution or just water and soap you can buy at your grocery store. Just make sure you will do an excellent job of cleaning the surface, removing dust and other debris in the surface to secure your light’s tight grip. Once clean, you can now measure and cut the lights to the correct size.
Cutting the Lights the Right Way
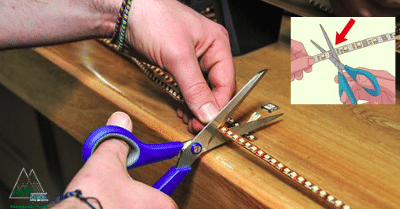
Cutting in installing LED lights is a significant part of the process. This is where you will decide the length of the LED (if using a strip) that you like. When cutting, ensure you only cut in the designated areas to avoid the risk of damaging lights. Copper pads arranged in rows are often used to indicate these places. However, your light’s user manual will be able to tell you for sure. To measure and cut the lights, all you’ll need is a ladder, a tape measure, and a sharp pair of household scissors, and then you’re ready to install them.
If you’re planning to replace an existing or old LED light on your RV, you should cut the wires cleanly to the old light’s wire and as close to the LEDs as possible. there will be plenty of wire to connect the new lights to. Before you start snipping wires, make sure the LEDs are turned off.
Secure the Lights in Place
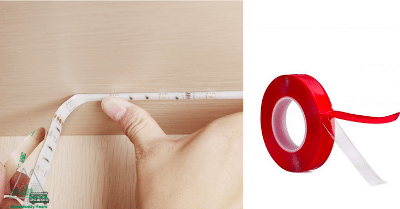
Most light strips will come with an adhesive backing for mounting, but if you want something that will stay a bit longer, lay down a strip of double-sided outdoor tape where you want the lights to go. Both Scotch and 3M provide high-quality exterior tape that will get the job done, and 3M also sells an adhesive primer that will help your tape stay better.
Since most LED strips are half-inch wide, simply cut it in half if you obtain one-inch tape. Remove the old strip from the RV or awning with care, making sure to remove as much of the old glue as possible. Ladder, scissors, wire cutters (if replacing), double-sided tape (optional), and LED lights are the tools you’ll need.
Wiring and Powering LED Strip Lights Under an RV
When you decide to put LED lights on the RV, it comes with good brightness and efficiency of lighting. But do not worry, you can DIY easily. Just bring out your long patience if you’re starting.
Things You’ll Need: What To Prepare Before Installation
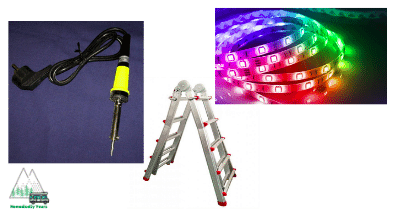
One of the primary tools you will need in the installation is a soldering iron. A soldering iron is a hand instrument that heats solder at high temperatures above the melting point of the metal alloy, usually from an electrical supply. This allows the solder to flow freely between the workpieces that must be bonded. Also, you will need wire connectors and flexible conduits for exposed external wires to secure your line.
It is also suggested to have a voltmeter for checking the presence of power in your connection. This is critical to ensure safety while working on your lights and wires. Next are heat-shrinking wire tubing and silicone sealant to secure your wires and light firmly on the RV’s surface. It is also essential to avoid leaks in the future. It will also be handy if you will include wire strippers and terminal connectors in your list just in case you need to strip insulation from old wires in your RV.
You will probably need a ladder to install or replace your LED lights, especially if you can’t reach the spot quickly. Having this at bay will surely make your DIY set-up easy. Suppose you want to put LED lights under the RV’s flooring; you might also need to have a mat or back support to aid you in the installation process.
If replacing light fixtures, you will need a drill to quickly remove them and ensure to turn them off or, better yet, disconnect from the power source before working.
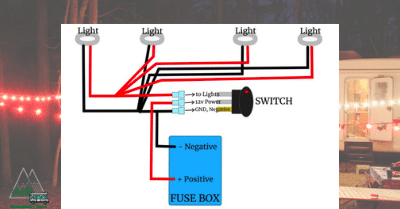
The Correct Ways to Wire Your Light
There are a lot of options in giving power to your newly installed LED lights. You will have it easy if you’re replacing old LEDs. Simply strip the wires where the old strip-cut them to reveal the metal ends, and then solder them to the copper pad.
If you already have experience in soldering wires, you can use the same way with your new LED lights. If it is your first time, you can do your research and self-learning (nothing is complicated if you do your best).
The type of connector you require will be determined by the LED lights you purchased; read the user manual and product listing to see what connectors are available. The only time you’ll need to run a cable to the electrical control panel is if you’re installing a module for a remote-controlled or color-changing strip that you didn’t have before.
If you’re putting an LED light strip for the first time on your awning or awning roller, you’ll need to pick which power source you’ll use. If you have a porch light, you may be able to connect the strip to the existing porch light cables, but your LEDs will not operate unless the porch light is turned on.
If you need a longer cable, thread it through the same hole that the porch light wires go through and connect it directly to the battery or another 12V power source. If that doesn’t work or you don’t have a porch light, you’ll have to drill a hole through the battery box for the wires to pass through. If you must drill a hole, weatherproof it with silicone sealant afterward, and ensure that all wire connections are insulated with heat-shrink sleeves.
Keep in mind that though your LED lights may come with a power adaptor, they will work fine if connected to a 12V source. This eliminates the requirement for the bulky power block that came with your lights.
Installing LED lights in Different Parts of the RV
Always keep in mind that you are not limited to the parts of the RV where you can place LED lights. Sky’s the limit of your creativity, but make sure to put your safety first over aesthetics.
Under the RV’s body
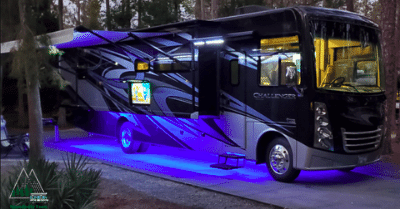
Install the LED strip below the awning reel and along the body of the RV using this method. When contrasted to the edge of the roller, the advantage of positioning the lights here is that you may use them even when the awning is closed. You’ll need your ladder for this, but it’s typically a simple task. When measuring, you should usually stop about an inch from the awning’s edge.
As a result, cut your light strip and adhesive tape 2 inches shorter than the overall length of your awning. Measure down the chosen amount from the bottom of the awning to get your strip lights evening installed. Close the awning while doing this. Make a mark at either end, then draw a line connecting them. It will be easier if you use a chalk line, but it is not required.
If you’re using adhesive tape, follow the line you just drew on the RV’s body with the tape. After that, gently remove the backing off the light strip and adhere the lights to the tape.
Lights at The RV Awning
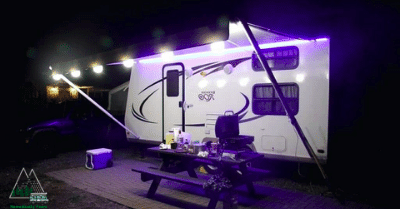
You can only use your RV awning lights. In contrast, the awning is fully extended if you position them along with the awning roller at the end of the awning. If the awning isn’t fully stretched, the lights will be obscured by the unrolled awning cloth. When installing your light strip, remember to leave about an inch of space between each end of the awning roller.
In doing this, you will benefit from choosing where you will direct your light that will illuminate more what you want. You should fully extend your awning for this installation, but this will depend on your awning.
Install your double-sided tape along with the awning roller once you’ve selected where you want your LEDs to go. It’s also a good idea to draw a line along with the roller that you can follow with your tape to ensure the LEDs are put evenly. Mount the light in place after you peel off the backing.
If you want to hardwire LEDs into the awning roller, run an insulated wire down the extension arm of the awning and back to where you want to hardwire them. You’d have to be careful not to get the wire pinched by the arm when rolling the awning in, but other than that, you should be fine.
Selecting Wisely The LED Lights For Your RV
Most people initially look at the cost of lights in RVs because, of course, it is one major factor that will contribute to your decision. Aside from this, there is other helpful information you should take note of.
The Cost LED Light Requires
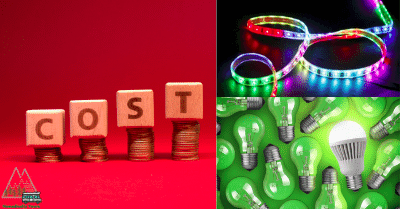
LED Lights last and will save you a lot of money. However, they are more expensive than incandescent bulbs, but prices are dropping. And what’s so fascinating about LEDs is that it’s more of a long-term investment. So, while the cost might be a little higher, it’ll be worth it in time. It would usually range from just 5 dollars to 200 dollars depending on what brand and type of LED Light or what type of design the LED Light has.
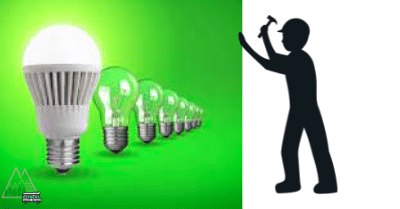
If you replace incandescent bulbs with LEDs, the savings will be substantially more significant than replacing halogen lights with LEDs. Even if you use CFLs or other energy-efficient bulbs, you can save a lot of money.
Finally, whatever your motivation for using LED lights, you will almost certainly be able to get a good return on investment, if not immediately, then throughout their estimated lifetime.
When comparing LED to CFL, the savings are not as significant, but they are substantial enough to be helpful. A comparable CFL bulb costs around $3 and lasts approximately 10,000 hours. It will use around 180 dollars of electricity over its lifetime, which is still a lot more than a single LED light.
Of course, there are many LED lights, but you could anticipate paying between $10 and $20 for a bulb and anywhere between $20 and $50 for a tube. If you want to replace a significant number of bulbs for your business or house, it can cost over $400 to replace 30 or more.
Things To Consider Aside From Cost
Aside from the cost, it would be best if you primarily thought about your RV’s specifications and features. Remember that since LED lights consume electricity from the battery, it will mean that they will drain your battery faster the longer you use it.
At the same time, also consider the safety that comes with the use of LED lights if planning to use them as a night light. There are also many specifications or outstanding features you should look for in LED Lights that come with a cost.
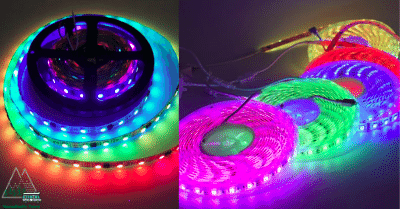
You can choose to go for multi-colored or single-color lights, depending on your preferences.
Some lights are sound-sensitive that will react to music when playing. If you like to add this to your RV, that is also good.
Also, consider the amount of electricity saved compared to other bulbs and the durability of the replacements you are putting in. Ask yourself if it is worth your investment in the long run.
Maintenance of LED Lights: Making The Most Out Of It
As said, it is essential to choose LED lights wisely so that you can maximize what you paid for with the suitable lumen, color, and the likes. These lights come with a user’s manual for sure, and indeed, it pays to read this to make sure this is what you desire to get.
Even though LEDs save a lot of money on maintenance, all lights, including LEDs, require regular maintenance such as clearing. Dirt and debris from both inside and outside the RV light may cause electric shortages, which will surely piss you off. Lighting units must be cleaned regularly, and make sure to do regular check-ups of the lights too.
Conclusion
Installing LED lights on your own is a great DIY project that’s not too hard with the right tools and steps. This does not require an expert for installation and is easy to do by a starting RVer. Just install it the most uncomplicated and correct way you can to enjoy a well-lit area. Also, it is not just for the outdoors, but it also makes your indoor spaces brighter.


