

If you are thinking of starting your van life and building your van from the ground up then be ready to face plenty of challenges along the way. It may be a long winding process but the result would be pleasing. It will take effort, time, and money to complete your dream home on wheels. With proper planning and knowledge, you can achieve the van that you need while living on the road.
Converting a van can take anywhere from a few weeks up to more than a year. It will depend on how much time you are willing to spend on the conversion, the customization level you want, and the budget. With the right guide and time allocation, you can get your dream van in no time.
When it comes to van conversion, there are plenty of factors that you need to consider. This article will break down and tackle this many-faceted question by breaking it down into parts and giving you the best-estimated conversion time. Each section will discuss factors that can affect your overall conversion time, with a section that breaks down the conversion process into separate specific areas with estimated time frames.
Type of Custom Build: Think About It Clearly

The first order of business to talk about is the type of conversion you want. You can live minimal in your van and opt for the bare essentials like a bed, storage, a table, and maybe a countertop that doubles as prep space and a dining table. You can also go the more customized route by incorporating a kitchen, fridge, toilet and shower in your van – using expensive materials, or you can play your conversion somewhere in the middle of the two.
There are three different conversion types that you should know which are highly customized (everything is built with expensive materials), middle ground (standard materials are used), and quick and cheap (bare essentials only).
Highly Customized: Get Everything You Need

To be honest, all camper vans are highly customized because they are built to fit the owner. However, a highly customized camper van is a van built to have all the essentials plus more. Materials used in this kind of build are high-grade and expensive. You can expect your camper van to look and feel homier. Customizations like this are mostly done by professionals who have had plenty of years retrofitting vans with everyday living essentials.
The build usually takes a year, maybe more to finish, as every interior aspect is scrutinized before you can draft a layout. If you plan to DIY this kind of conversion, you are looking at months to years of build time. There are plenty of company sites that offer van conversions, and the usual process boils down to meeting the client, drafting a layout, getting the vehicle, the conversion process then hand-over. The time frame of the whole process takes about eight to 14 months.
On the other hand, highly customized camper vans have all the necessary amenities like a toilet, shower, a mini kitchen with a mini-fridge, and stoves. Overhead cabinets, safety boxes, and convertible sitting areas are a popular option too. Also, solar panels are part of the build as well as outside storage and sometimes outside showers. Depending on the weather, either an air conditioning unit or a heating unit is part of the layout. There are plenty of options to customize the layout and include or exclude aspects of the design.
Middle Ground: A Van That Is In Between
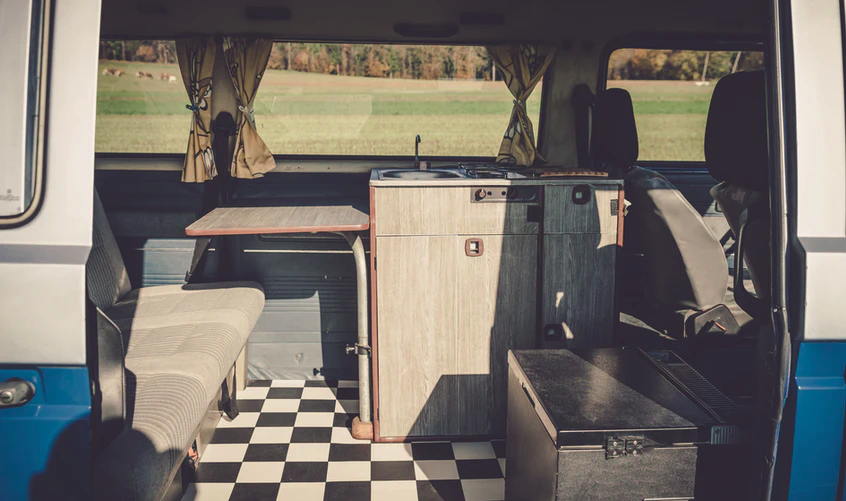
The middle ground category is pretty much like the highly customized option. The difference is that the build materials are a mix of high-grade and standard costing choices. This type of build will also produce a camper van that looks livable and feels homey but without the high price tag.
Most builds in this category may or may not have convertible beds, and others have kitchens with a sink and stove, while others just have a sink with countertop space. Some will forgo the kitchen set up and just cook their food outside, while others prefer to have a mini-fridge rather than keep their food inside a cooler. Some have electric heaters, while others opt for the more traditional wood stove design. There is plenty of room for customization here too, just like in the highly customized category.
The build’s length will depend on how much time you are going to put into the project if you are going the DIY route. Most professional conversion takes a minimum of eight months to finish. This kind of build will take almost the same time as a highly-customized job. It’s hard to say what items are part of your van conversion because this will depend on your needs. However, the basics would be a place to sleep, a place to work, a place to prep meals, and storage space for your stuff. Some prefer to store their things in lockable bins, while others prefer to have tons of cabinets and drawers.
Quick And Cheap: The Easiest Conversion
This type of conversion is the easiest and fastest since there will not be much to consider. Your basic needs will only be the basis of this conversion. Items such as custom-built cabinetry might not be part of this project, but floors, walls, ventilation, and insulation will still happen. The only thing you need to keep in mind is having a place to sleep, a space to work, a place to store your items, and that is pretty much it. Other aspects like additional windows, toilet, shower, and kitchen are optional here.

You can expect your van to look decent but not as beautiful and homey as the other two categories. The materials you will mostly use are either standard materials or recycled for a more cost-friendly option. This build can take you only a few weeks to a couple of months, depending on how much work is needed.
The Things You Need To Consider Before You Build
The next step is to look at the other factors that might affect your build time, especially if you are doing this DIY style. There are different factors that you need to consider before you can start your build. Keeping these things in mind is important so that you can have a successful build.
Time: How Long the Build Will Take to Finish
There are countless DIYers who have taken time off from work, and months later, they are nowhere near finished with their conversion. If you commit your full-time to this conversion, the things you need to build from scratch would be done faster. In addition to that, will you be employing professionals to help you convert your vans because electricals and plumbing are no easy business to deal with.
If you plan to do this all on your own, it is best that you enlist your family members and friends for an additional workforce. You can do all the thinking, layout, and design, but when it’s time for the nitty-gritty stuff, you will need extra hands. Conversions will test your creativity and bring out the resourcefulness in you.
Most DIYers would commit their weekends to the conversion because they know that they need a steady income source to complete the project. This is one reason why conversions may take months, maybe even a year or more, to finish. If you opt for professional conversion companies, it might be faster, but this will mean it would cost more.
Budget: The Most Important Factor to Get the Job Done

Of course, this is a subject that will affect your build time because you need to have enough cash to keep the project moving forward. If you’ve taken time off from work and are devoting your time to this build, you are going to need to find a way to finance your conversion. If you find that you’ve run out of money in the middle of the project, the project will halt, and the time frame moves up.
Tools: What You Need to Finish Your Dream Van
Having the right tools for the job will get the conversion running faster because you don’t have to run around looking for tools. See what tools you have already and, if possible, borrow tools from families and friends.
Space: Make Sure You Have Enough
If you have the tools but don’t have the space to do your conversion, this can be a setback. Not many neighborhoods would welcome the sound of banging, clanging, and whizzing, so you might want to look for a space where you can peacefully finish your conversion.
Space can also be applied to the amount of space your van has. You will downsize your life to fit in a van, so be sure that you are ready for this move before you start converting. Look closely at your layout and utilize as much storage space as possible. This is the best time to figure out what items would go in your van and what items you are willing to give up for the lifestyle.
Water Source: For Drinking and Washing Your Dishes

If your layout includes a sink and a shower, it is a good idea to know where you can get water for your needs. You can purchase water by gallon in grocery/dollar stores or campgrounds for your cooking needs. I still prefer buying bottled water for drinking just to be safe. The freshwater you collect can be used for showers if you have a shower system installed in your van.
Gas stations, rest stops, parks, friends, and family residences can also be sources of water when you start living in your converted van. I have seen vans fitted with rainwater collection and filtration to save more on cost and other vans that have solar-powered water filtration systems so that they can collect water from streams and lakes. Figure out how you will store and manage your freshwater because this will affect your van conversion.
Of course, you will also need to consider your greywater. If you have a sink and a shower, you will need a system to collect and dump your used water. You can either have a grey water tank permanently installed or collect your used water in a jerry can and dump it out on your next stop.
Hygiene: How to Keep Clean While On the Road
Hygiene can be broken down into three parts, which are showers, toilets, and laundry. The following section will tackle each one with more elaborate detail about what you should know.
Showers: The Option of Not Going Out Stay Fresh

Most modern van conversions now come with a toilet and bath setup because many people will not give up this luxury. Although, they do need to adapt the military shower style because they need to conserve water as it is limited. If you are seriously considering switching to van life, then you have a few options you can choose from to keep clean and smelling fresh.
Sign up for a gym membership because most gyms have showers as part of their membership inclusion. It is best to find a gym that branches in most states, so you do not have to sign up every time you move. You can also opt for a monthly renewal membership. You can just not choose not to renew if you are planning to move.
Shower options for your van are pump showers, battery-operated showers, solar-powered shower bags, and portable pressure showers. You can also take a dip in a lake or river if possible just make sure to use eco-friendly products. You can also build a pop-up shower tent with outdoor shower mats for an outside shower setup. However, if worse comes to worst, you can use baby wipes or wet wipes to clean yourself up for the time being.
If you want to know more about van life showers, here is an article that I have written for you.
Toilet: When It Is Time to Do Your Business

There are different options to incorporate a toilet in your camper van conversion. The first one is a DIY composting toilet made from a bucket with cat litter or peat moss inside. This is very eco-friendly, and you can look for a brand named Luggable Loo to give you an idea of how this works and how it looks.
The next is public toilets like the ones you see in campgrounds, department stores, truck stops, and gas stations. They are easy to spot and are almost always clean and sanitized. Another option is your high-end composting toilet with a liquid separator. This means that your pee goes in a different container, and your #2 goes into the compost bin. This is often the type of toilet you will see in a camper van because they are used without water.
The Clothes On My Back: Laundry Issues

Staying clean does not stop with keeping your body clean; you must keep your clothes clean too. Most van lifers would go to laundromats to do their laundry. Others would do their laundry at a friend’s house or on campgrounds that have laundry services.
You can go for the more old-school style and use buckets to hand wash and rinse your clothes. There are also portable washing machines or manual washing machines that are hand-cranked. If you have the space in your van, you can also buy a washing machine for your van.
Climate: Important When Traveling in Different Locations
When planning your conversion, you must also look at your current area’s climate. It is important that you take into account climate control devices inside the van that would provide you with a livable temperature. A van is constructed with metal, and that is a good conductor of both heat and cold. If your winters are harsh, you will need to have heaters in place and have your water tanks indoors if possible. If you live in a tropical region where the heat is scorching, you will need air conditioning units to keep cool.
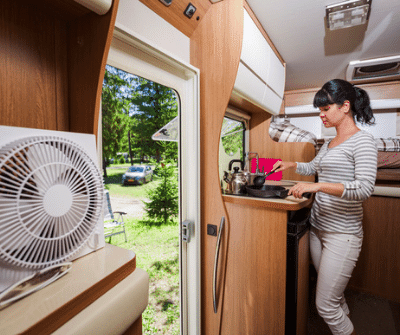
Food Prep And Storage: Making Sure Everything Stays Fresh

You will be changing your lifestyle, and as such, you will make certain adjustments to your daily routines. Food prep would be a challenging task when living in a van. Remember that you have limited space and very few options to store your supplies. Get creative with your meals and start learning simple dishes to make that require fewer ingredients.
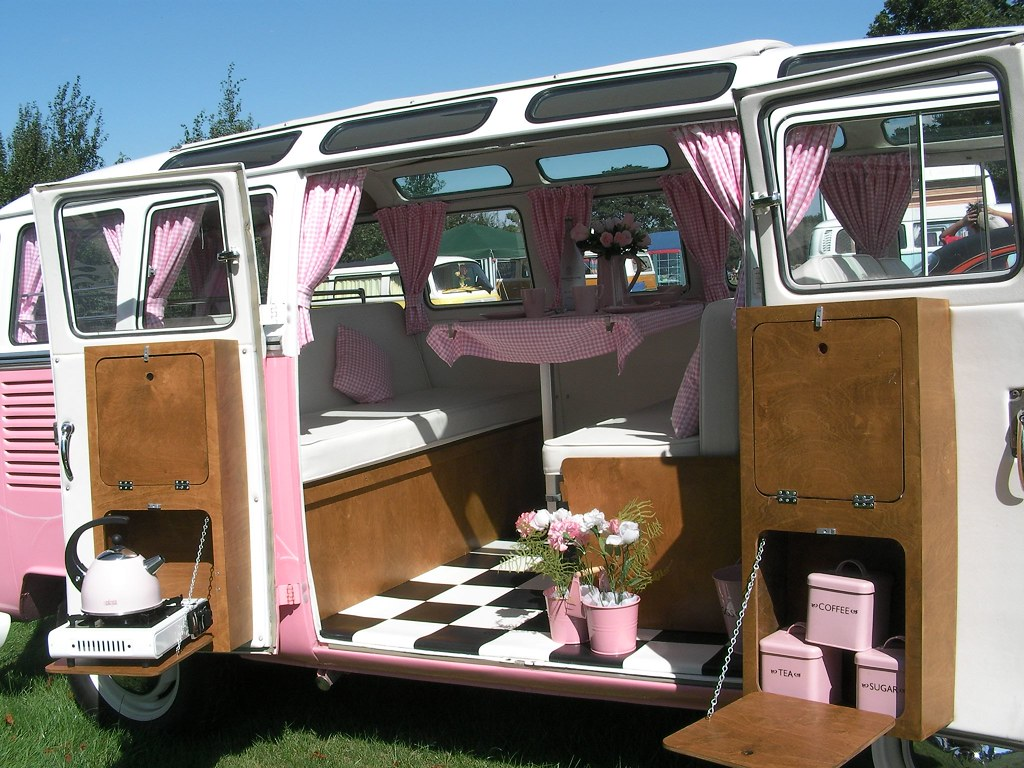
You can eat out most of the time, but the cost of eating out would add up to your monthly bill. I’ve seen vans converted to have pull-out kitchens that allow them to prepare meals outside the van and not worry so much about space. If you prefer fresh meals, then a fridge or a cooler is needed to store fresh produce that you can cook later.
Sleeping Area: When It is Time to Rest

It would be best to have full-sized bed in your van as much as possible. The main thing that you should think about is how you are going to do it. Your sleeping area can be a designated spot just for a full-sized bed, but you can also opt to have a convertible place where your bed turns into a sitting area.
Your bed foundation will have to reflect what you have in mind. If you prefer a stationary sleeping quarter, then build a permanent bed foundation. A convertible area will need a different foundation to accommodate the change.
Safety And Security: Crucial Part of Van Living

Some things should never be taken for granted, and one of those is your safety. To keep your van secured, you can purchase additional locks on your doors, steering wheel locks, and wheel boots. You also need to have a first aid kit on board and fire extinguishers for emergencies, and of course, a place to secure your valuables.
Hide important documents in your van and never leave documents that have your permanent address on display. Bring certified copies of your car registration and a copy of your insurance policies only. Having a concealed storage area that is lockable will also help in keeping your valuables safe.
DIY Van Builders: It’s Time For The Hammer And Drill
This is the section where the nitty-gritty begins when you plan to build your own van. Following these steps will help you achieve the van of your dreams. Going the DIY route is much cost-friendly than hiring a van conversion company. So, if you want to put in the time and effort in creating your own van build, then this is the section for you.
The Strip Down: Take Everything Out
A van conversion always starts with a strip down. You need to remove everything inside, excluding the driver and the shotgun seat. Think of this as gutting your van to the bare metal. You’ll certainly work up a sweat here, but this is a fun and therapeutic part of the conversion. To make extra money, you can sell the backseat if it is in good condition. This can take up anywhere between one to two days.
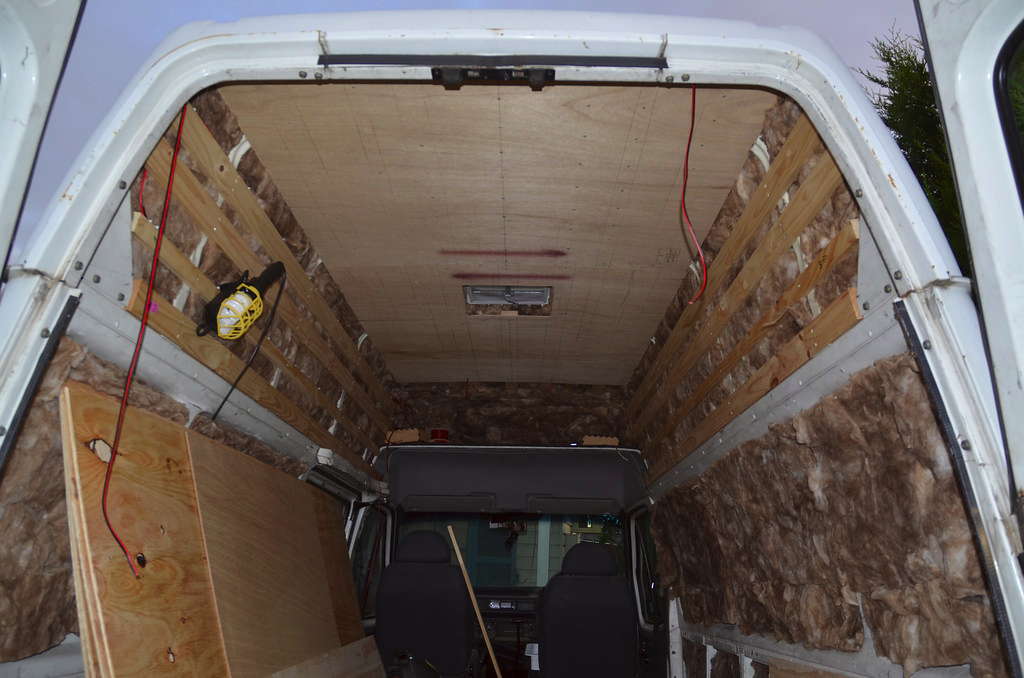
Keeping Her Warm Or Cold And Quiet
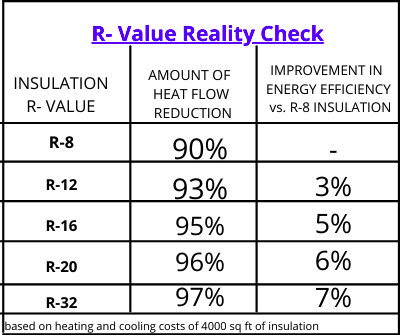
Once you’ve stripped your van down, you need to start laying your insulation all over. There are many to choose from, and it will depend on what kind of climate you have in your area. It is important to have insulation to help keep your climate control devices working better. When looking for insulation, you have to check for the R-value. Higher R-value means better insulating power.
Heat is transferred in 3 different ways, and they are conduction (material to material), radiation (through electronic magnetic waves), and convection (through fluid or gas movement). Insulation will help keep your indoors cool during the summer and warm during the winter. Also, your insulation doubles as sound deadening too. Most insulation in van conversion takes about a day, maybe less to install. Here are some popular insulating materials you can check out.
Polyiso Rigid Board: Great for Insulation
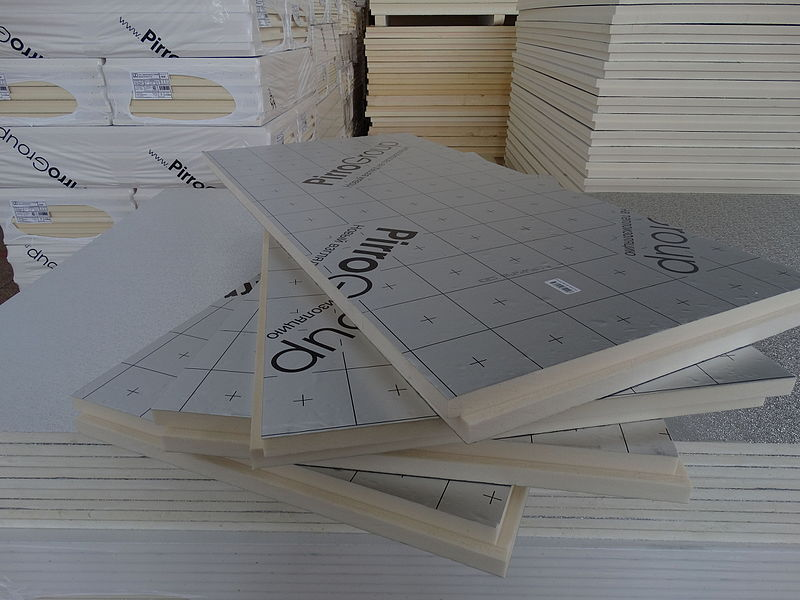
This insulating material can double as a vapor barrier too – which is a good thing. It has an R-value of 5.6 per inch at 75℉ and 5.0 per inch at 15℉. The cold temperature decreases R-value significantly, so make sure to account for the loss when choosing insulating material. Installation is a little challenging since it is not flexible and will not conform to shape and uneven surface.
XPS Rigid Board: Better Thermal Resistance
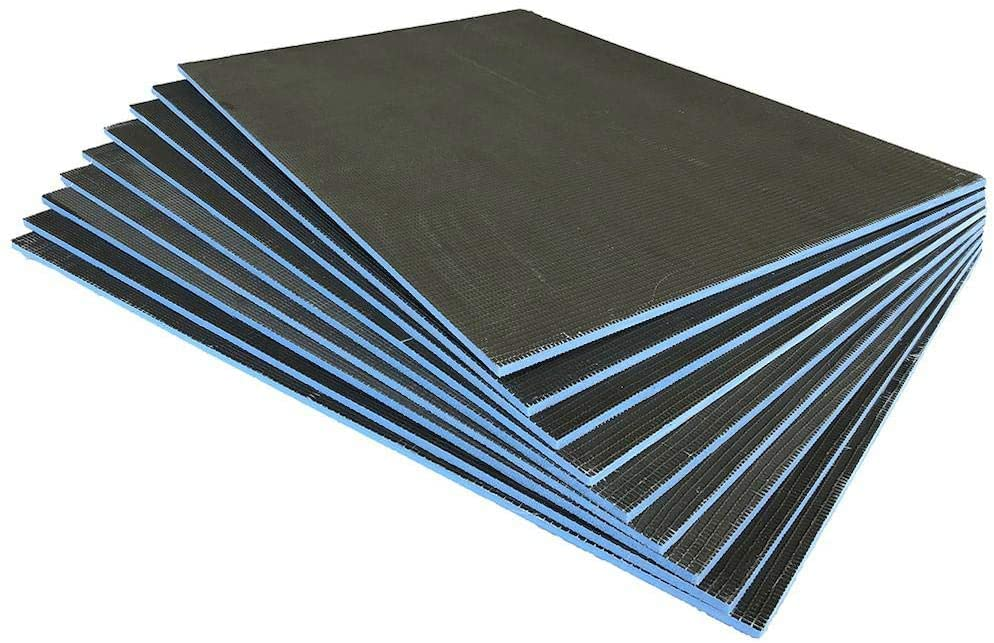
The XPS Rigid Board is like the previous one, but it has a better thermal resistance – the maximum temperature is 165℉. It doubles as a vapor barrier too, with an R-value of 5.0 per inch at 75℉ and 6.0 per inch at 15℉. Since this is another rigid type of insulation, it is a bit hard to layout.
Thinsulate: When You Have Money to Spare

For someone willing to splurge more in insulation, you can go for this. Out of all the options in this list, this is by far the most expensive. It has an R-value of 3.3 per inch and is easy to install. It easily conforms to every nook and odd area in your van and doubles as sound insulation too. It does not retain moisture and will not release fibers during installation (not itchy). It does not attract bugs and will be easily removed if your van needs body repair.
Rockwool: Great for Soundproofing

It is easy to install, has soundproofing quality, and is water and fire-resistant. I am not a fan of this insulation because it is itchy as hell when you install it. You also need to wear a mask when rolling this insulation out since fibers would be flying everywhere. It has an R-value of 3.0 per inch, which is not bad.
Van Ventilation
The van ventilation is a vital part of van living. You have to make sure that your van is appropriately ventilated, which is why installing roof fans or skylights is recommended. In a bigger van, you might want two roof fans that will work together. One will suck air from the inside while the other will blow air from the outside. You can install a fan or a skylight in just half a day, maybe even less. Make sure that you measure twice before cutting a big hole on your roof.
Power Source And Electrical Wirings
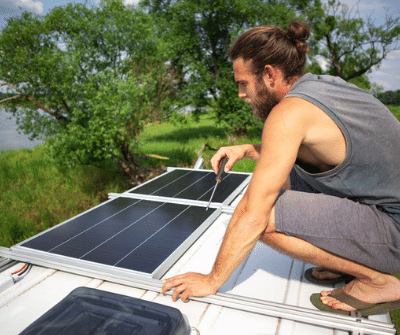
There are a few options you can choose from for your power source. People who use their vans for extended periods will opt for a more reliable source like a generator or a solar panel system. Others are fine with car batteries as their primary power source. Most often, camper van conversion includes solar panels for a more sustainable energy reservoir.
If you plan to live full-time in your van, you will have to figure out how much power you consume in your day-to-day living. You’ll need to figure out if you want outlets in your van where you can plugin and charge your electronics. Your lights will need wirings, and so will your roof fan if it is powered. This is a bit of a technical aspect in your van conversion, so make sure that you know what you are dealing with or have a professional help you out.
Depending on the power source you decide, this part can take anywhere from a few days up to a few weeks. If you have professionals working to install your solar panel, this can take just two to three days.
Floors, Walls, And Ceiling

This is a significant undertaking because the woodwork will start here. First, you will build the substructure. Then you will install the insulation and then line the walls, floor, and ceiling with ply boards. If you prefer a cleaner and more homey look, you can install vinyl flooring too. This can take anywhere between three weeks up to a month, depending on how much time you spend on the project and the number of helping hands you have. Precise measuring will make your work easier, and many suggest using templates from cardboards to avoid major mistakes.
You also need to make sure that you cut out holes for your lights and roof fan. Again, measure twice and cut once to avoid mistakes.
The Interior Lay-Out

Once you have all your ceiling, floor, and walls taken care of, you will now know how large your interior is. You can now start feeling your way inside and decide where your sleeping area, kitchen, cabinets, toilet, shower, and other storage will be. You can find plenty of inspiration online and some ideas on a layout for specific models. It’s recommended not to start building your cabinetry and other stuff until you have this figured out.
The time it takes to develop a layout can take months, even years, to finish. Some had started their search way before they even bought their van. Others even have 3D floor plans that they work with to make sure that they are satisfied with their camper van’s overall layout.
The Sleeping Area
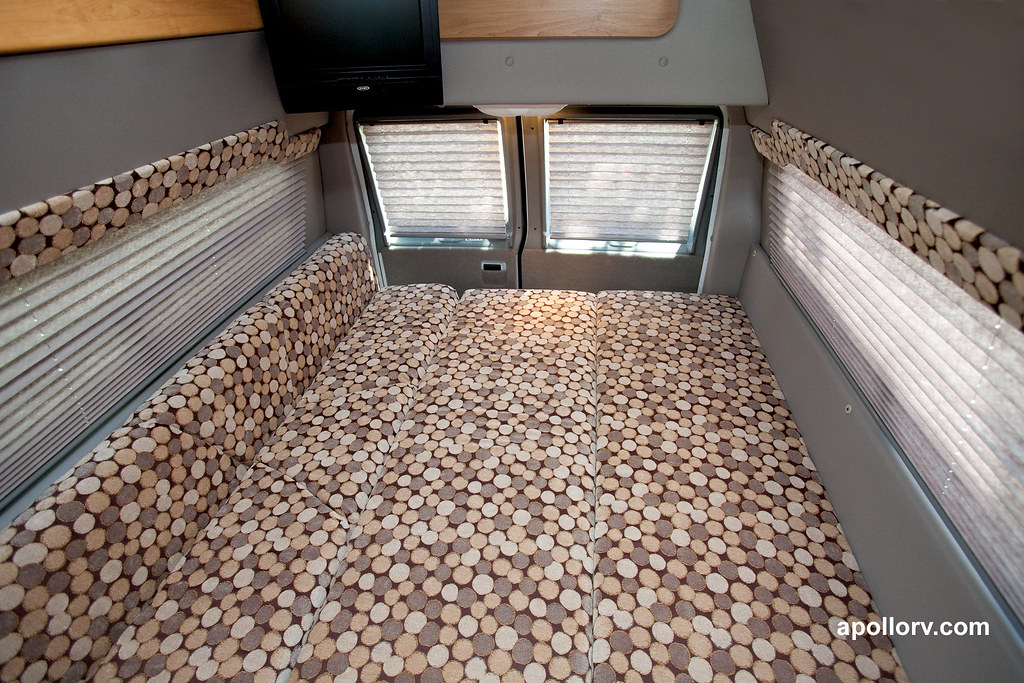
As soon as you have decided on your layout, you can start building your sleeping area first. Depending on your design, you can have a stationary type of bed or a convertible style. Build the proper bed foundation and make sure that you utilize any available space for storage. You might want to invest in custom-made mattresses if you are going the convertible style.
It may not a very complicated area to work on, and most conversions take about four days to a week to finish the frame and lay down boards that will support the bed.
Let’s Talk About The Kitchen
A kitchen is optional for some, but for those who want a place where they can prep their meal and wash their hands, a mini kitchen is necessary. Usually, a sink with a small countertop is all the kitchen you will get if you want to have it indoors. You can be creative and build your van where your kitchen can be a pull-out from under your bed frame.
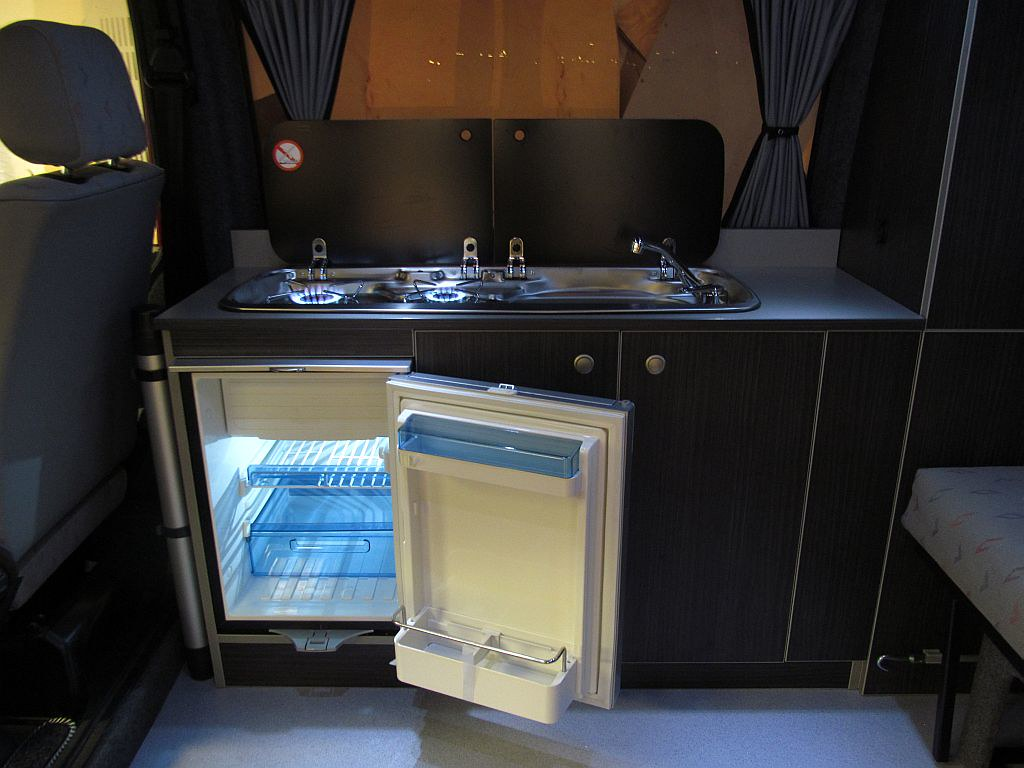
If you want to incorporate a fridge in your van conversion, the space under the countertop is an excellent place to put it. Usually, you would see vans with their freshwater supply, greywater collection, and composting toilets under their kitchen. Others have built-in stovetops in their kitchen, while some prefer they cook outside away from their van to keep the smell of food outside. You will have to figure this all out before you begin construction.
Depending on how much woodwork is involved, this can take one to three weeks, maybe even more if you have an unconventional kitchen style. If you prefer not to build your kitchen from scratch, you can buy DIY kits online that you can resize the height to fit your van.
Additional Storage

Usually, the last to be built is the cabinetry in your van, but you can make this as you go along your conversion if you like. I just prefer to have the cabinetry built last because it will allow me to change my mind if I want overhead cabinets in my bed area. If you have a sitting area in your van, use the underside as storage. You will also find these small spaces that can double as cubby holes to make sure that you are utilizing all the space available.
This part can take about two to three days with friends and up to a week if you are doing it alone.
Finishing Touches
This is another fun part because this is where you make your camper van feel like a home. You now can put all of your finishing touches like paint, wallpapers, curtains, hooks, and other design elements that reflect your personality. One to three days is enough for a minimalist style more if you are very specific about the style you are trying to portray.
Conclusion
Whether you build your van on your own or have a professional do it for you, this will be a major step because it will affect not just you but everyone around you too. As I’ve said in the beginning, converting a van is not easy, but it is doable even if you can only work on it during weekends. The more important question you should be asking yourself is if you are ready to change your lifestyle to live a life of freedom and adventure.


